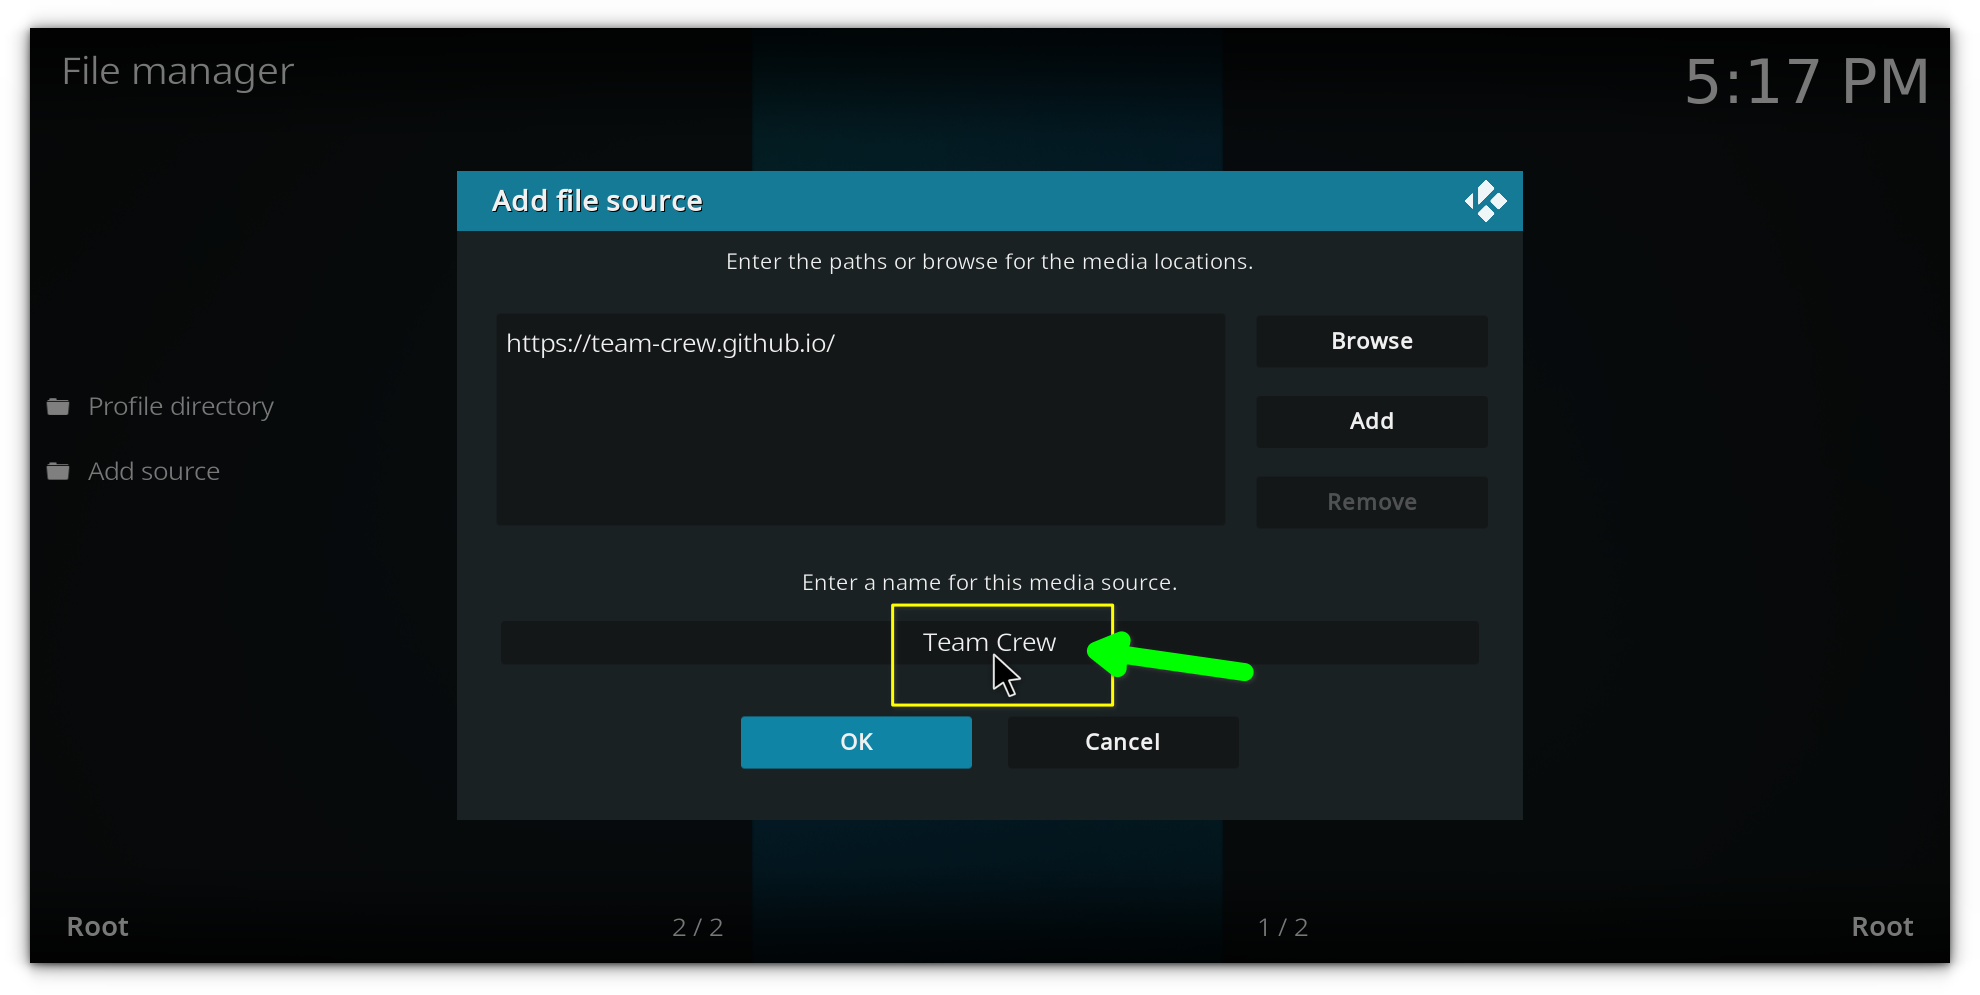
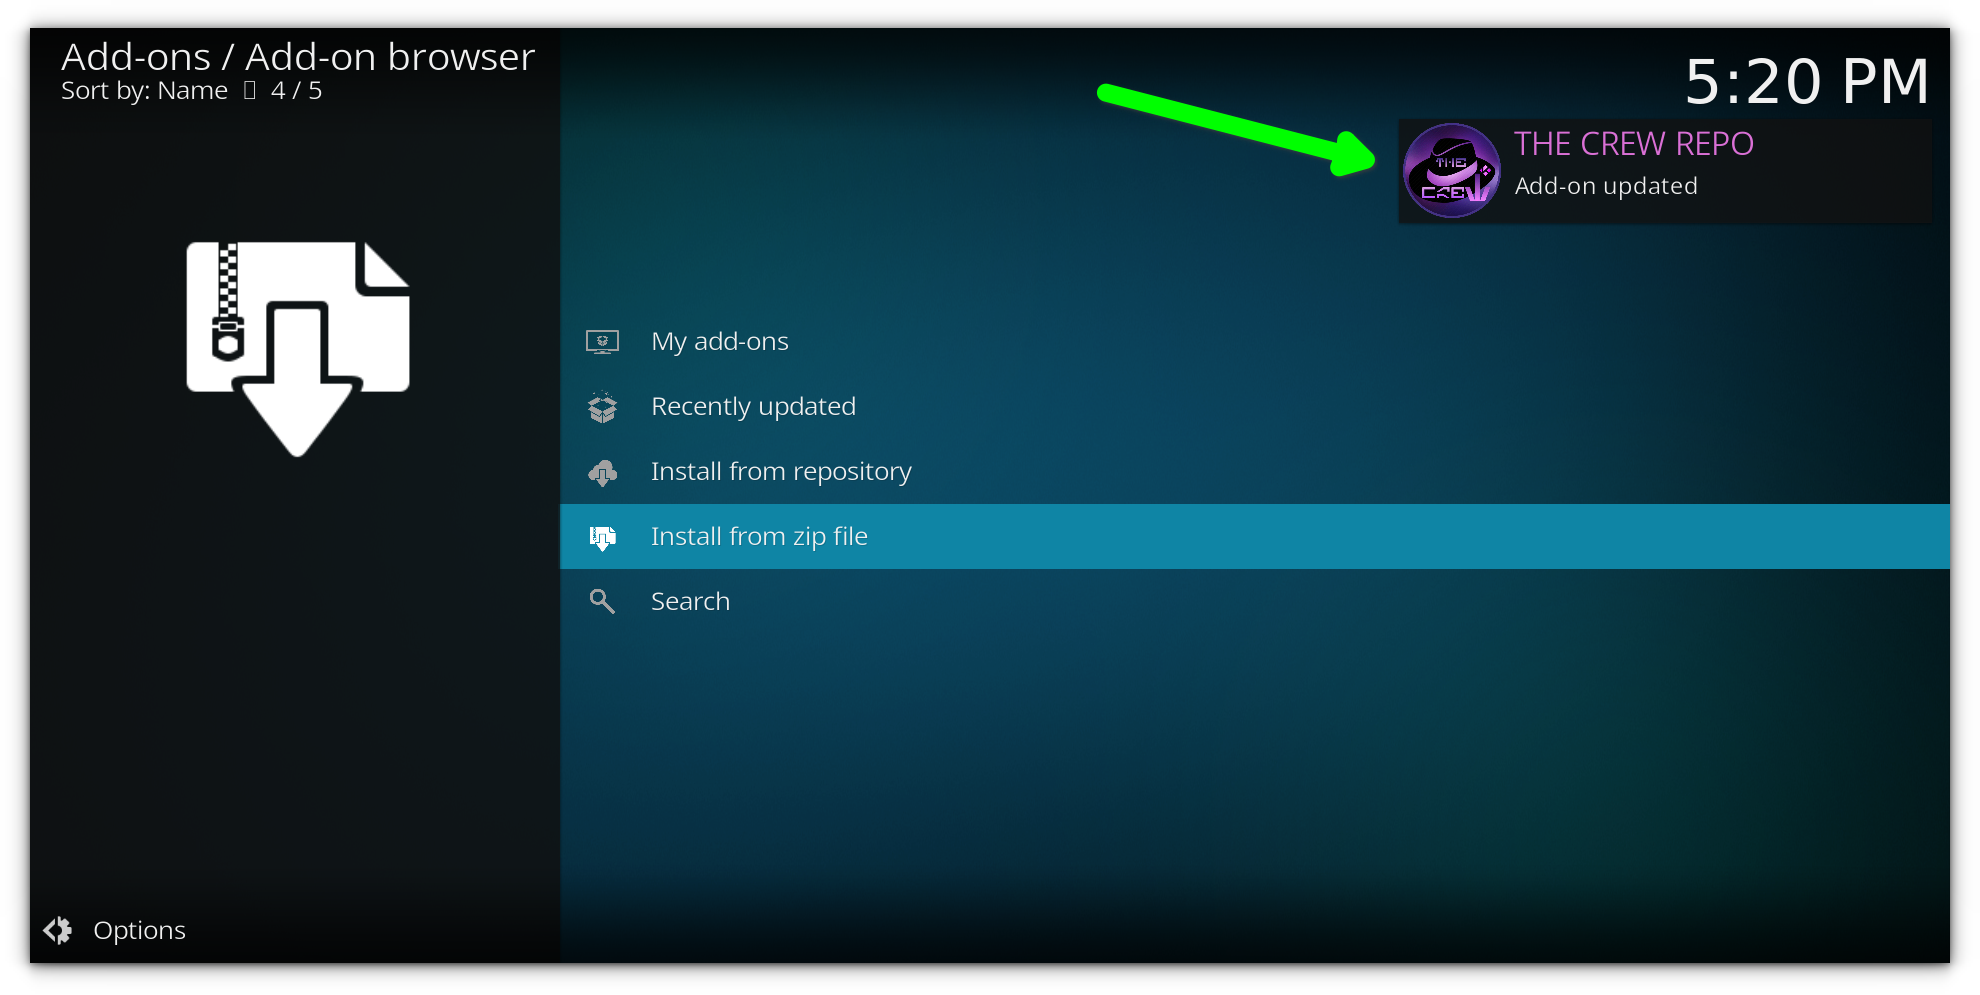
Wait for the notification that says The Crew Repository Add-on Installed.Name the source with any name you prefer), then click OK.These builds come pre-configured with skins, addons, and settings that make your Kodi experience even better. It’s clean, visually appealing, and comes with tons of addo-ns pre-installed, including some premium ones like Debrid.
Table of Contents
Step 1: Enable unknown sources
The next step is to install the build Wizard, which will allow us to install the specific build that we want.If you’re using premium services, you might need to configure those, but the build itself is a great starting point for anyone looking to get a smooth Kodi experience.
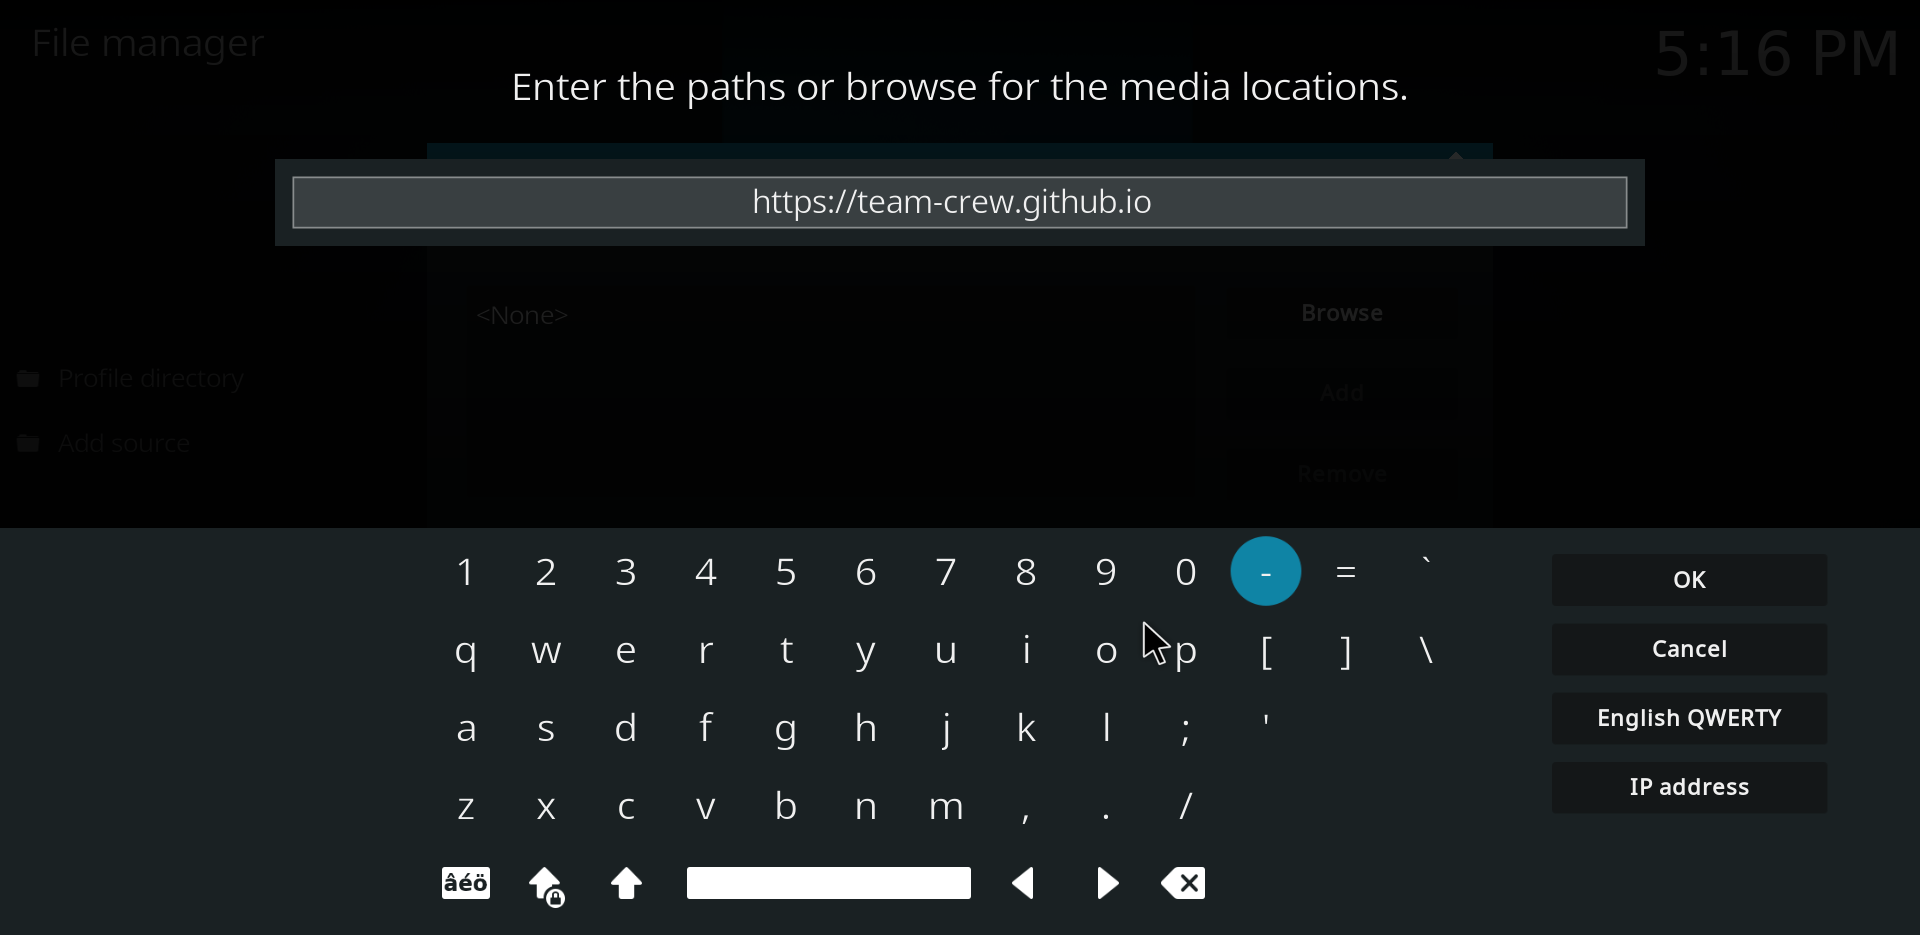
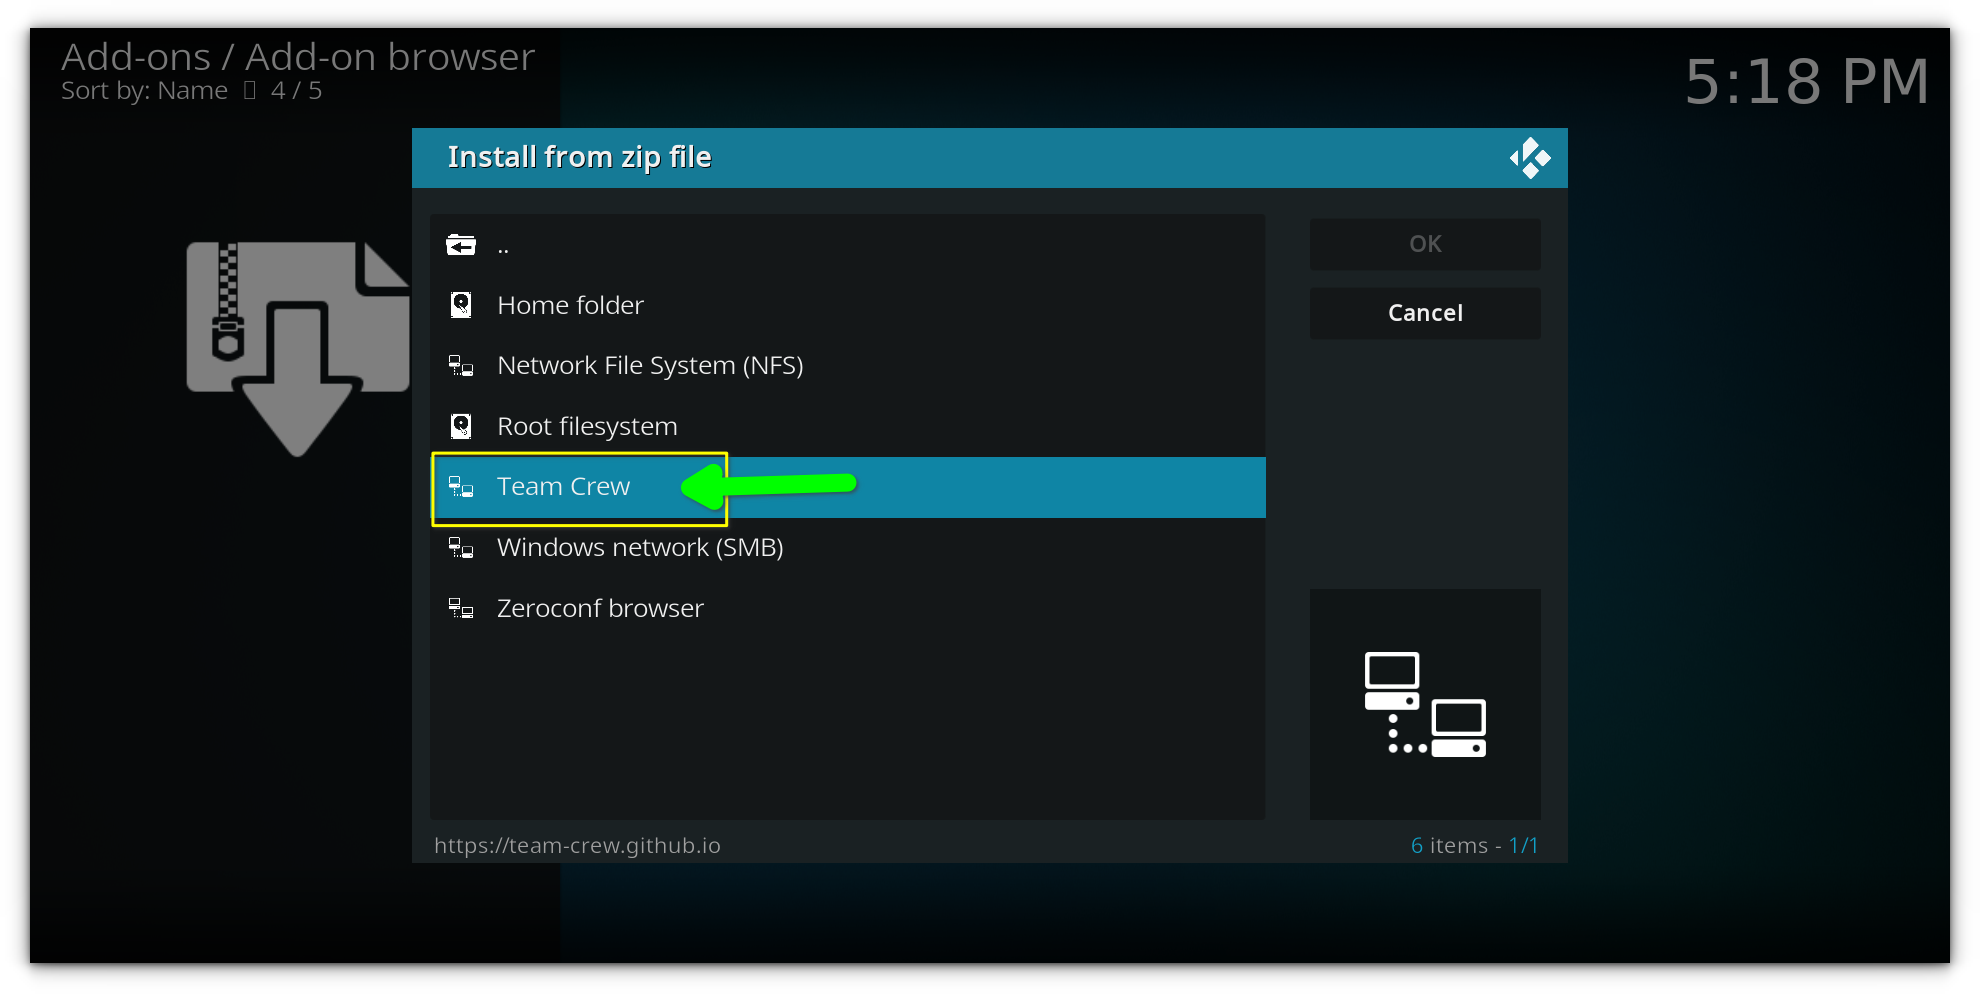
Now, we’ll add the source for the Team Crew Repository. This is where the HomeFlix and many other amazing Kodi builds reside.
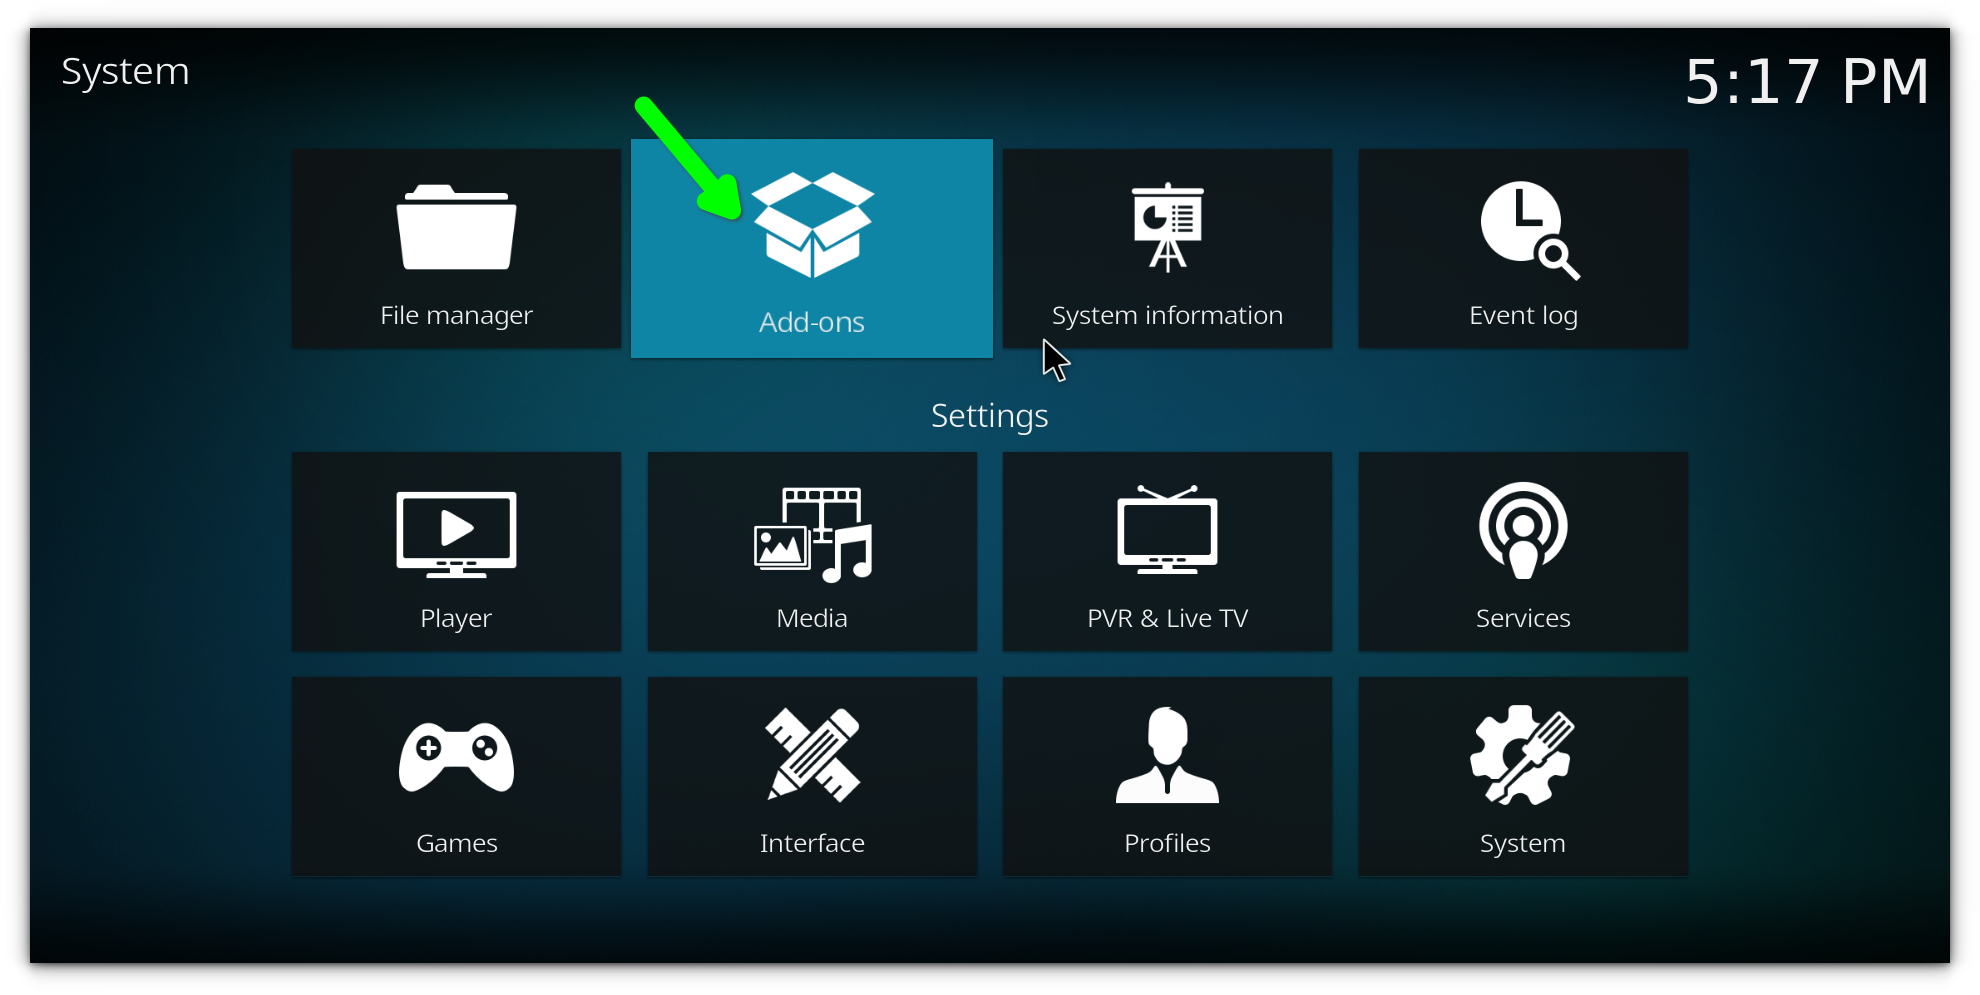
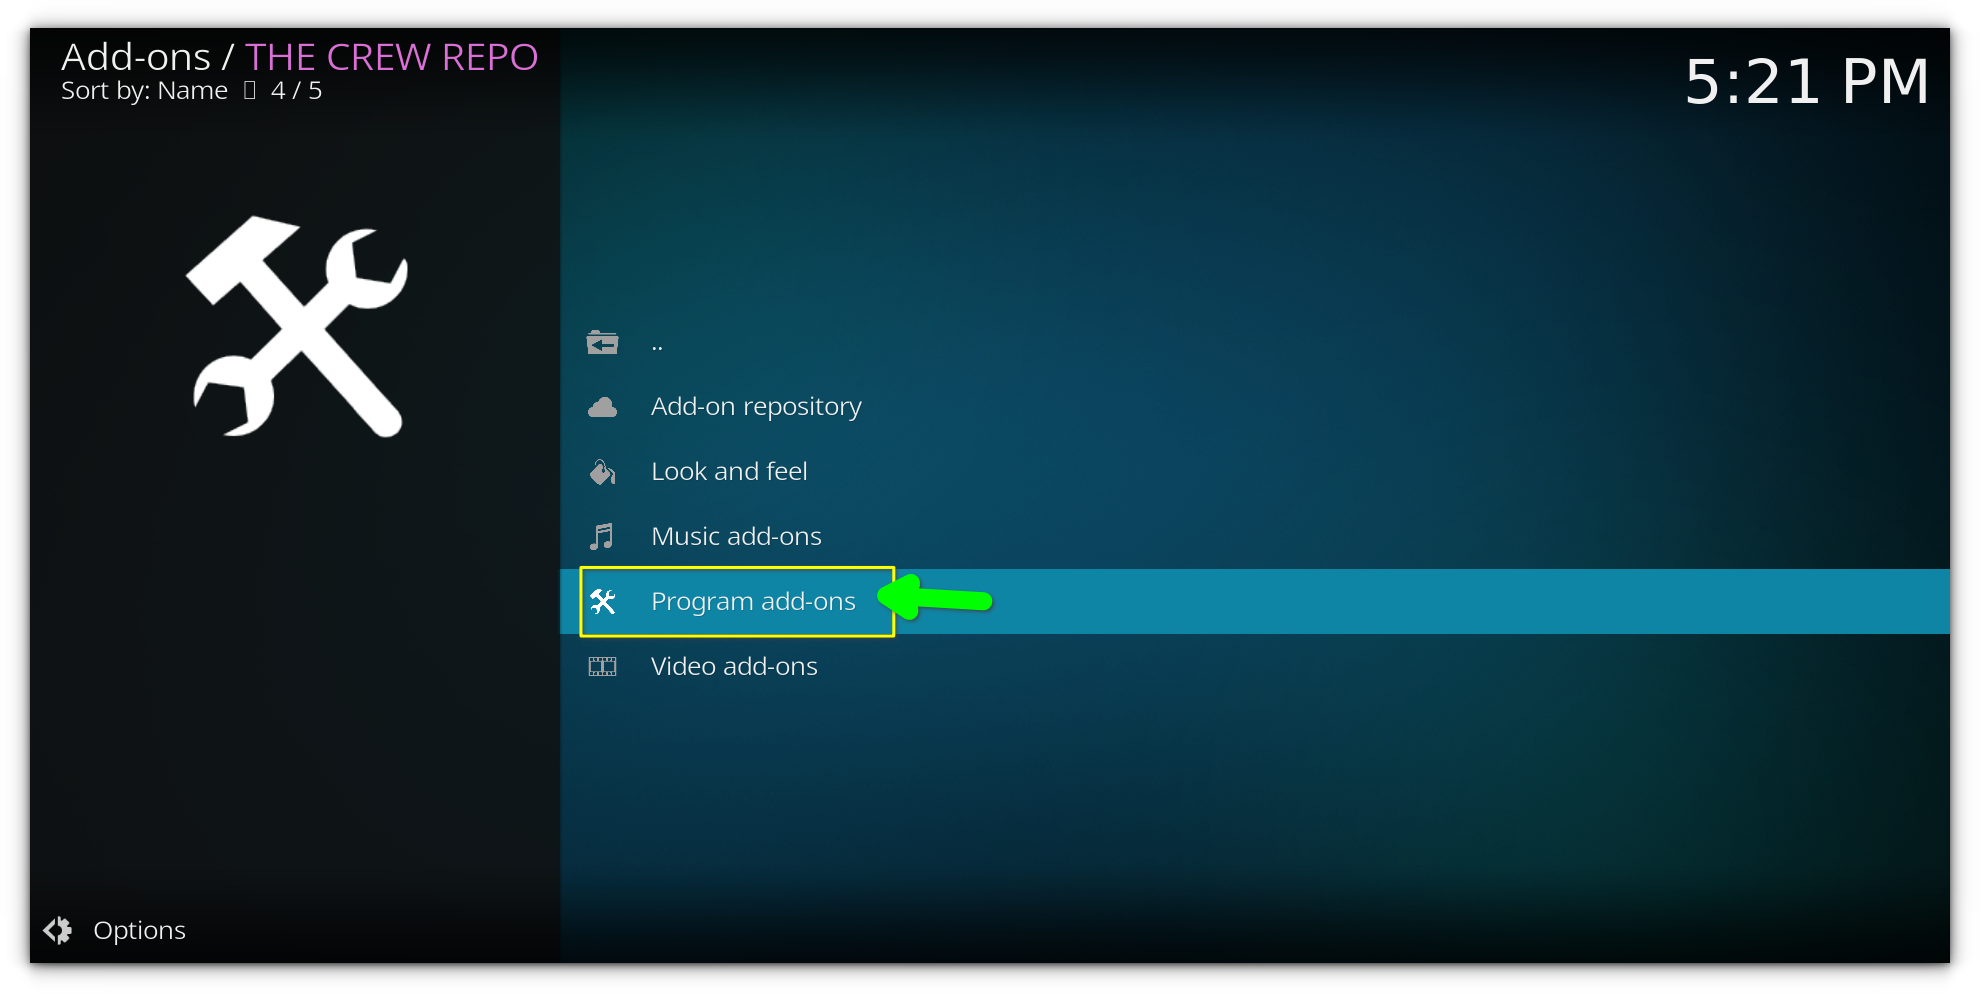
Select Program Add-ons.
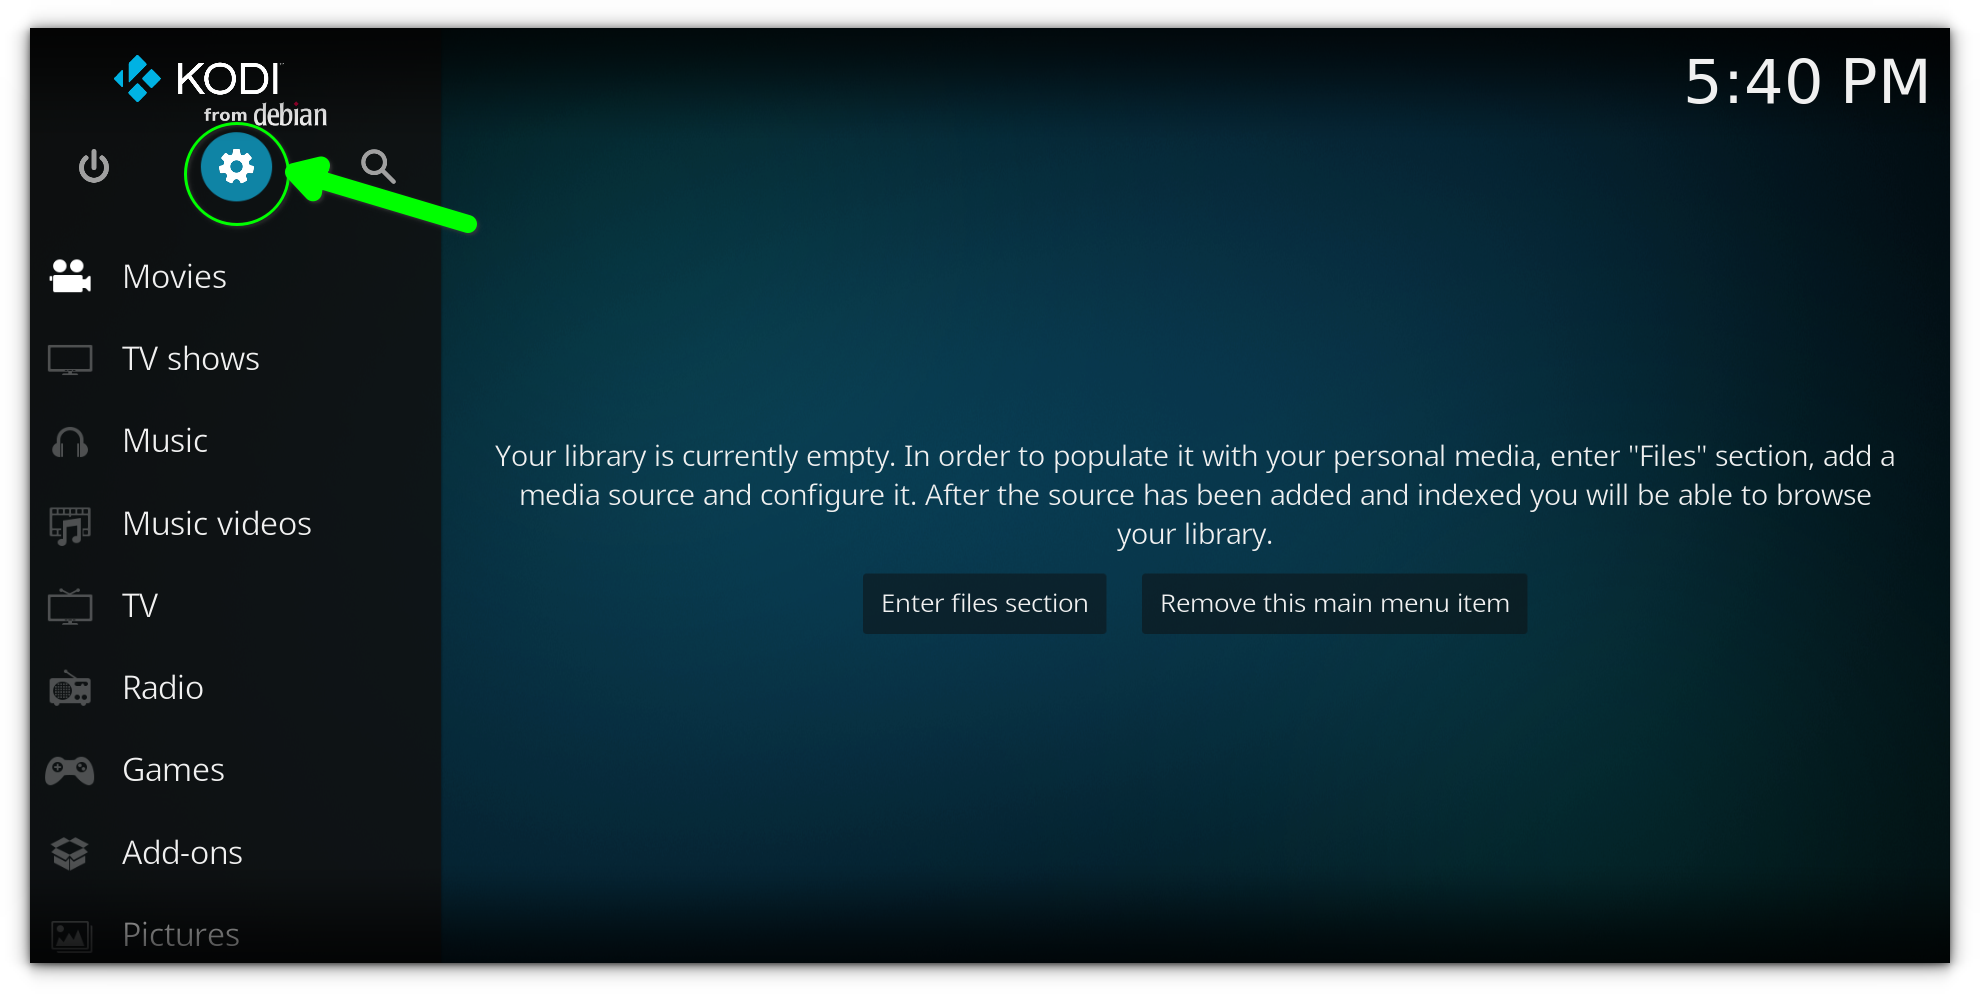
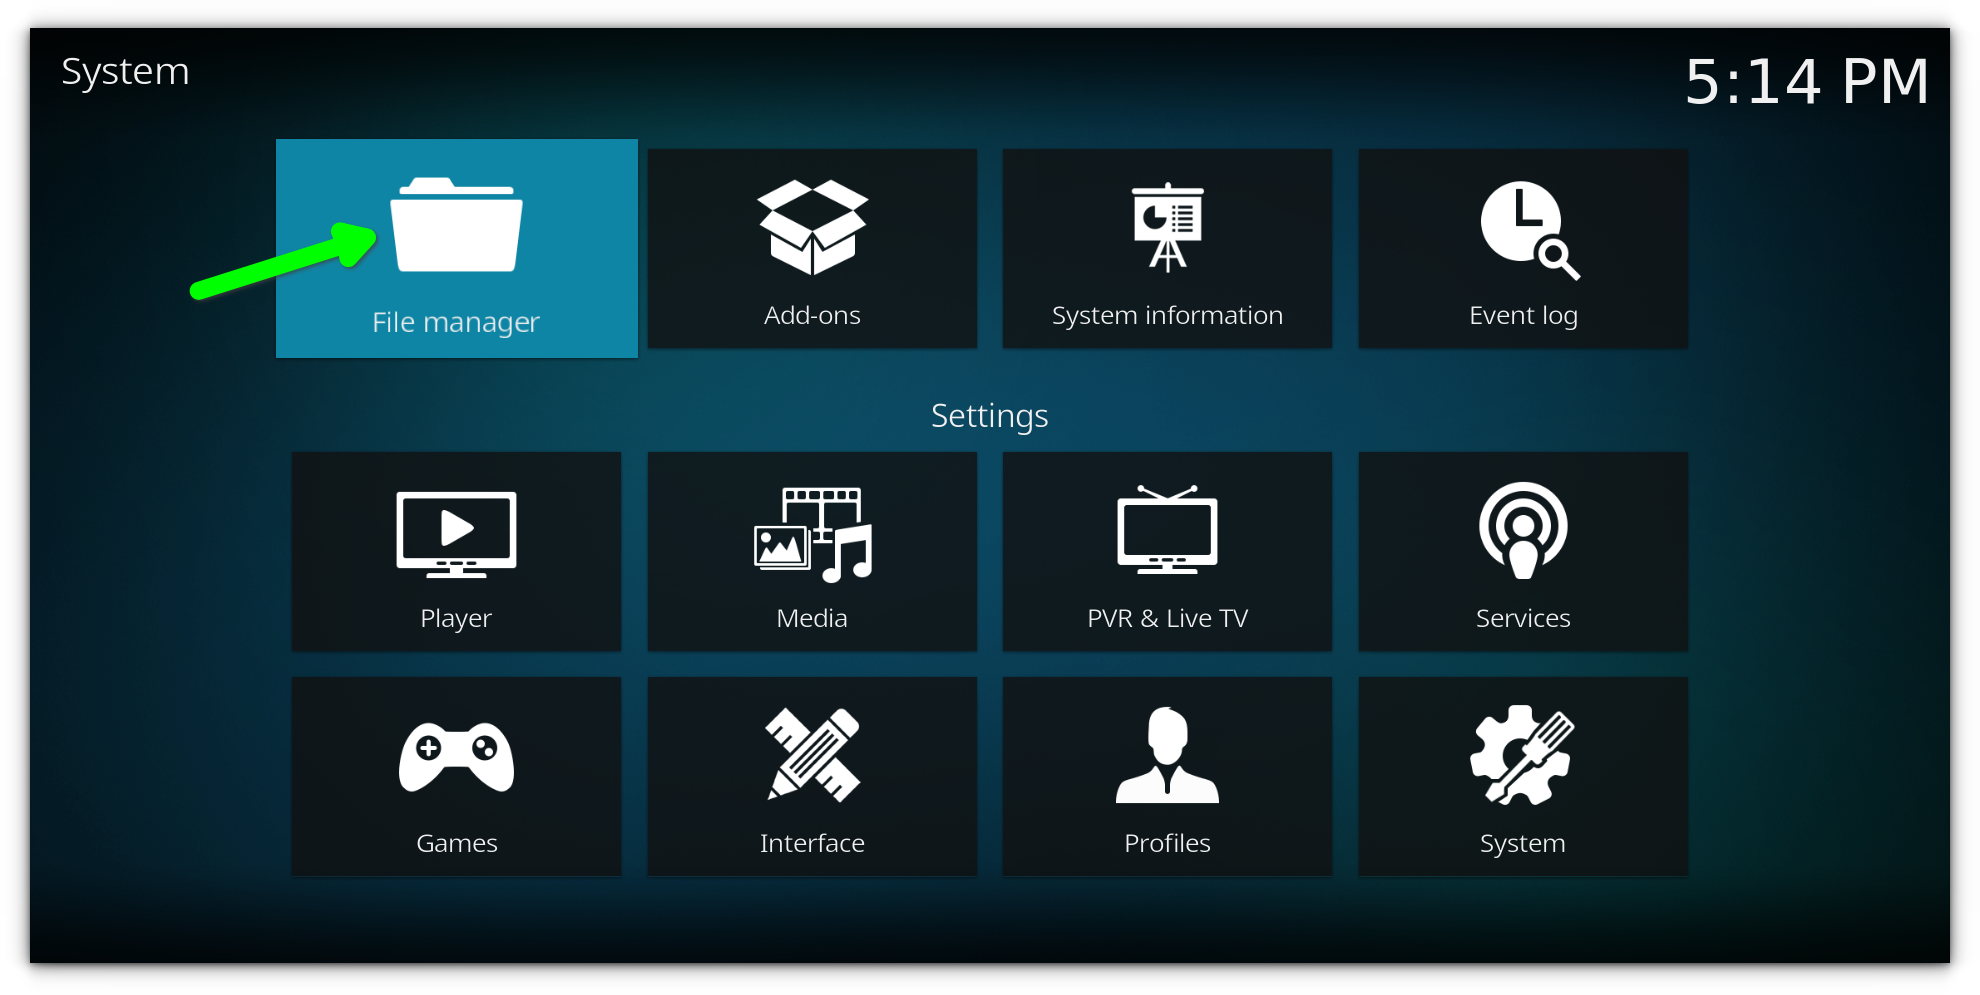
Go back to the Kodi home screen and open Settings again. Select File Manager.
Step 2: Add the repository source
Enter the build URL, in our case: https://team-crew.github.io and click OK.Select Program Add-ons
Select the source you just added.
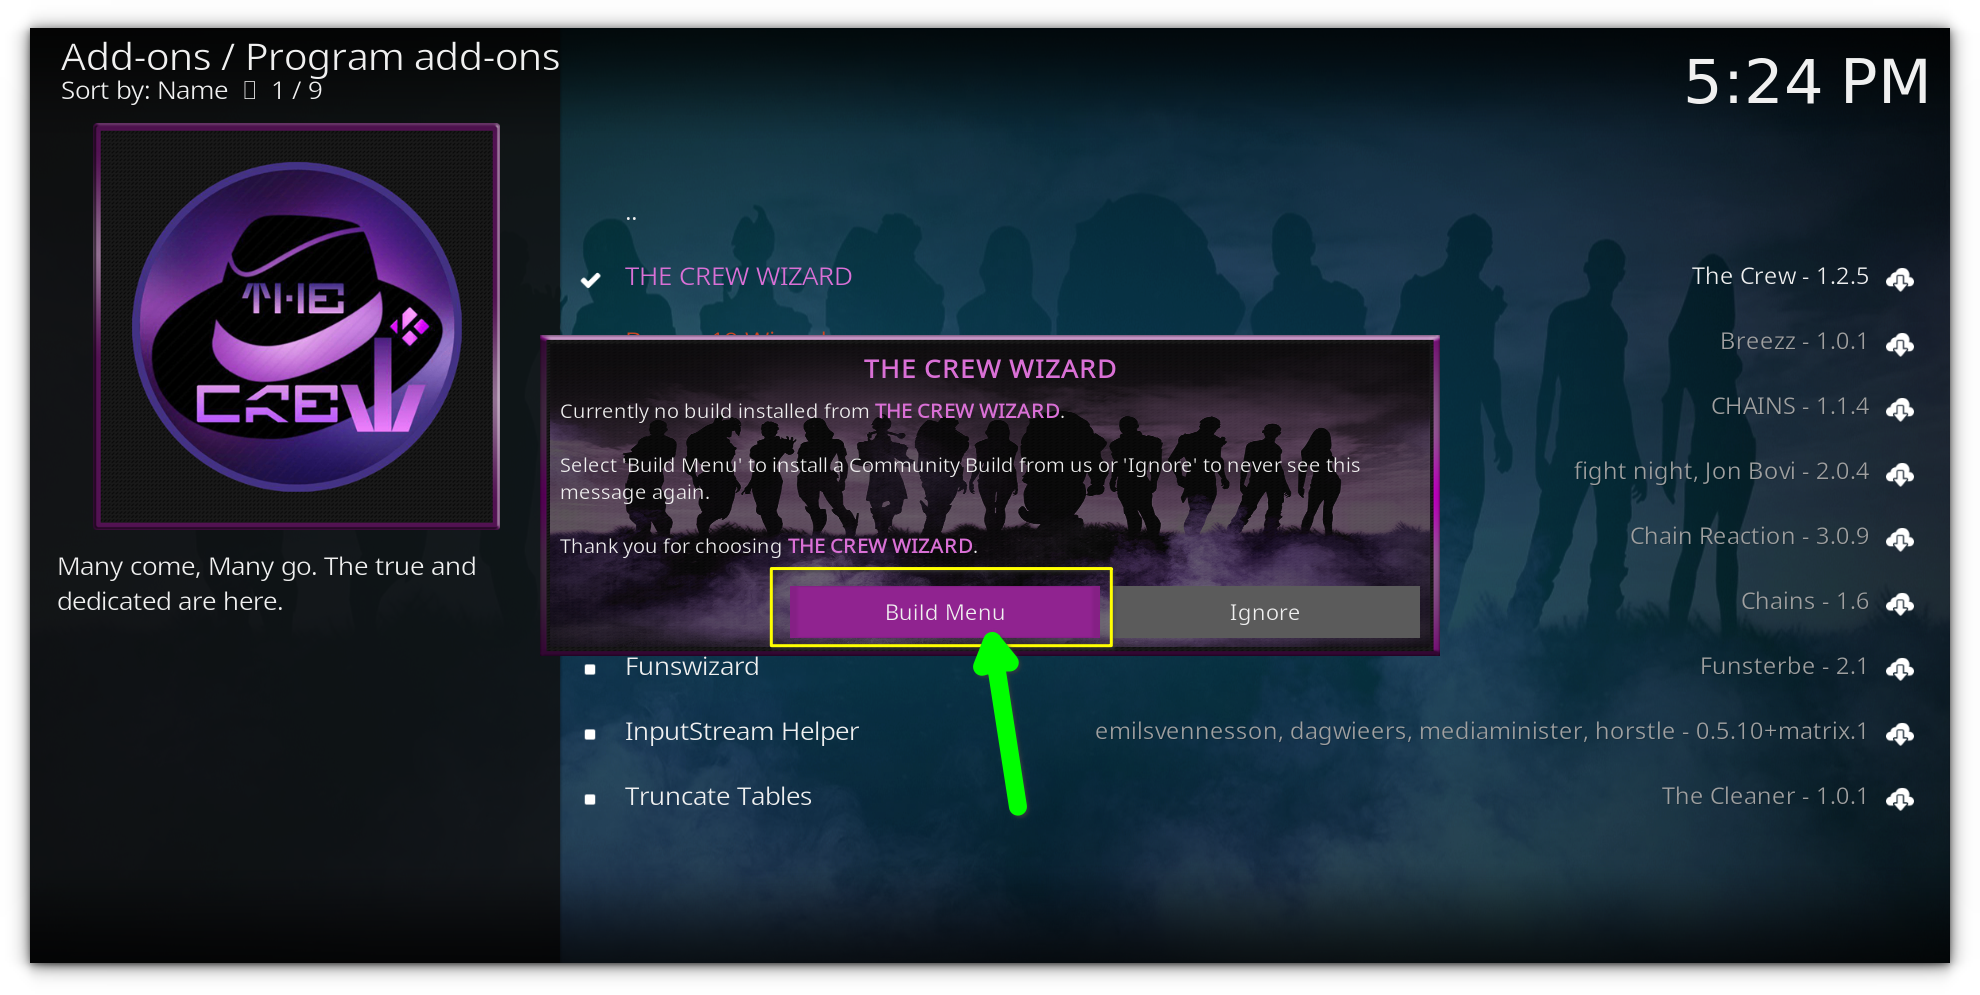
and click on Chef Wizard
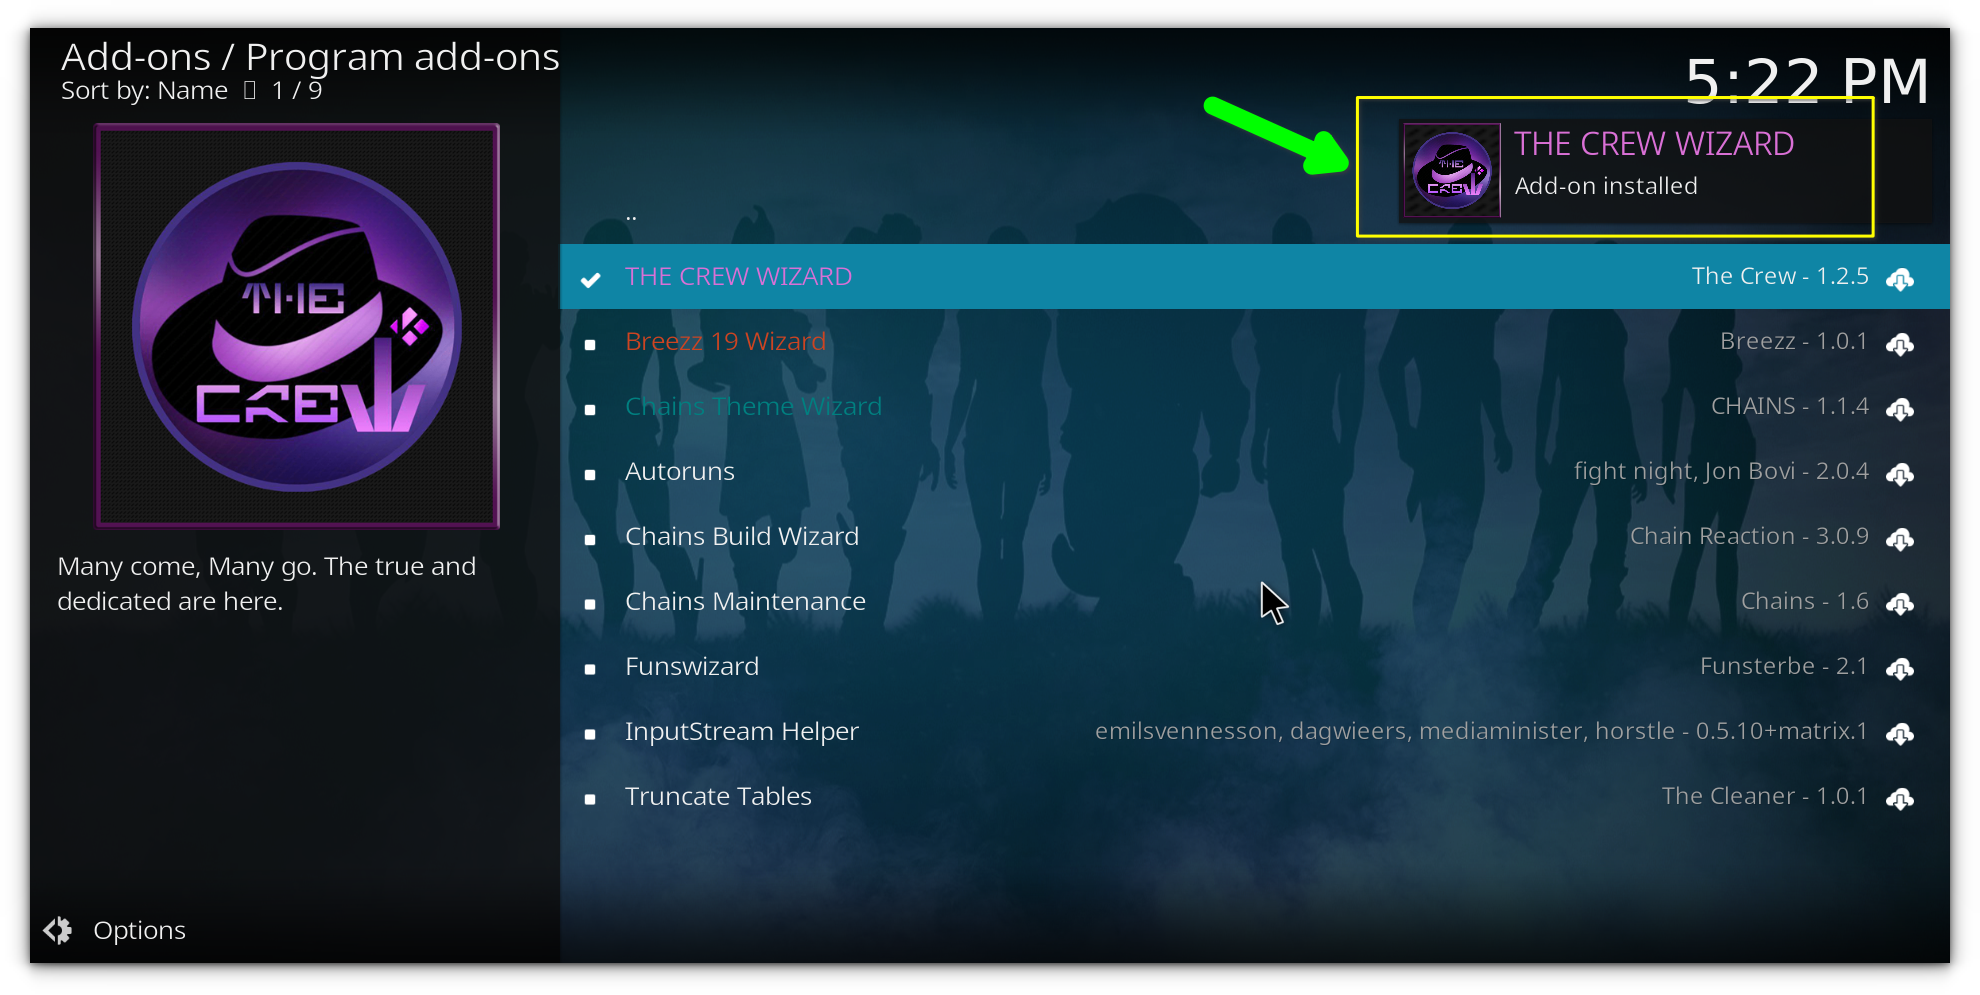
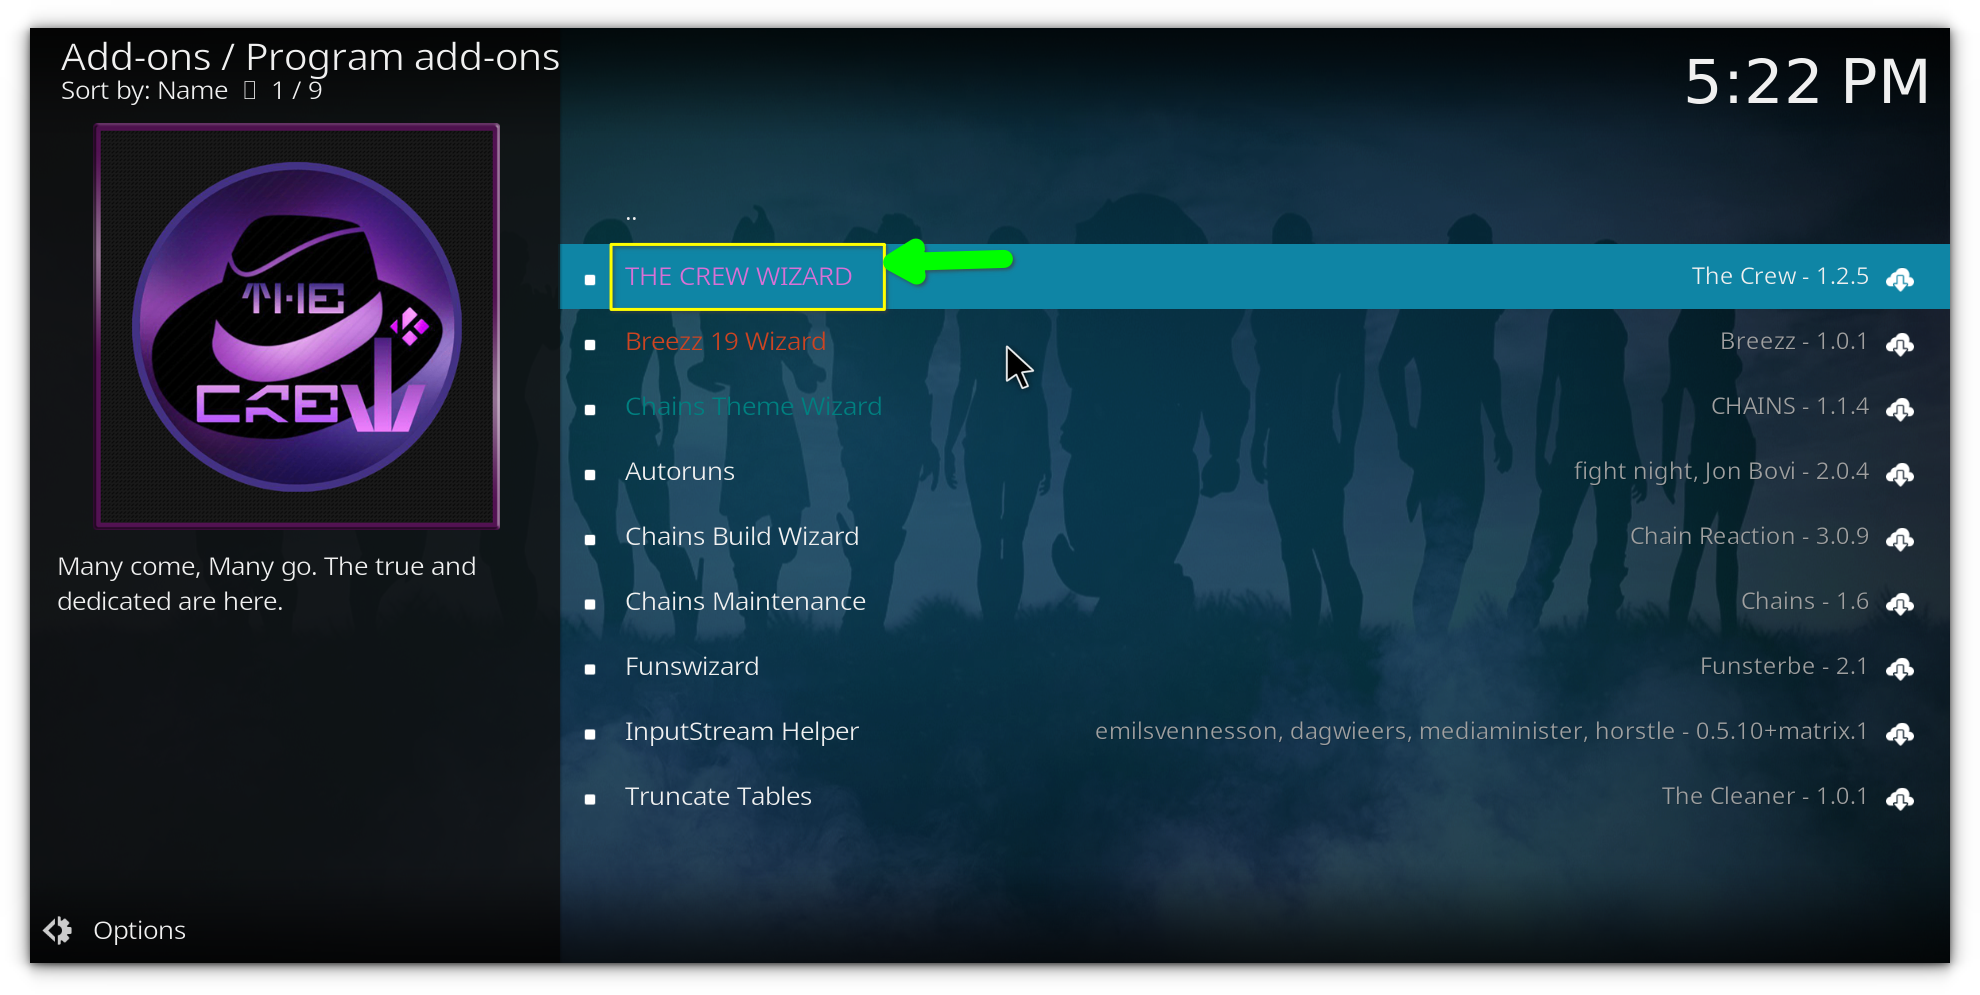
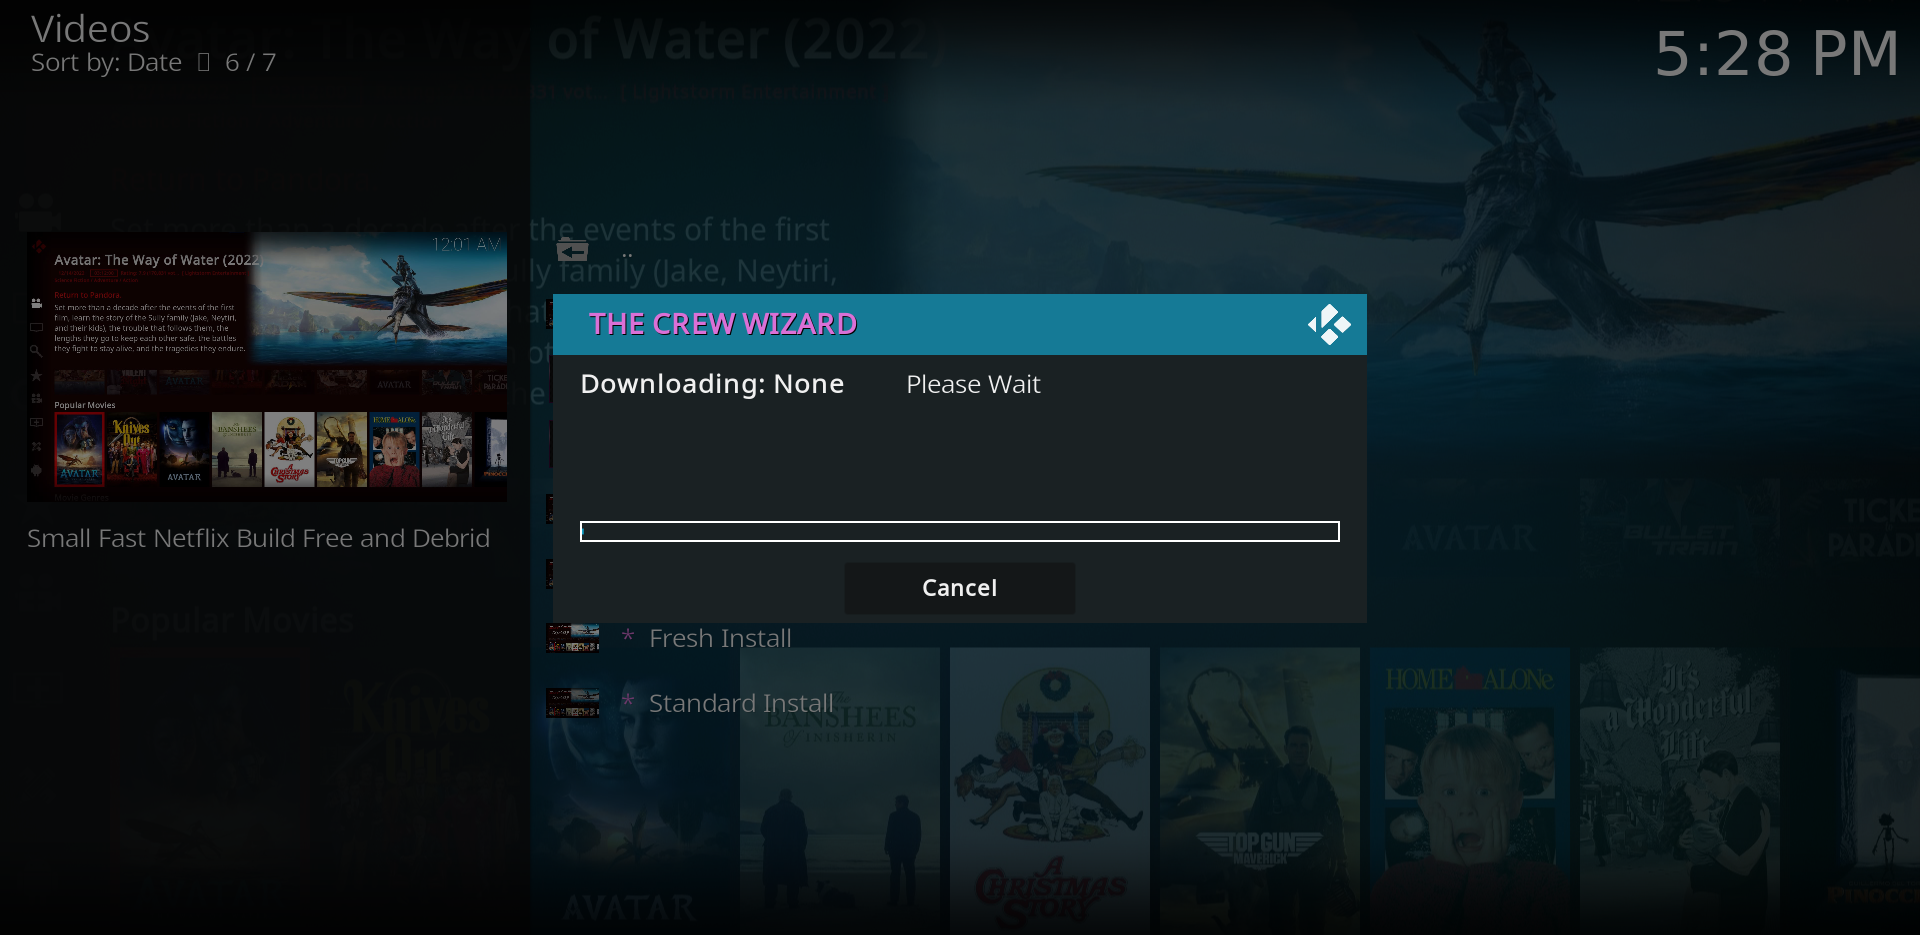
Click on build wizard i.e. The Crew Wizard
Once the installation is complete, click OK to force close Kodi.
Step 3: Install the build repository
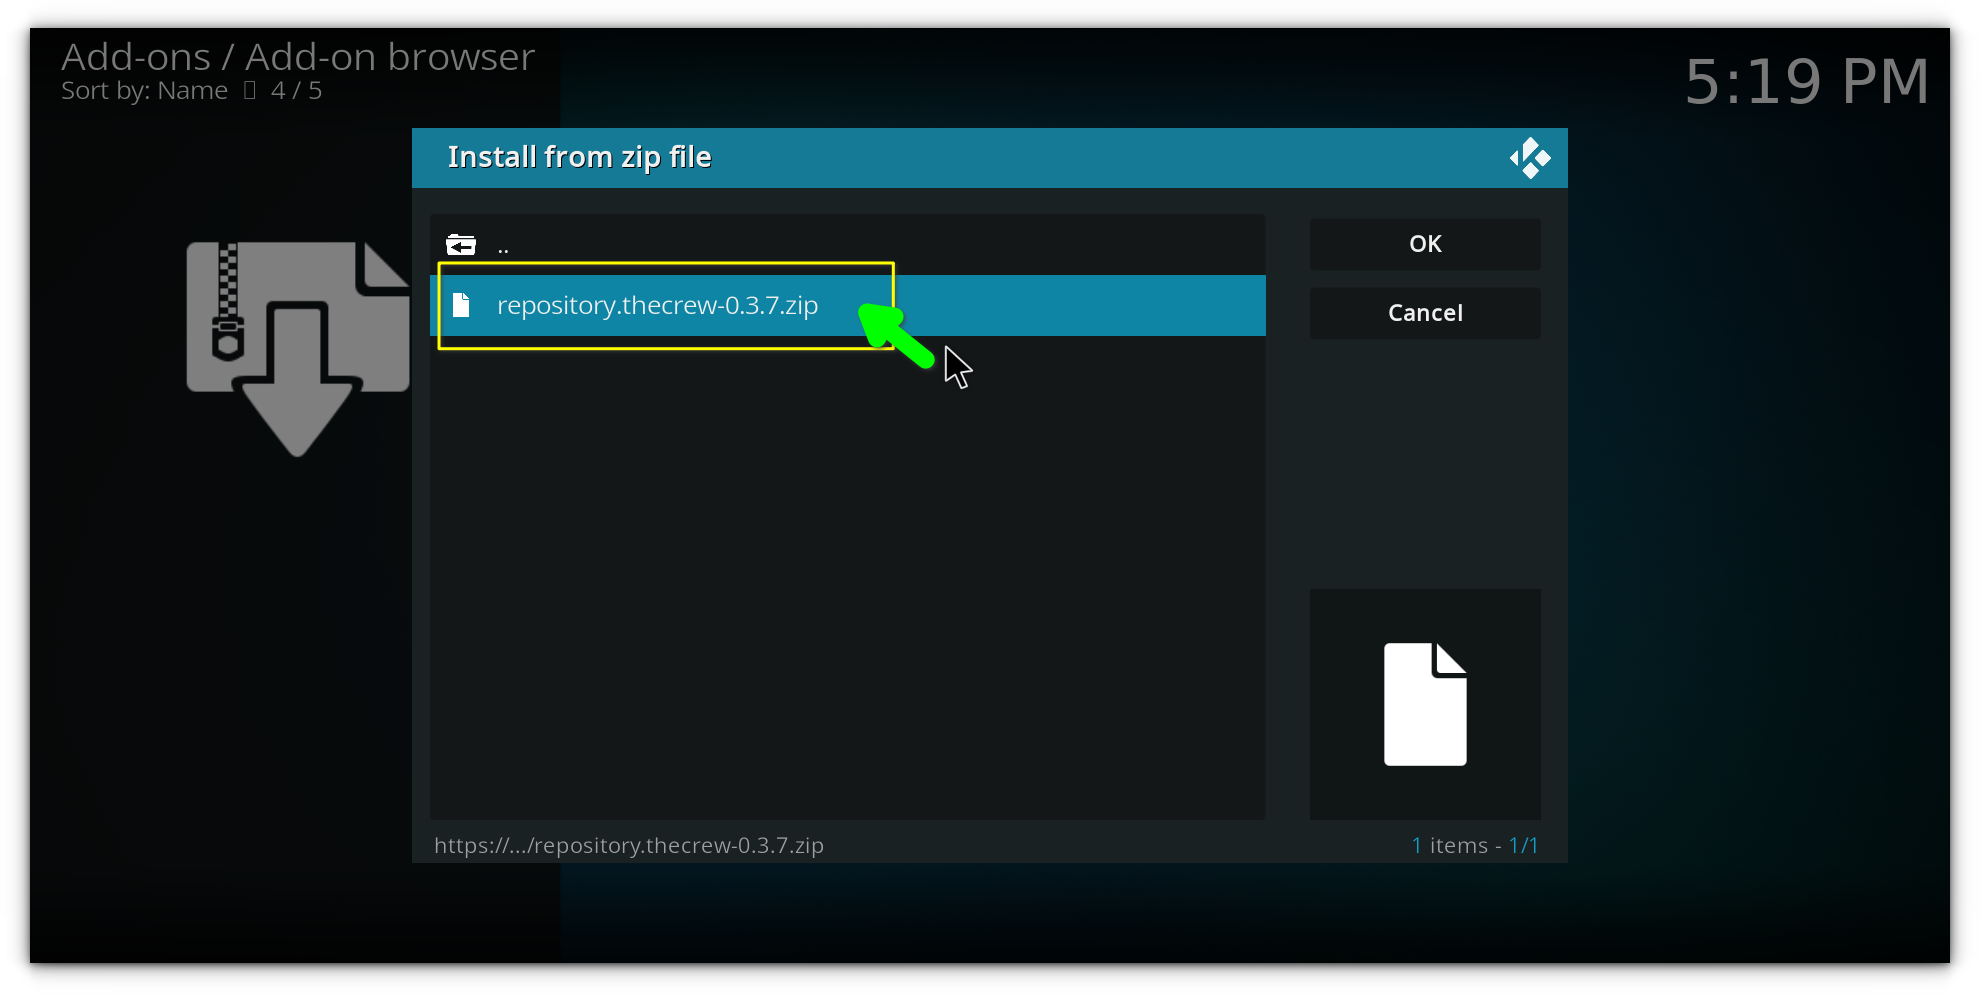
Go to Kodi’s Home Screen and click the Settings Cog (top-left corner).Click on the zip file named repository.thevrew-X.zip (X will be the version number).
We’re enabling this because Kodi doesn’t allow third-party sources by default for security reasons, but since we trust the source, we’ll proceed.
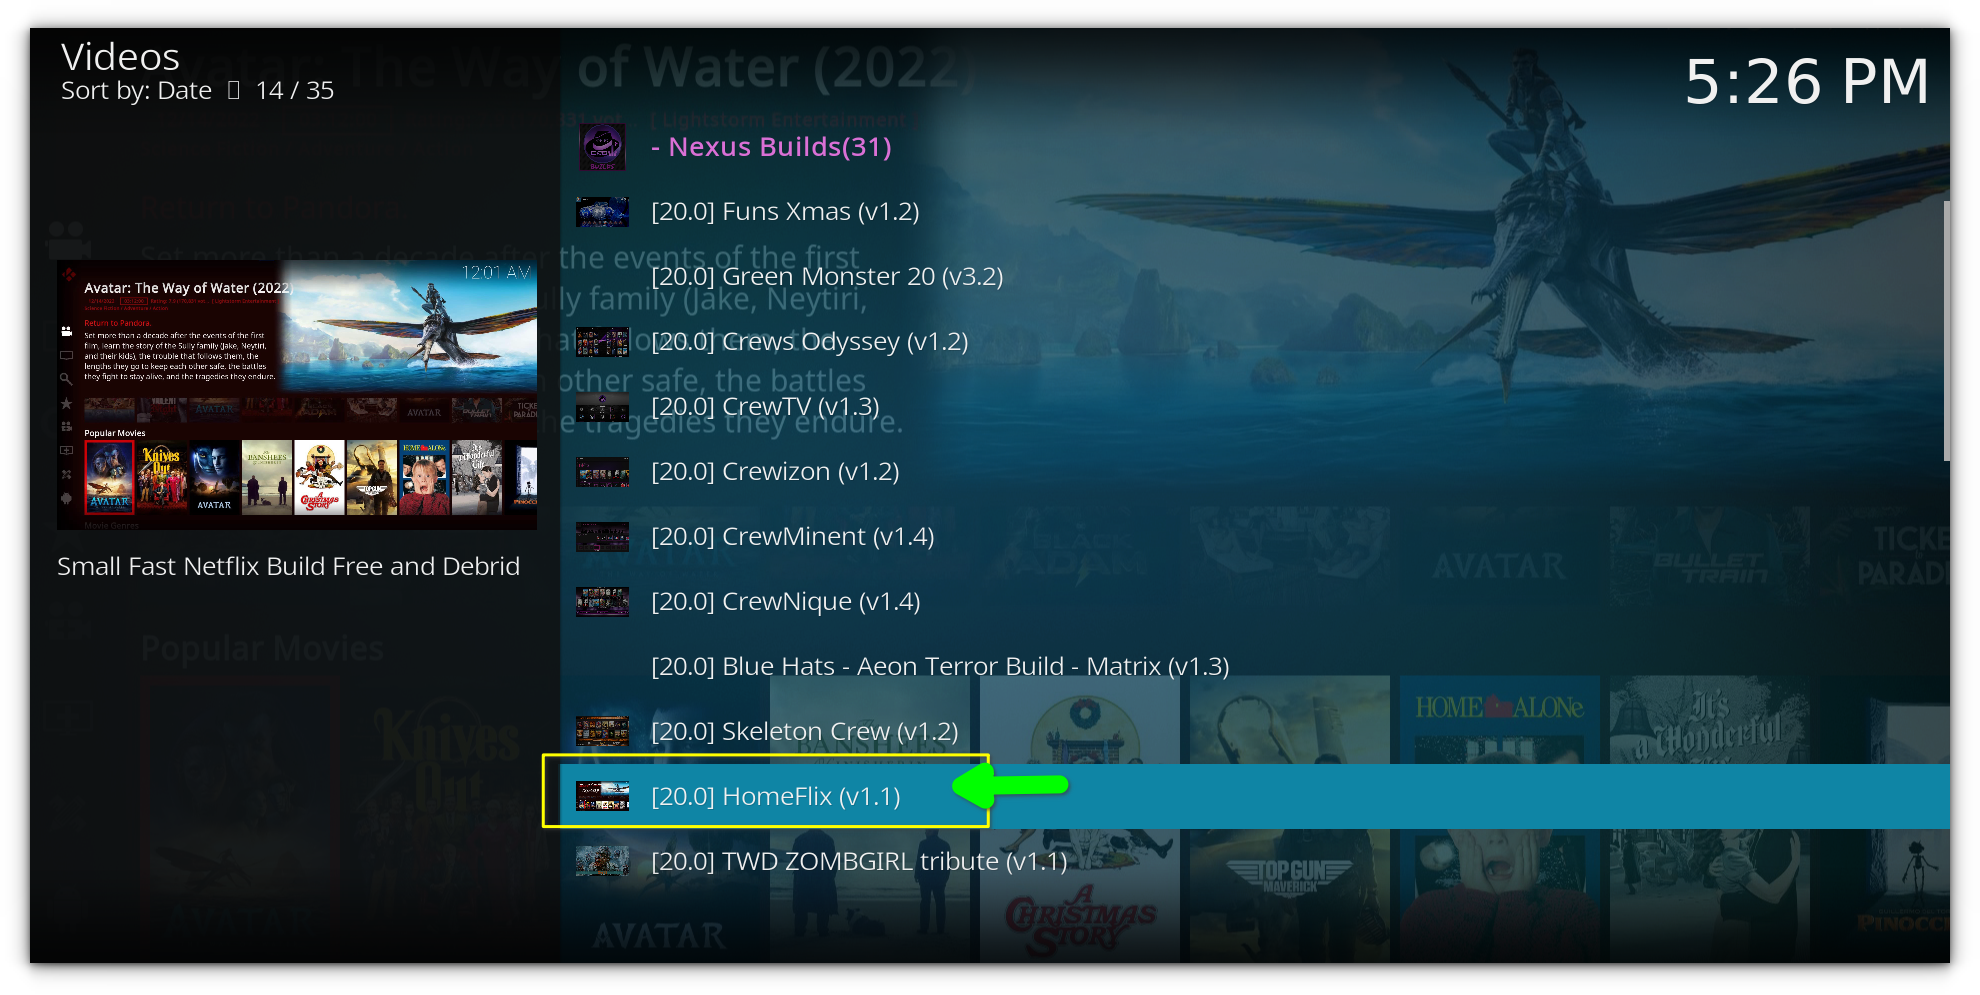
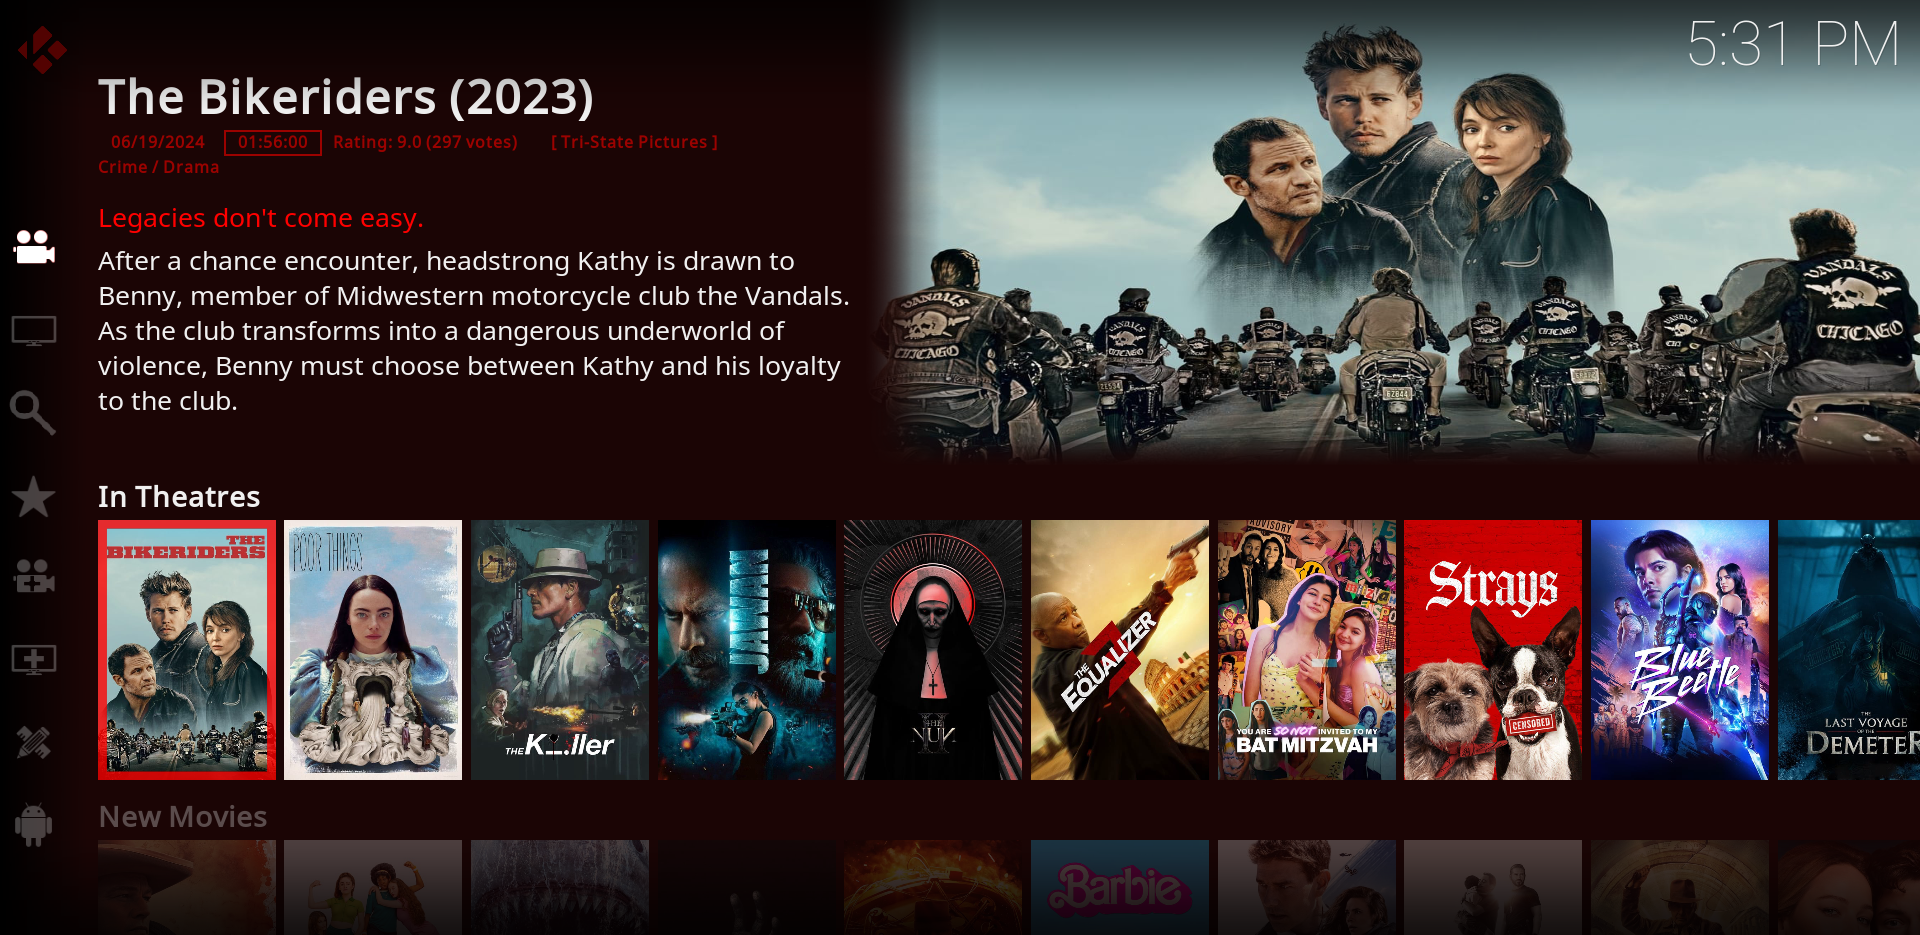
Personally, I love the Homeflix Build by Team-Crew because it gives me that Netflix-like experience, which I find really comfortable.
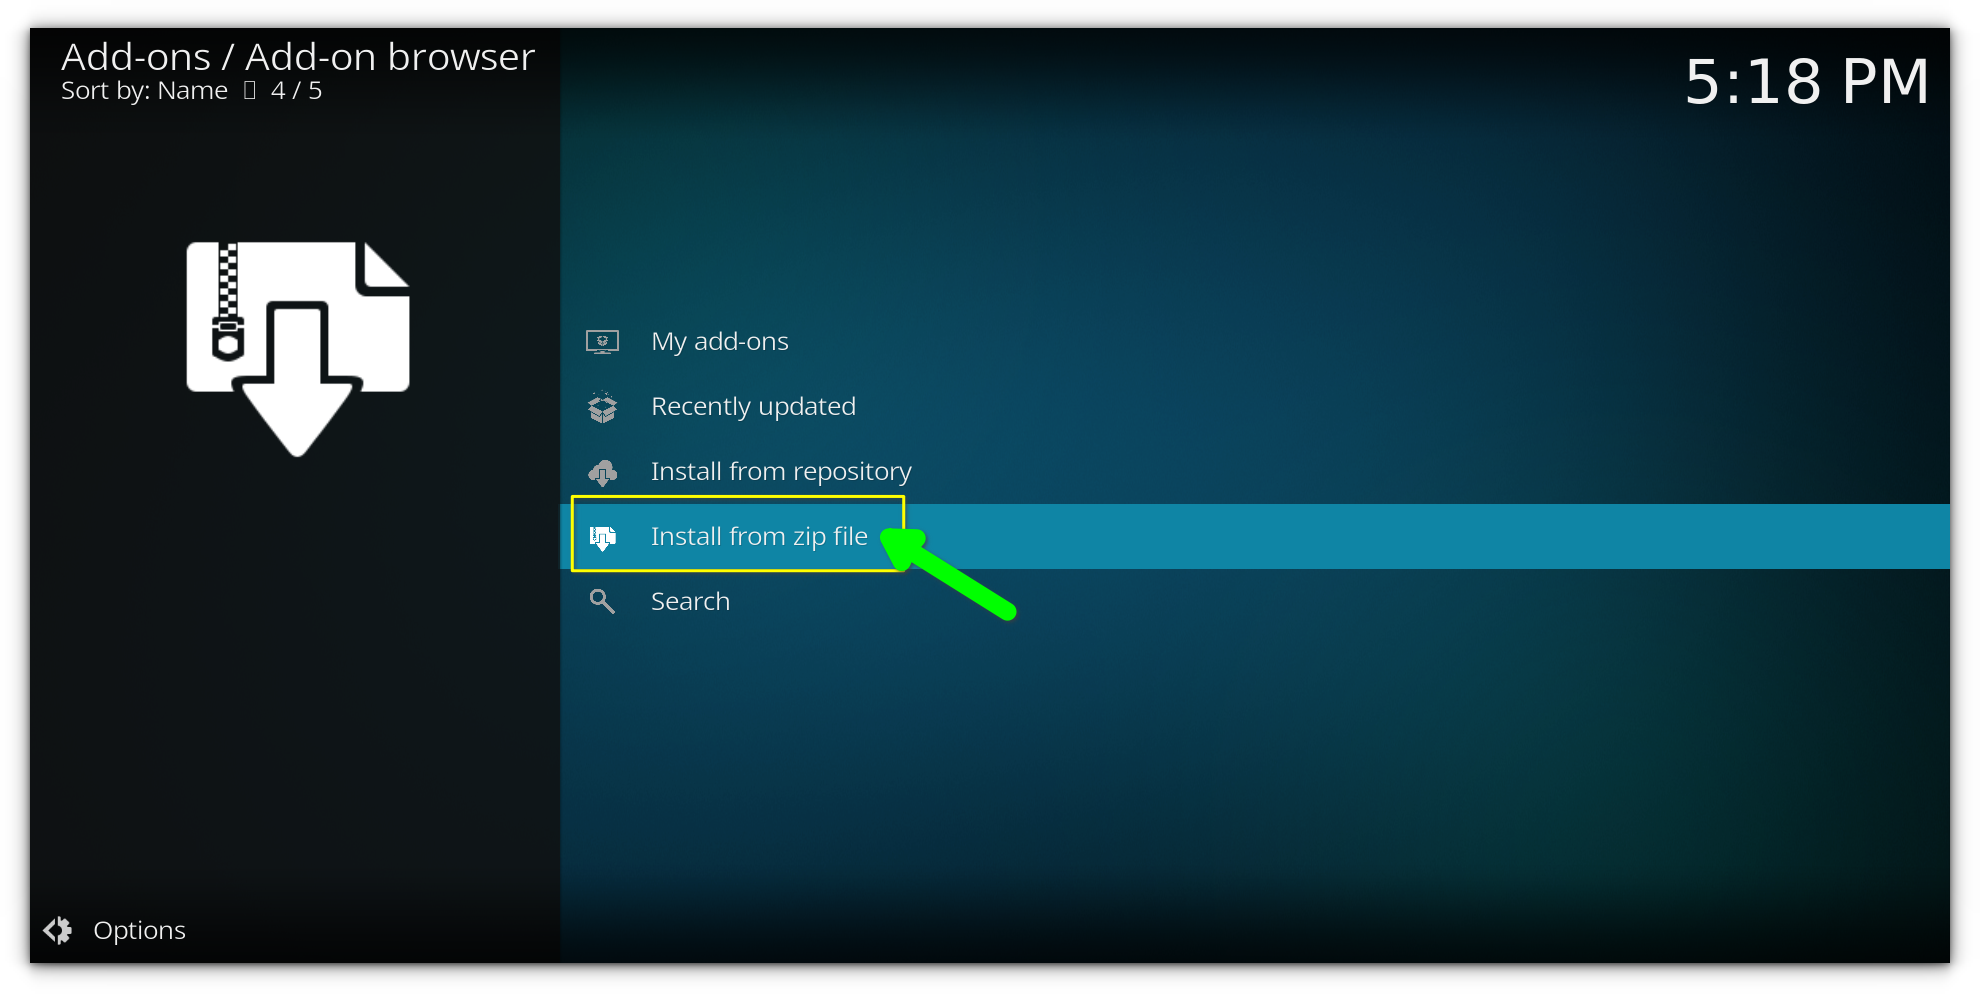
Choose Install from Zip File.
Now that the source is added, we’ll install the build repository.
Step 4: Install the build wizard
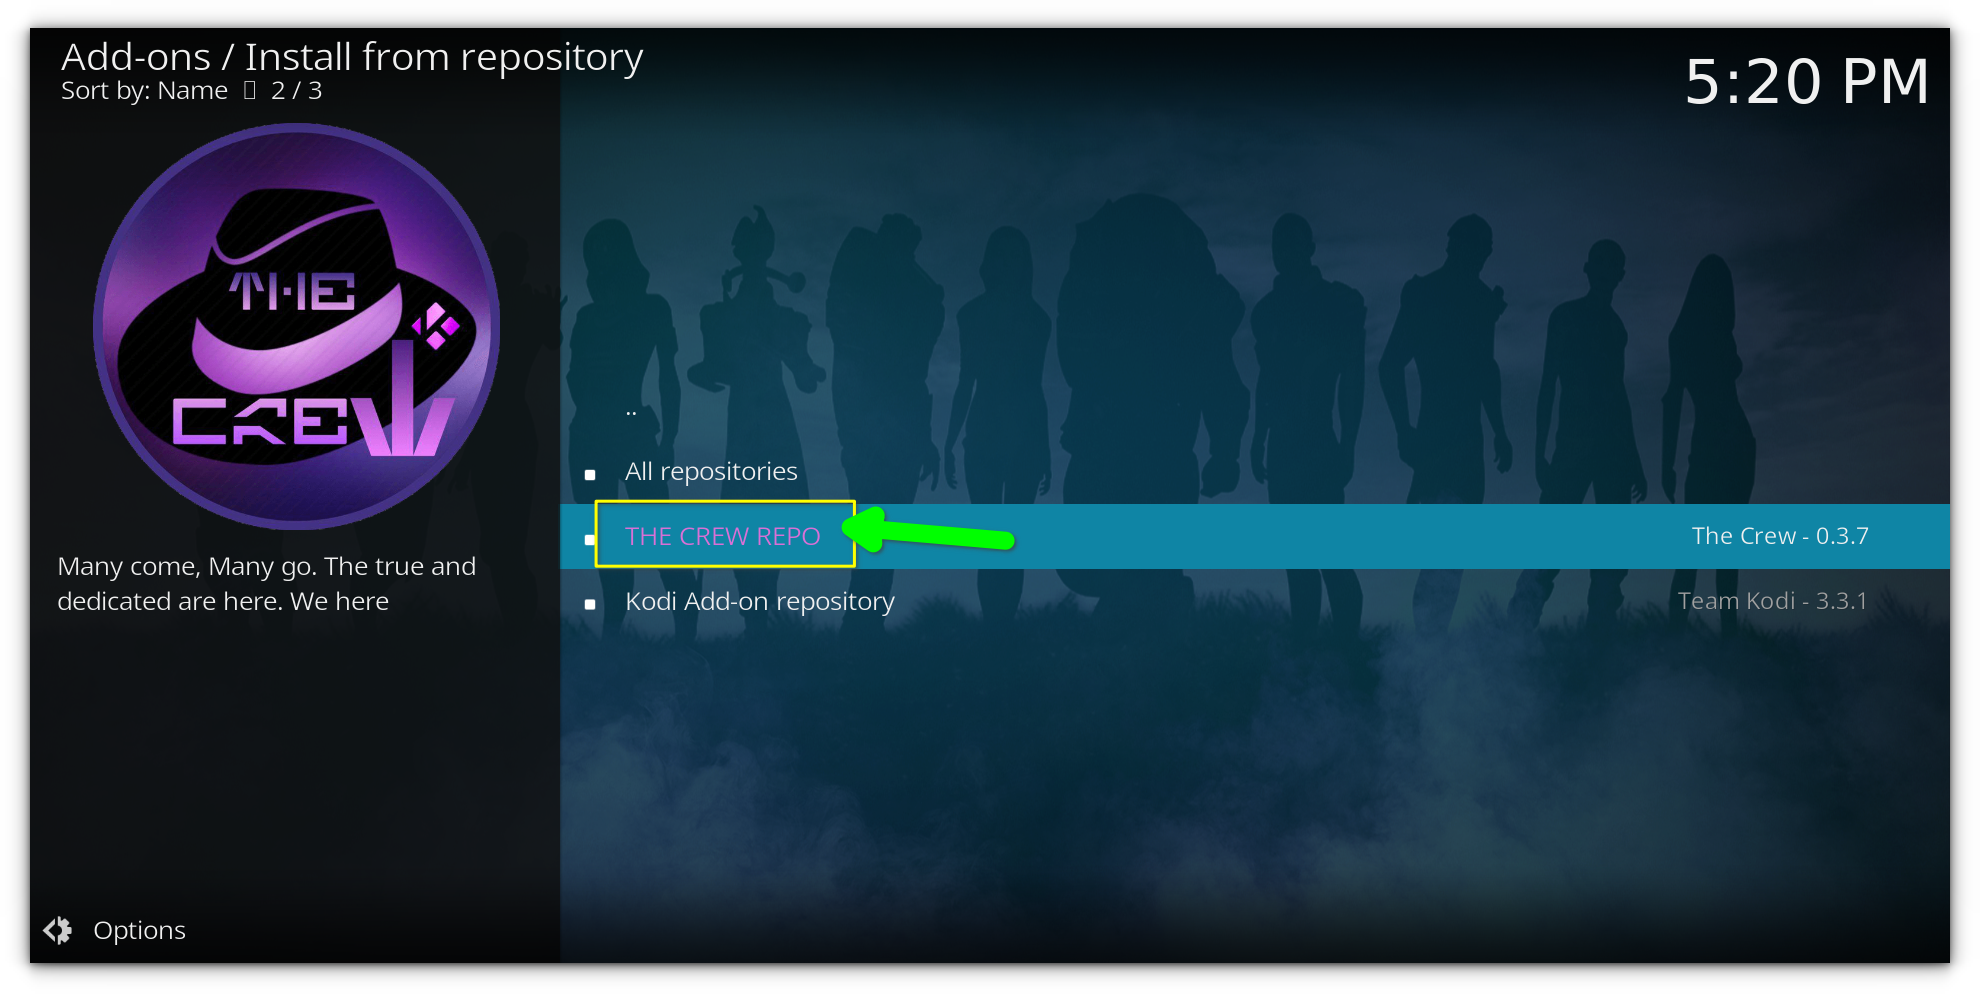
Open the Build Repository i.e Crew repo in my case.Return to the Kodi Settings page and click Add-ons.
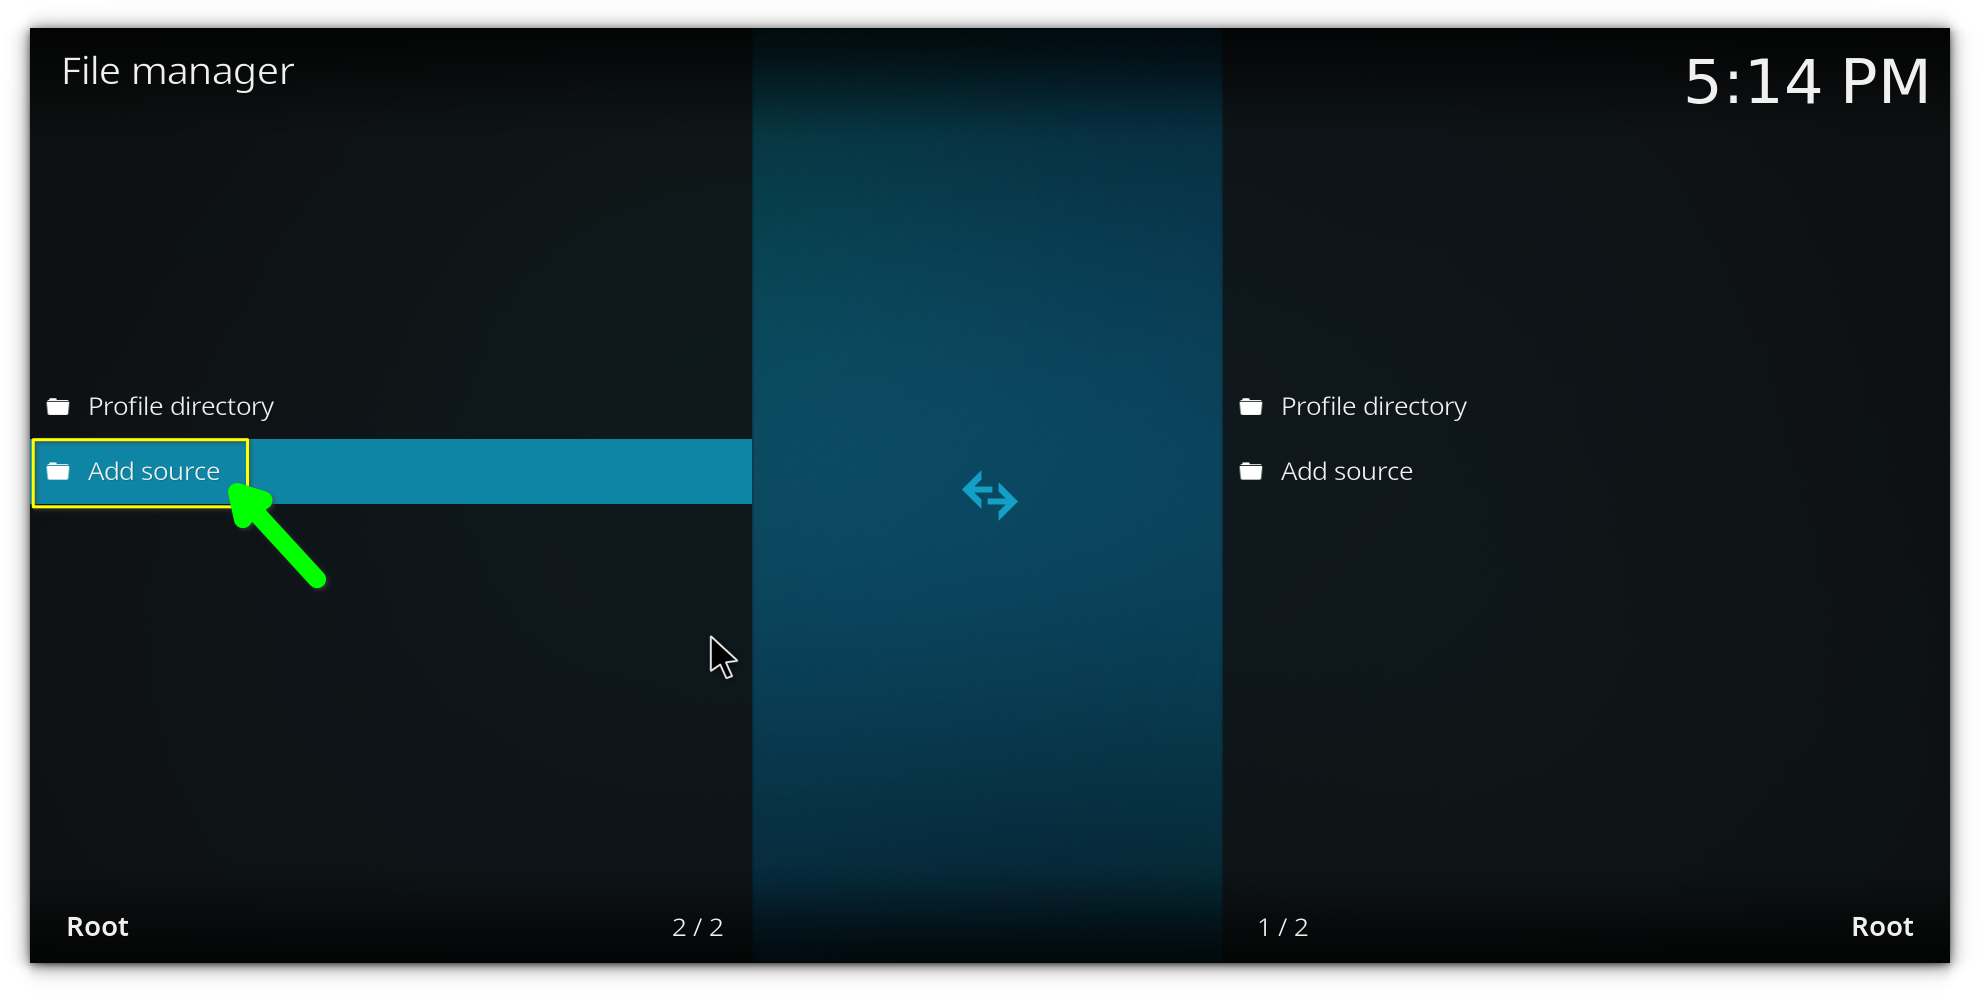
Click on Add Source.
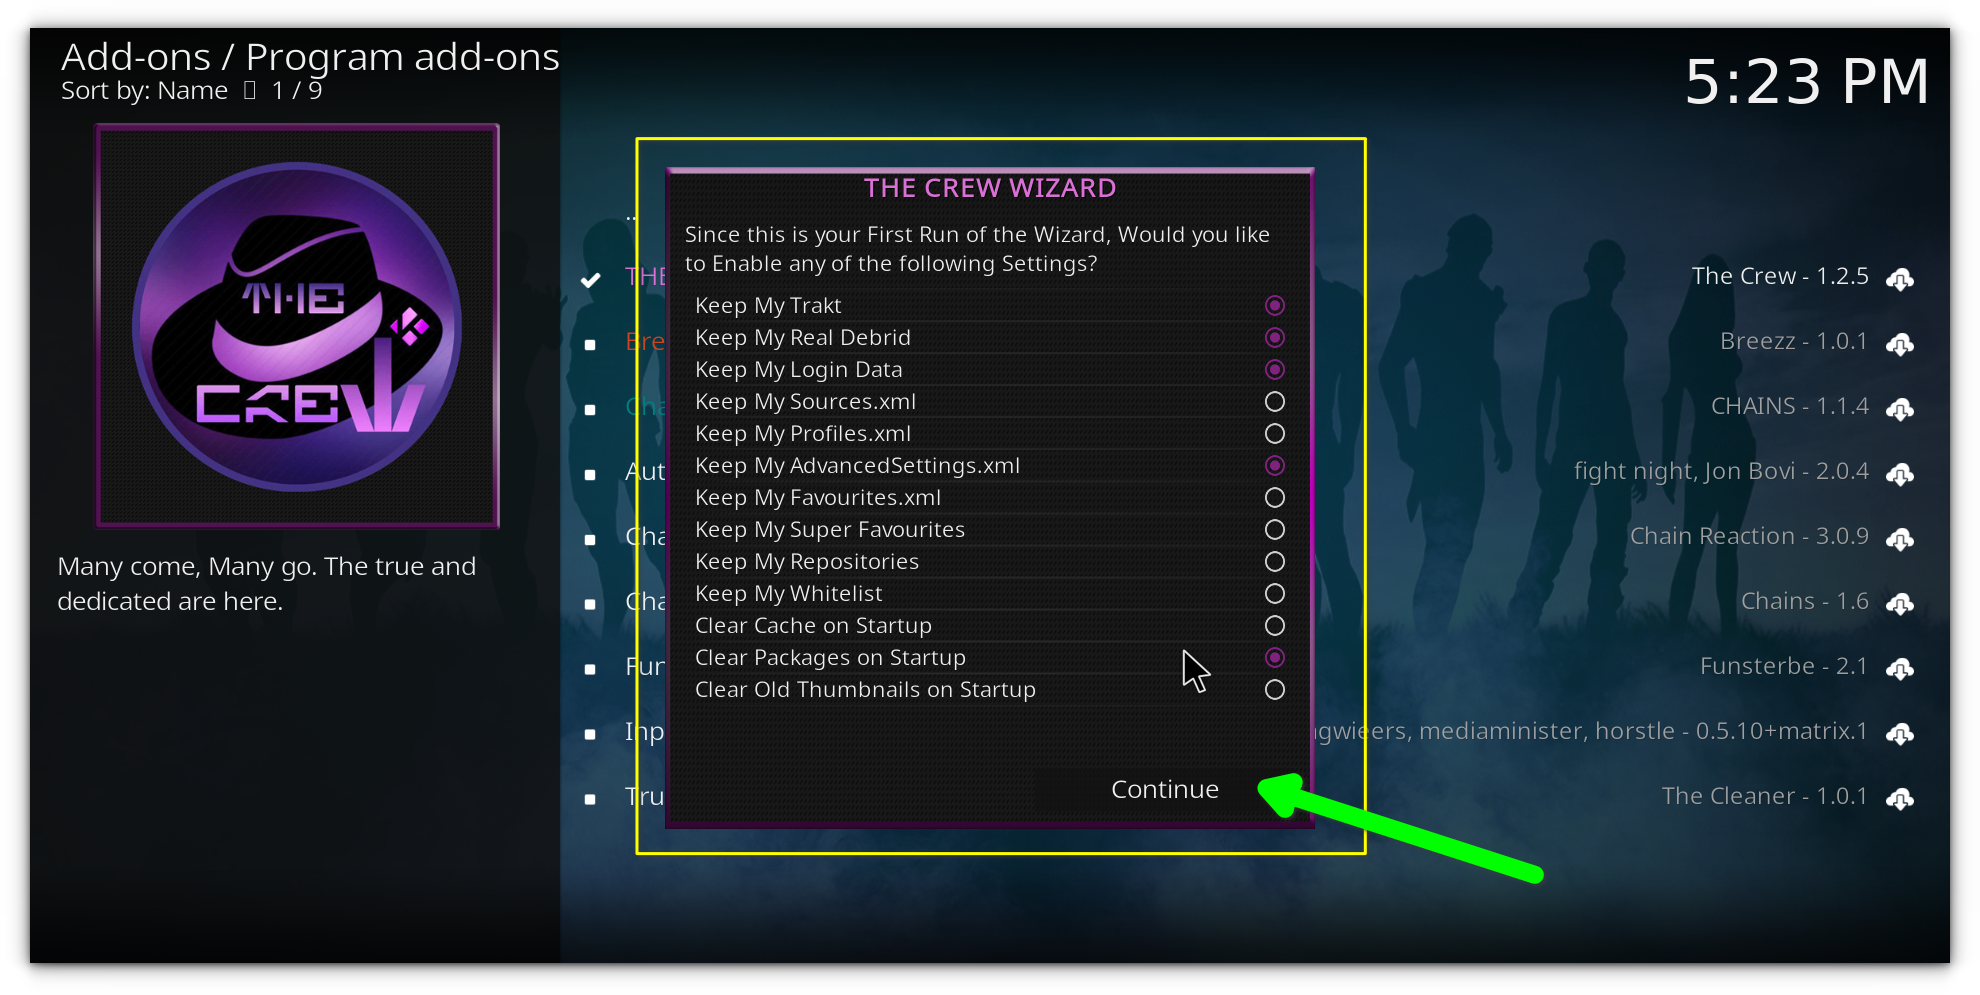
A prompt will appear asking you to confirm the installation of dependent addons. Click OK.
Return to the Kodi home screen and go to Add-ons.

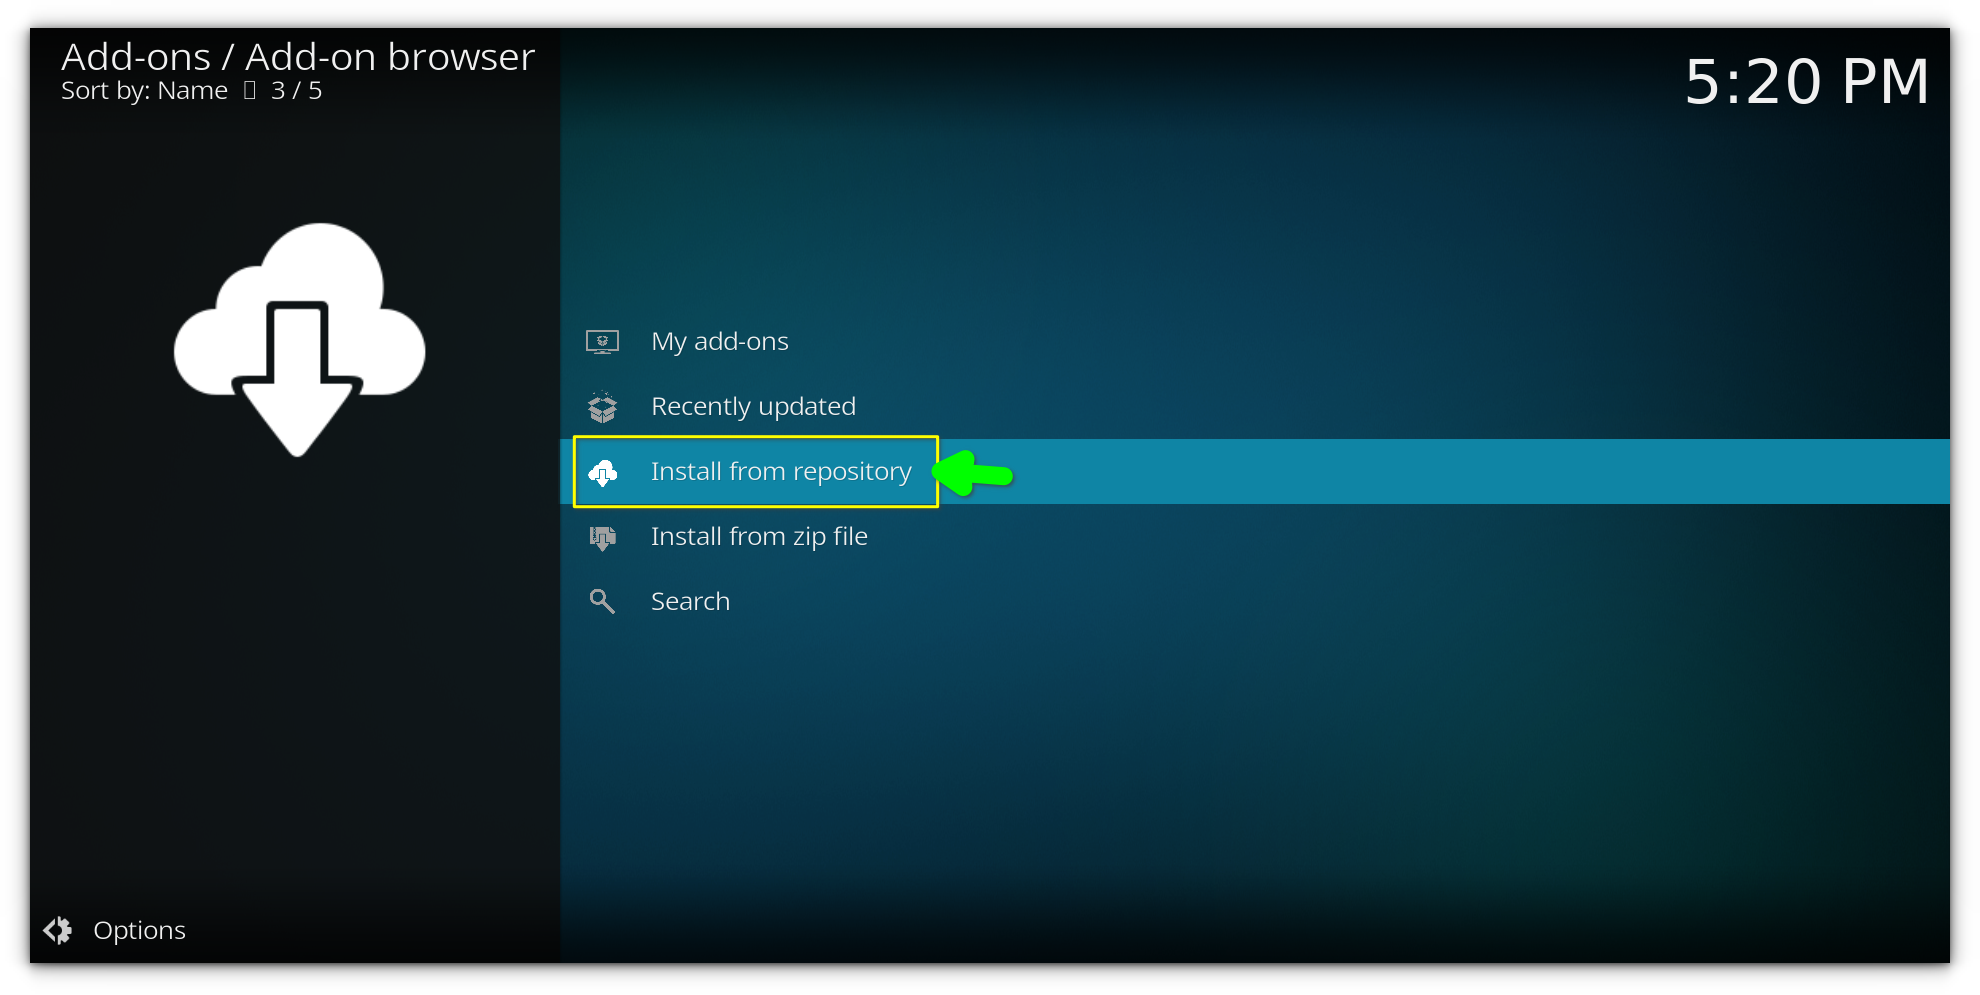
From the Add-ons menu, click Install from Repository.
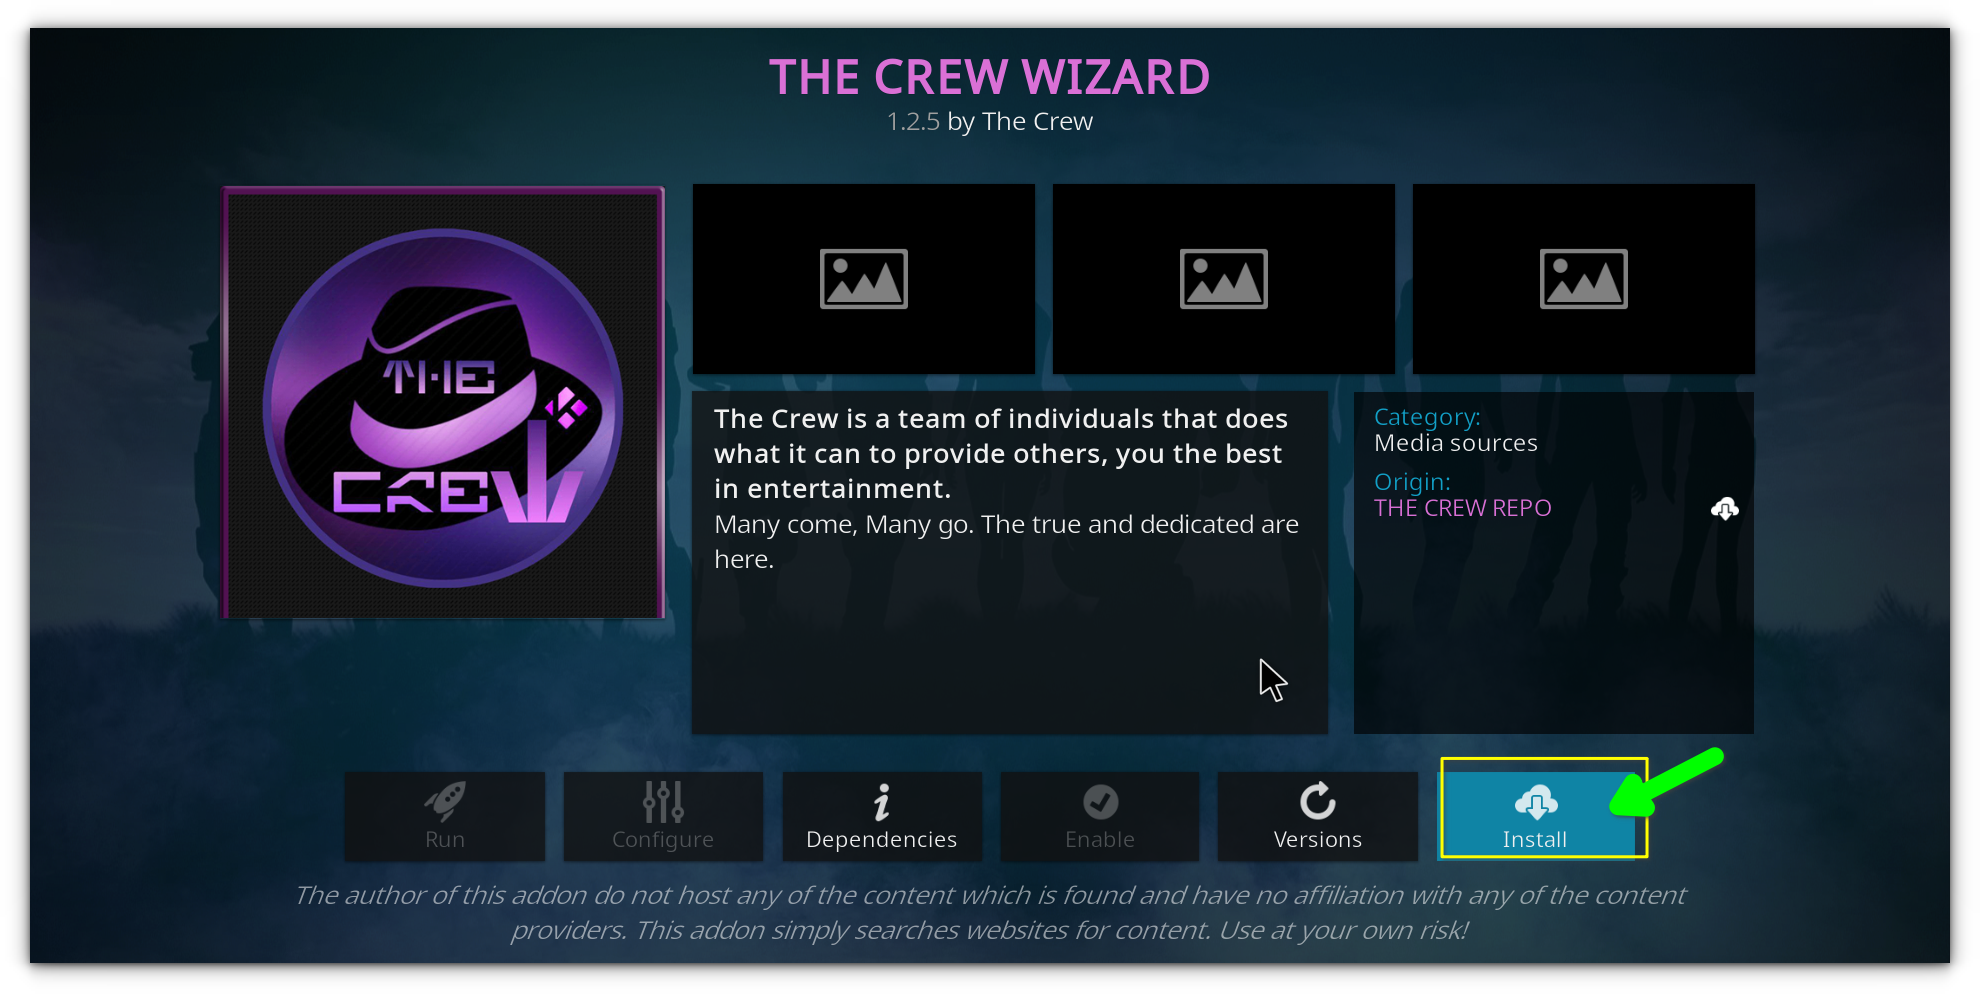
and then select Install.
Kodi is a versatile media player that can be customized to fit your needs, and one of the best ways to personalize your experience is by installing a Kodi build.
Step 5: Install the actual build
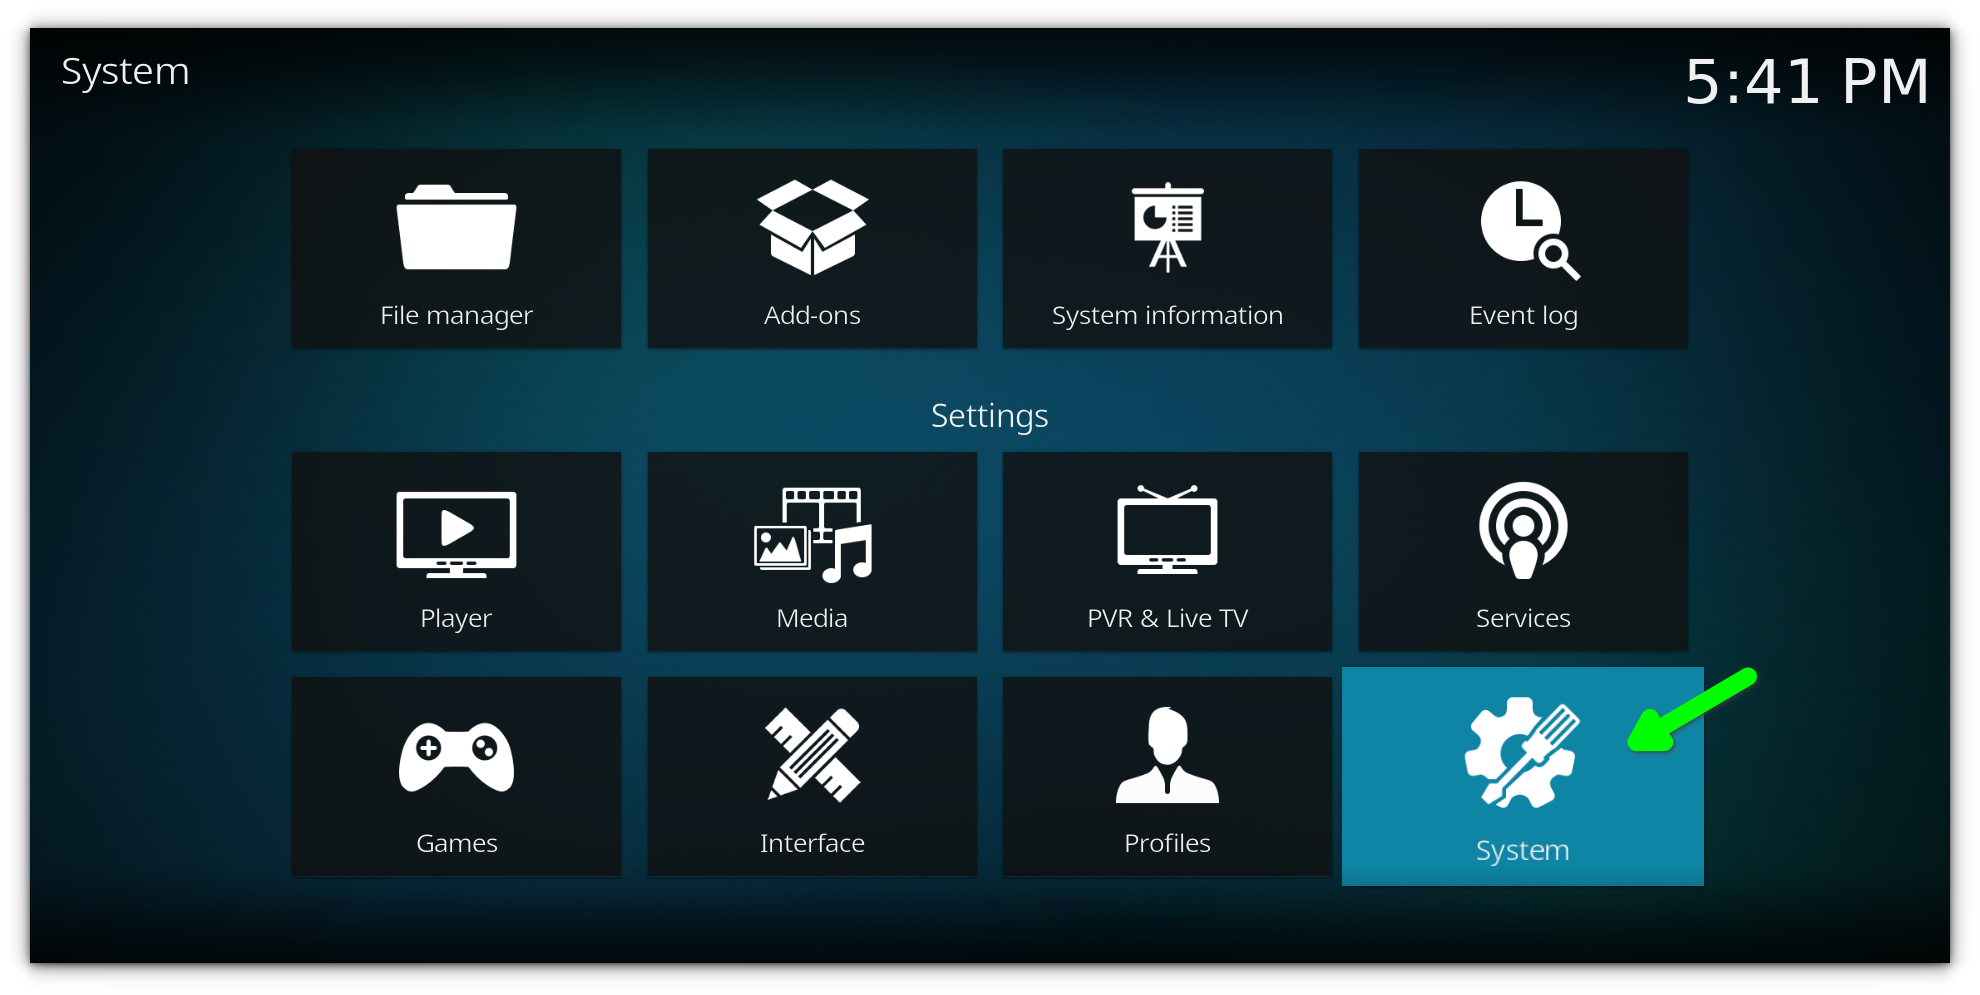
Now we’re ready to install the actual build itself. I like Homeflix because if its familiar interface with Netflix, thus I’ll be installing that.Select System from the options.

Wait for the installation to complete. This may take a couple of minutes.

There are plenty of builds out there, each catering to different preferences. Whether you’re into movies, TV shows, live sports, or even gaming, there’s likely a Kodi build that fits your style.
Now that you’ve got your build installed, sit back, relax, and enjoy a fully customized Kodi setup. Happy streaming!
I’ve already listed my favorite Kodi builds in a separate article, so be sure to check that out for more recommendations.
- Click Continue and wait for the build to download and install. This may take a few minutes, so be patient.
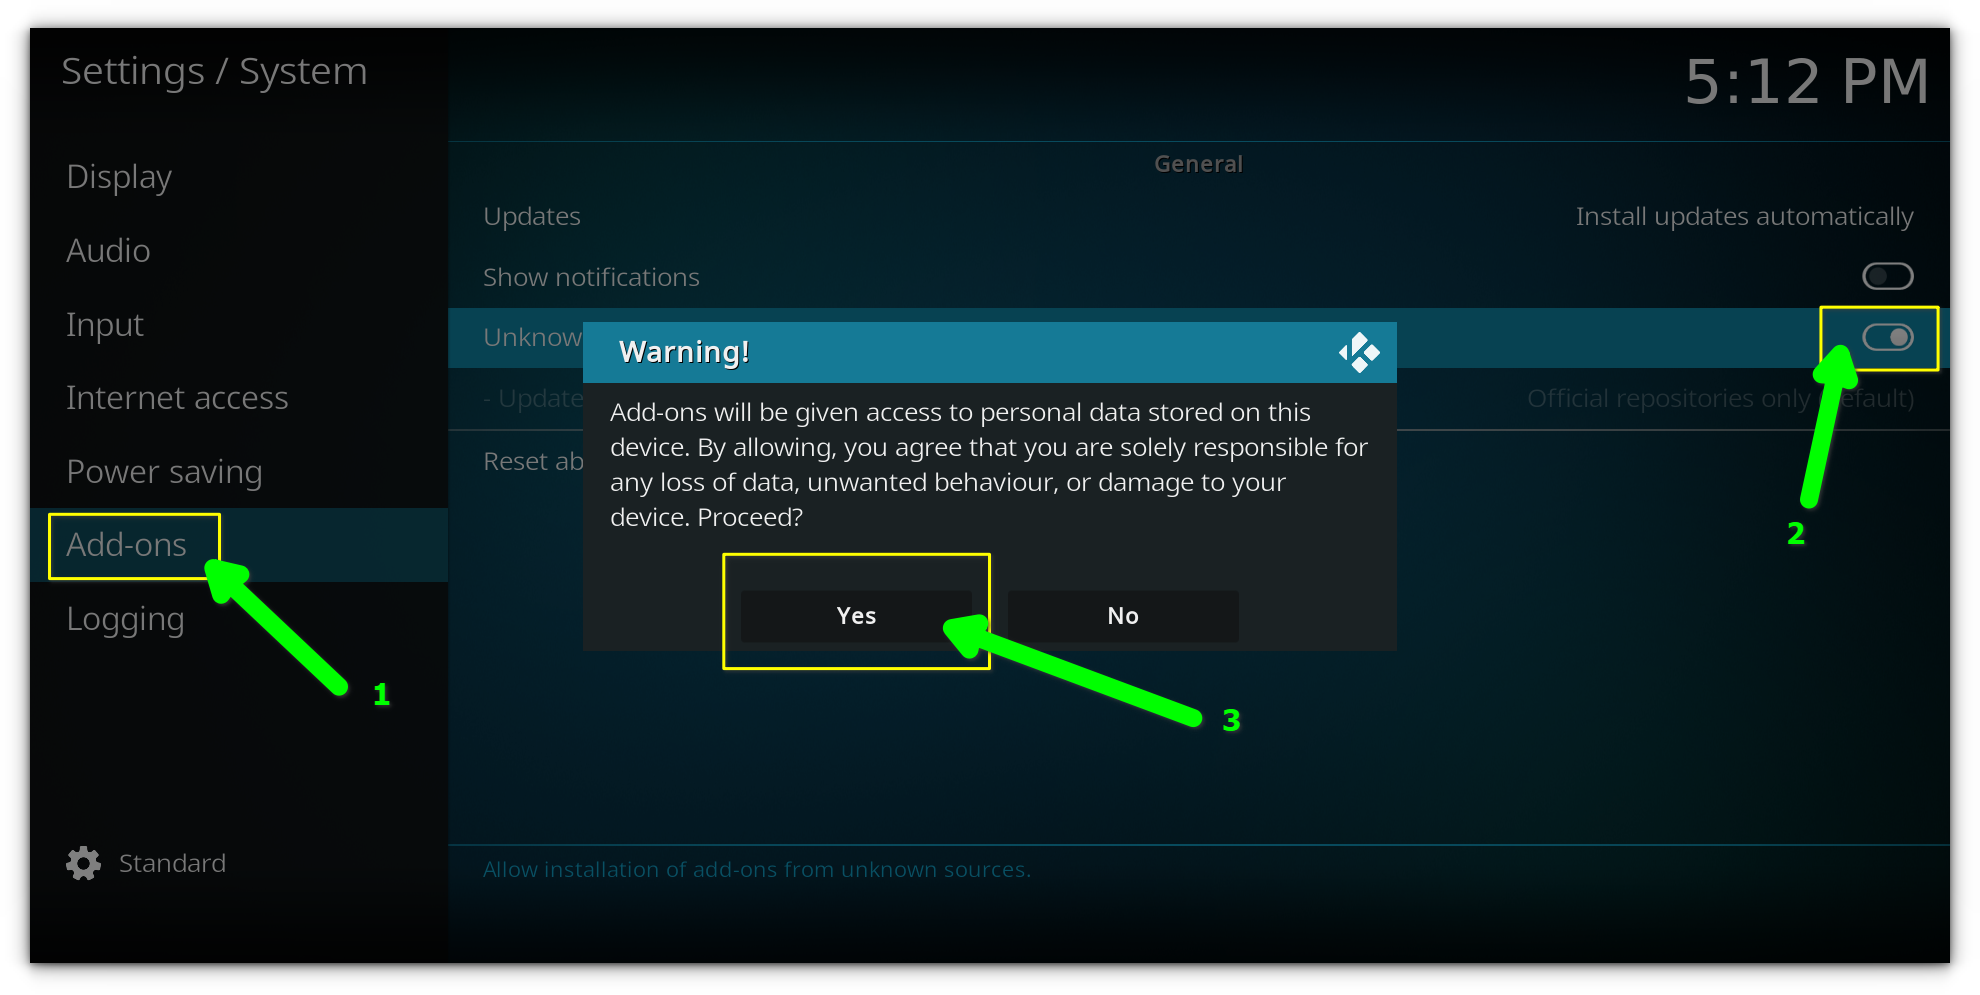
Scroll down and choose Add-ons. On the right side, toggle the Unknown Sources option to On. A warning message will pop up; click Yes to confirm.
Step 6: Restart Kodi and Enjoy!
Explore a few options, experiment with different builds, and find the one that enhances your Kodi experience the most.
Conclusion
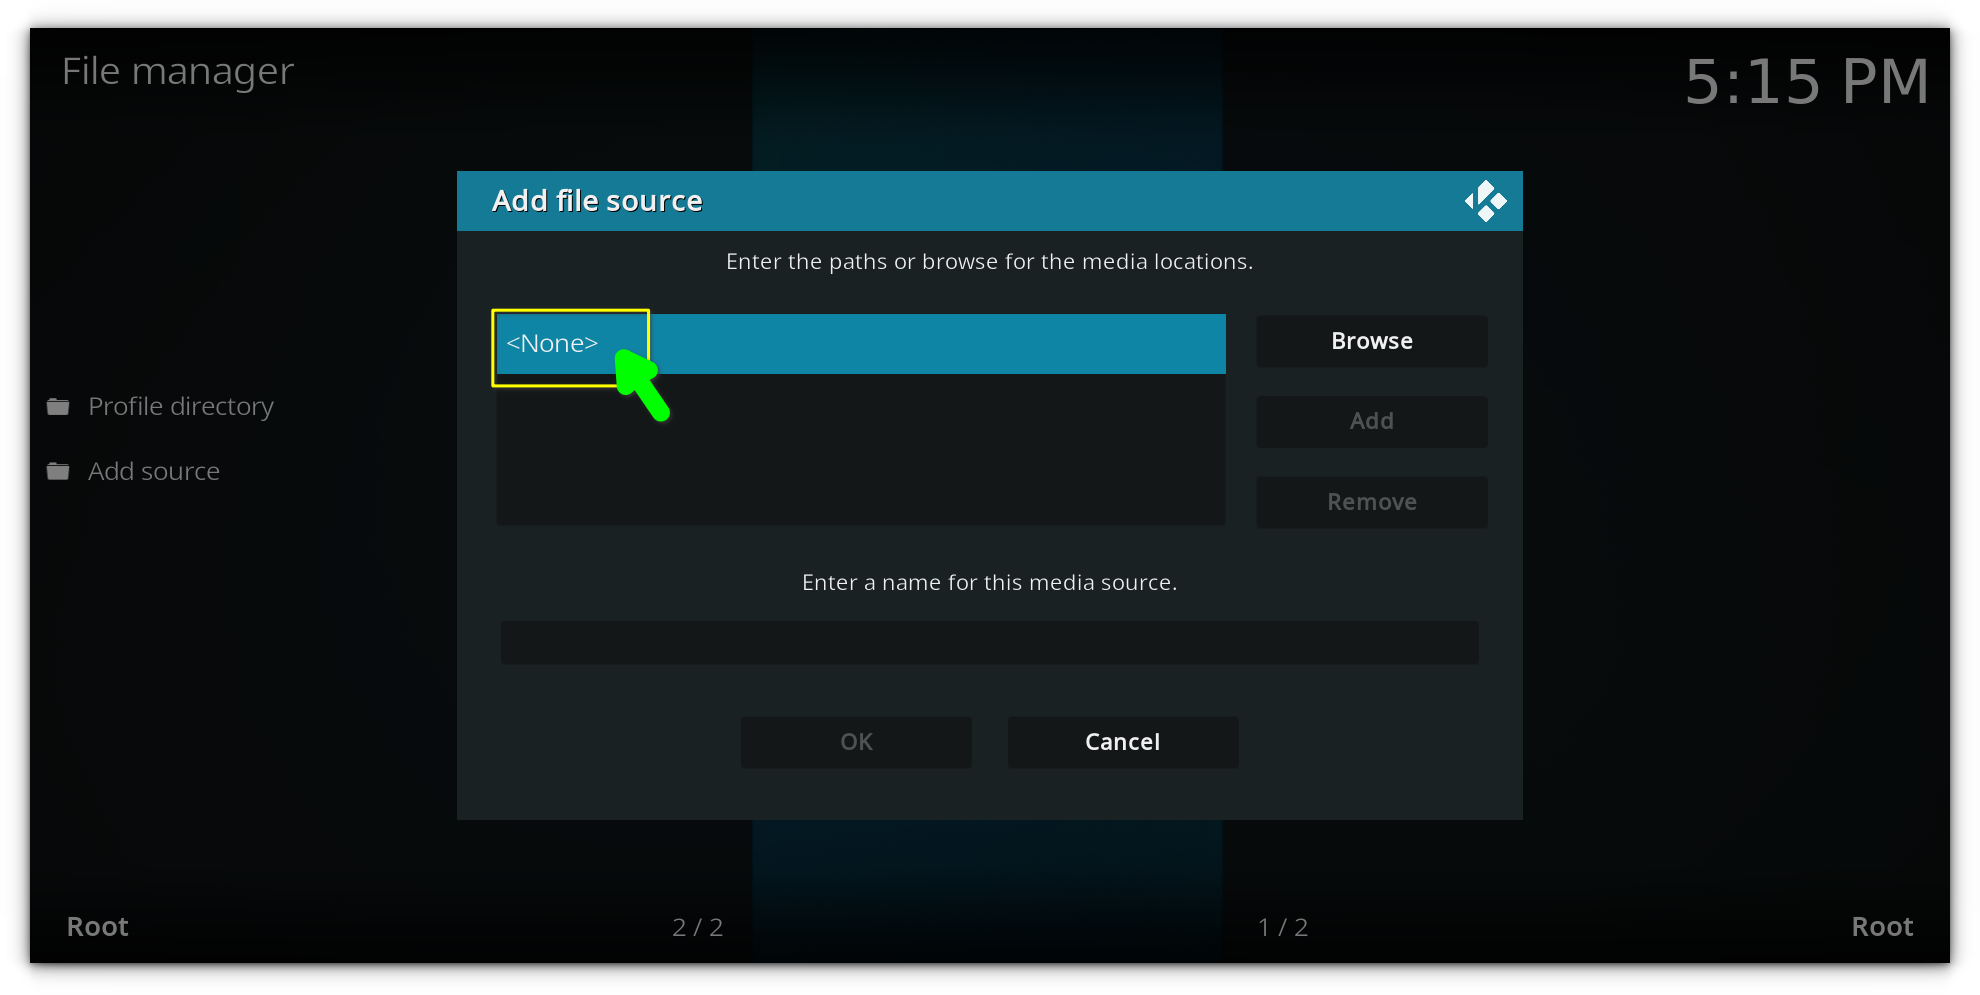
Whether you’re using Kodi on a Raspberry Pi, PC, or even an Android Box, these steps will work across all devices.In the window that appears, click on <None>.Click on Build Menu.In this guide, I’ll walk you through the steps of installing a Kodi build, using the Diggz Xenon Build as an example. The same method is used for installing add-ons to Kodi.After the installation, simply reopen Kodi, and you’ll be greeted with the HomeFlix Build. The interface will be customized with a sleek new look, and you’ll have access to a range of addons and features.

Find and select your preffered build, I’m selecting Homeflix.Before we can install third-party builds, we need to allow Kodi to install from unknown sources. Here’s how: