After doing some digging, I found out that the CLI tool for Cloudflare Tunnels had recently been updated, so that might’ve been the root of the issue. So while Jellyfin works, managing external drives in CasaOS feels like it could be a headache for new users. Built around the Docker ecosystem, it simplifies the process of managing various services, apps, and smart devices from a browser-based dashboard.It acts as the interface between you and your applications, providing a sleek, user-friendly dashboard that allows you to control everything from one place.
The initial setup process will guide you through creating an account and getting started with your personal cloud.
I spent a full week testing these services in my daily routine and jotted down some key takeaways, both good and bad.
Table of Contents
What is CasaOS?

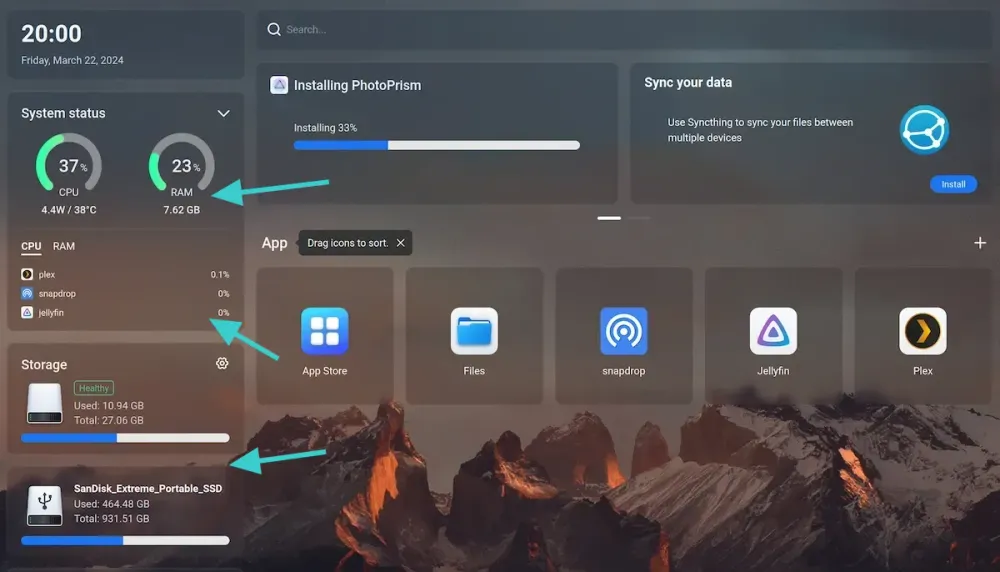
Each application you install behaves in a similar way, CasaOS takes care of the back-end configurations to make sure the apps are easily accessible through your browser. While CasaOS offers a smooth experience overall, there are some quirks that require you to have Docker knowledge to work with them.There’s also a search bar for easy navigation, and at the heart of the dashboard lies the app drawer—your gateway to all installed and available applications.The App Store is one of the main attractions of CasaOS. It offers a curated selection of applications that can be deployed directly on your Pi with minimal effort.But, if you are new, and want something easy to get you up to speed, CasaOS is what you can try.
Installing CasaOS on Raspberry Pi
I used Cloudflare Tunnel to access the services from outside the home network.
Container-level settings for the apps can be accessed by right clicking the app icon in the dashboard. It lets you map (docker volume) directories on the disk with the app. For example, if you are using Jellyfin, you should map your media folder in the Jellyfin (container) setting. You should see it in the later sections of this tutorial.Container-level settings for the apps can be accessed by right clicking the app icon in the dashboard. It lets you map (docker volume) directories on the disk with the app. For example, if you are using Jellyfin, you should map your media folder in the Jellyfin (container) setting. You should see it in the later sections of this tutorial.
Container-level settings for the apps can be accessed by right clicking the app icon in the dashboard. It lets you map (docker volume) directories on the disk with the app. For example, if you are using Jellyfin, you should map your media folder in the Jellyfin (container) setting. You should see it in the later sections of this tutorial.Once inside, CasaOS welcomes you with a clean, modern interface. You’ll see system stats like CPU usage, memory, and disk space upfront in widget-style panels.
Setting up a basic Nextcloud instance in CasaOS was surprisingly easy. It was a matter of clicking the install button, and within a few moments, I had my personal cloud up and running. Here’s how you can install an app:So, I would say it is fine for local use if you’re sticking to one drive, but if you plan to expand your storage, be ready for some trial and error.
Nextcloud: Good enough but not perfect
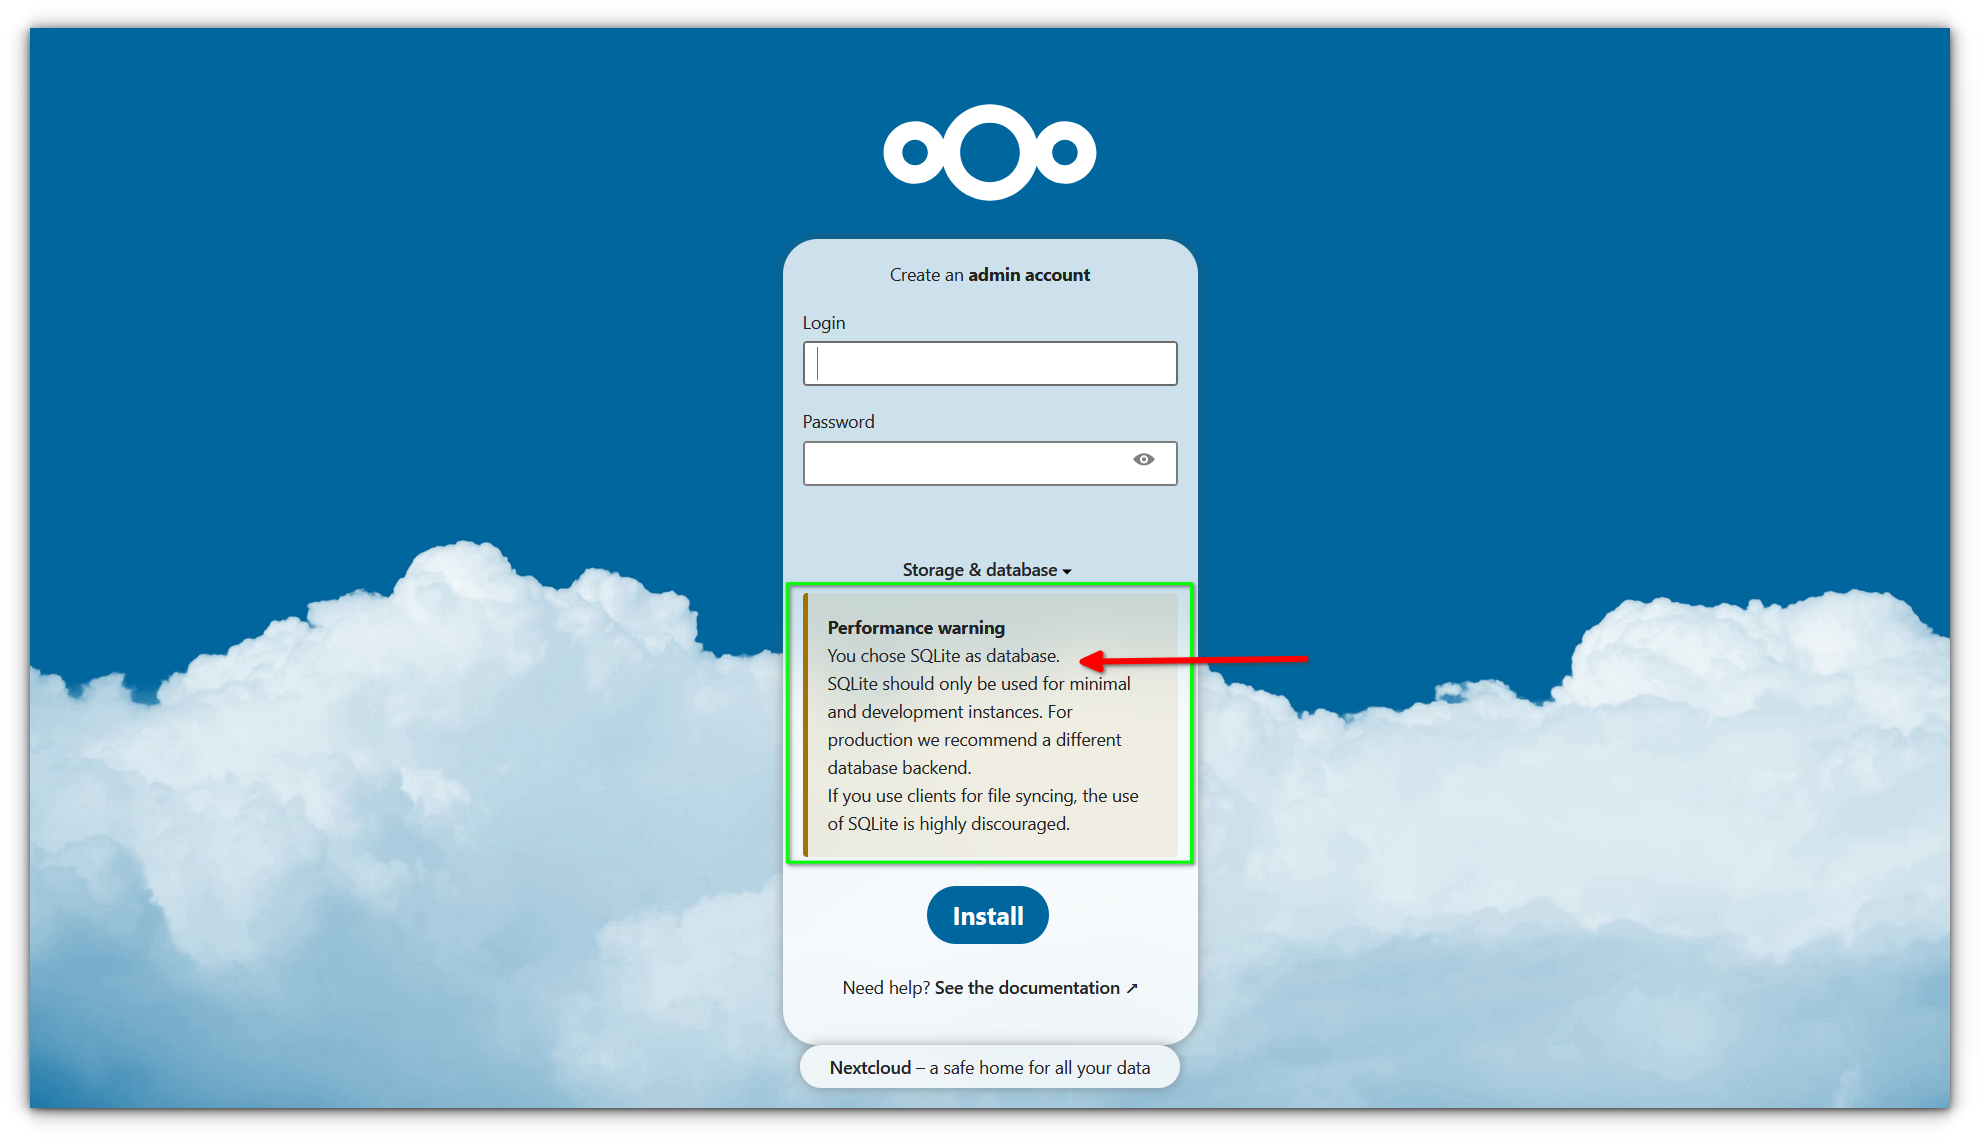
When you first access your Nextcloud instance, it defaults to using SQLite as the database, which is fine for simple, small-scale setups. In the case of Jellyfin, the default login credentials were:For applications like Jellyfin or any self-hosted service, you will likely need to log in with default credentials (which you can and should change after the first use). So while Nextcloud is easy to get running initially, fine-tuning it for real-world use takes a bit of extra work, especially if you are focused on data integrity and security.
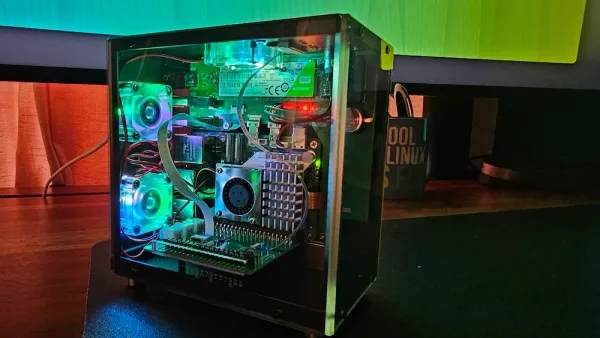
Think of CasaOS (Casa being “home” in Spanish) as a home for your Raspberry Pi or similar device. sudo apt install curl -y
Hopefully, it was a temporary glitch, but it is something to keep in mind if you rely on stable connections.Installing CasaOS on a Raspberry Pi is as easy as running a single bash script. But first, let’s make sure your Raspberry Pi is ready:
- Setting up secure SSL certificate
- Optimizing your database
- Handling other backend details that aren’t obvious to a new user.
Even after jumping through those hoops, it wasn’t smooth sailing. One evening, I accidentally turned off the Raspberry Pi.
Custom WordPress stack: Good stuff!
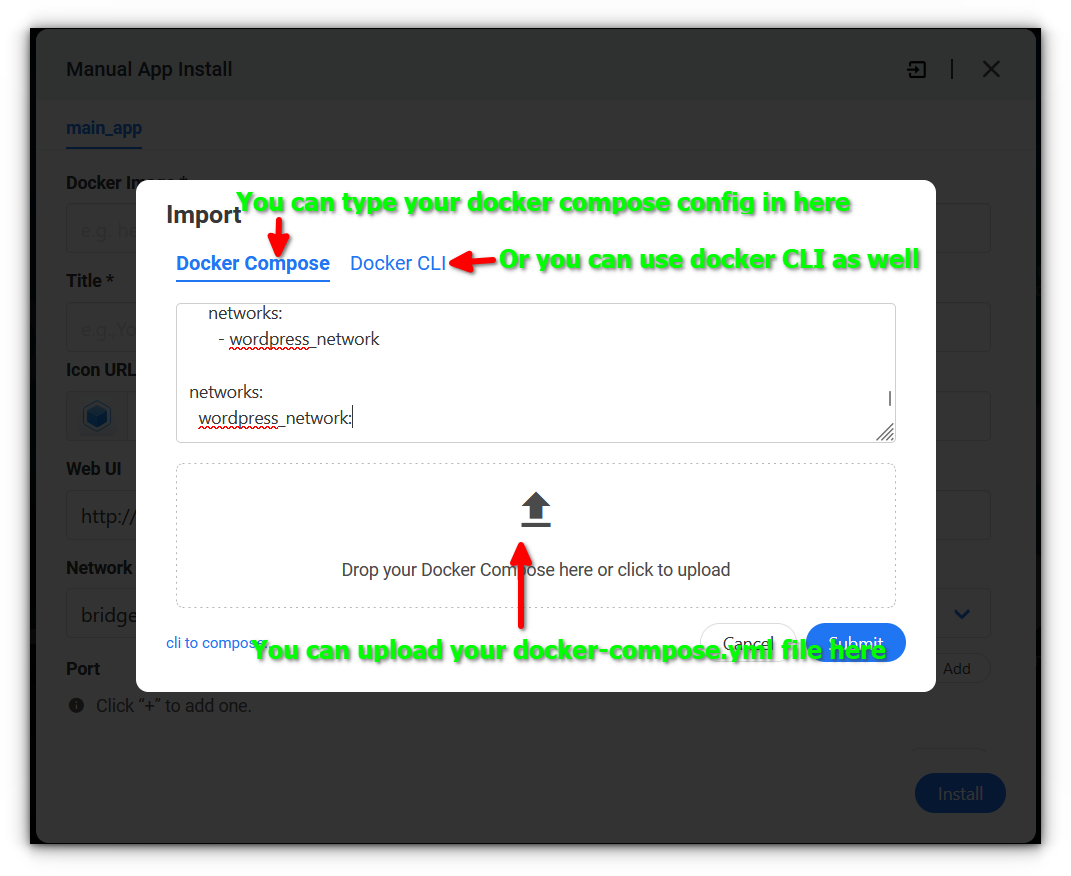
But if you’re serious about storing larger files or managing multiple users, you’ll quickly realize that SQLite isn’t the best option. Nextcloud itself warns you that it’s not ideal for handling larger loads, and I would highly recommend setting up a proper MySQL or MariaDB database instead. It is clear they’ve thought about users who want to deploy their own stacks using Docker Compose files or Docker commands.
Once you have installed applications in CasaOS, accessing them is straightforward, thanks to its intuitive design.The connection would just drop unexpectedly, and I’d have to fiddle around with it to get things running again.
Final thoughts
For someone new to Docker or CasaOS, the concept of binding volumes can be perplexing. You don’t just plug in the drive and expect it to work, it requires configuring how your media files will link to the Jellyfin container.Originally developed by the makers of ZimaBoard, CasaOS makes the deployment of tools like Jellyfi, Plex, Immich, PhotoPrism a matter of a few clicks.

I spent a good chunk of time managing permissions and binding volumes, which was definitely not beginner-friendly. For this article, I installed a few applications on CasaOS tailored to my homelab needs: Doing so will give you more stability and performance in the long run, especially as your data grows.