Now that you’ve got the tools, go ahead, experiment, break stuff, debug, and build.It’s particularly useful for backend work, automation scripts, or just quick testing without the overhead of an HTML shell.Running JavaScript in the editor helps you avoid constant context-switching, reduces distractions, and gives you immediate feedback when debugging.Node.js takes that same V8 engine and brings it to your local machine. This lets you run JavaScript outside the browser, directly from the command line or terminal.
- Running JavaScript inside VS Code using Node.js: most efficient and editor-native approach.
- Run it in a browser or using extensions: handy for quick tests or visual feedback.
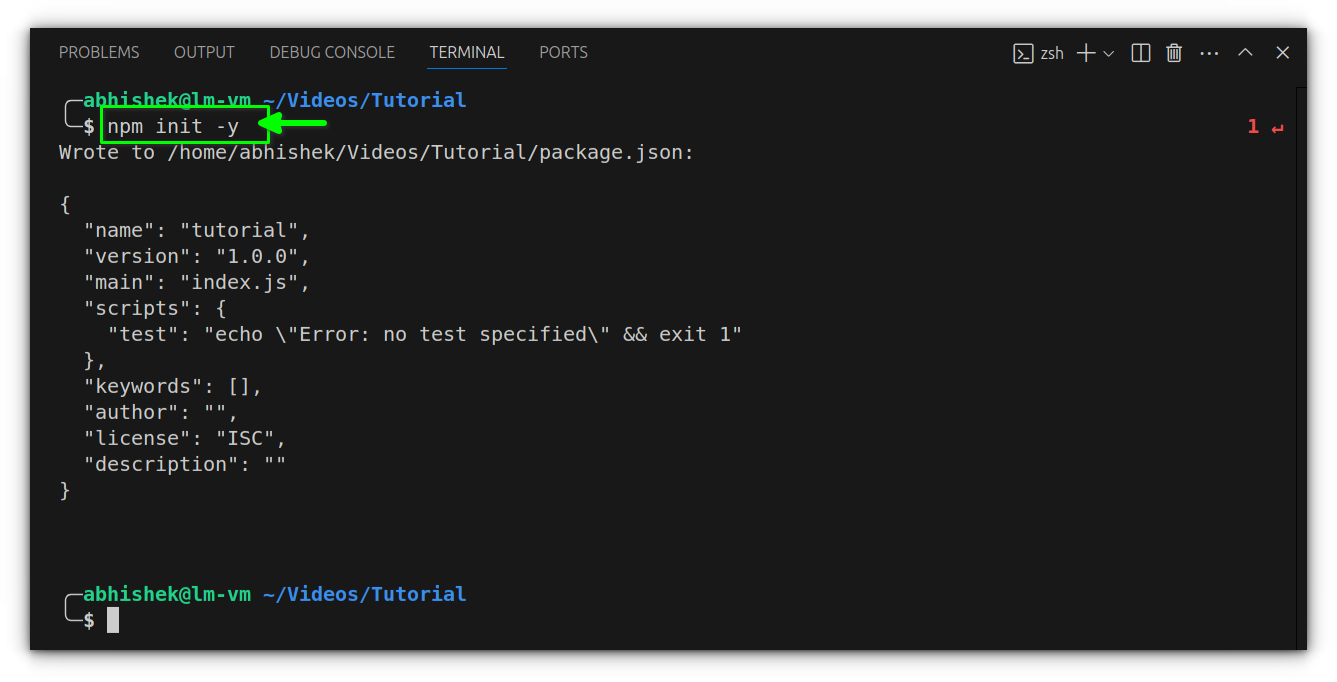
Once everything’s installed, open VS Code and create a new folder for your project. Inside it, launch the terminal (Ctrl + ~ or Terminal > New Terminal) and run npm init -y.
Table of Contents
Understanding the role of Node.js
This initializes a basic project and creates a package.json file, which will be useful for managing your scripts and dependencies later.Extensions like Code Runner can help for quick one-off tests, but for anything serious, sticking to the Node-powered method inside VS Code gives you more control, better error output, and a real development feel. If you’re unsure whether Node.js is already installed on your system, open a terminal and type:console.log("Hello, VS Code!");
For example, a file like example.js with:With JavaScript being the backbone of the modern web and countless developers now diving into frameworks like React, Vue, and Svelte, being able to run JavaScript code directly inside VS Code becomes almost essential.
Set up a JavaScript project
In one of my earlier articles, I showed how you can preview HTML files inside Visual Studio Code. That setup worked well for testing static pages, but what if you want to go beyond markup and bring interactivity into the mix? There are two approaches here:
We have covered node installation on Ubuntu.Let’s see about using them.
JavaScript was originally designed to run inside browsers, which come with their own JavaScript engines (like V8 in Chrome).
Add a custom script for simpler runs
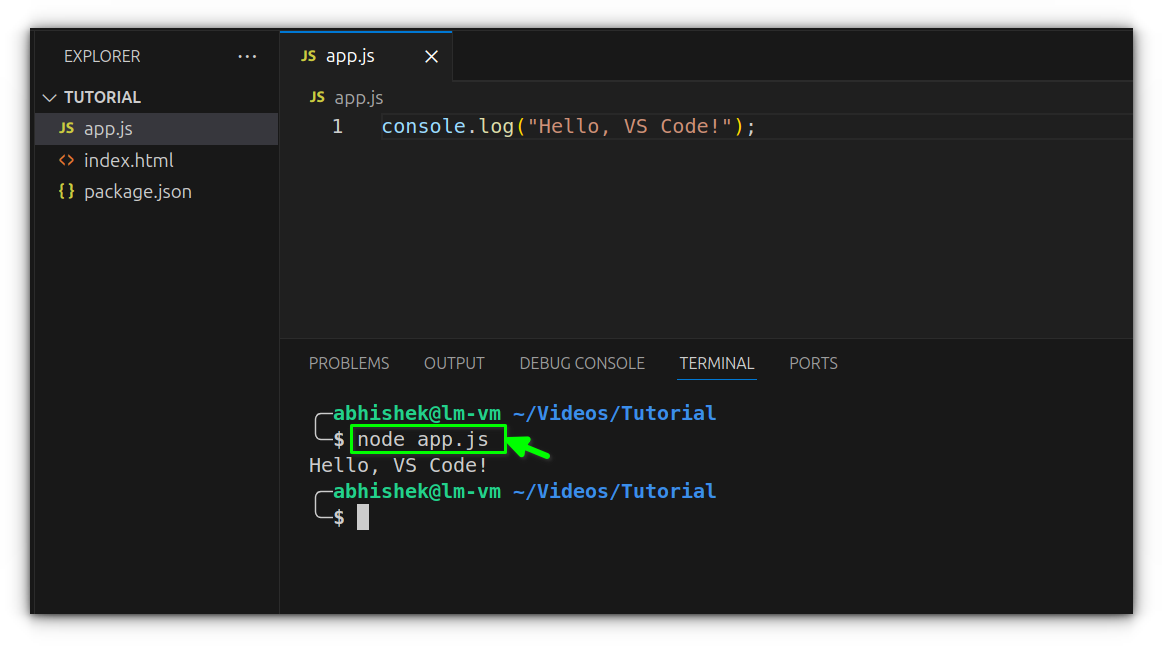
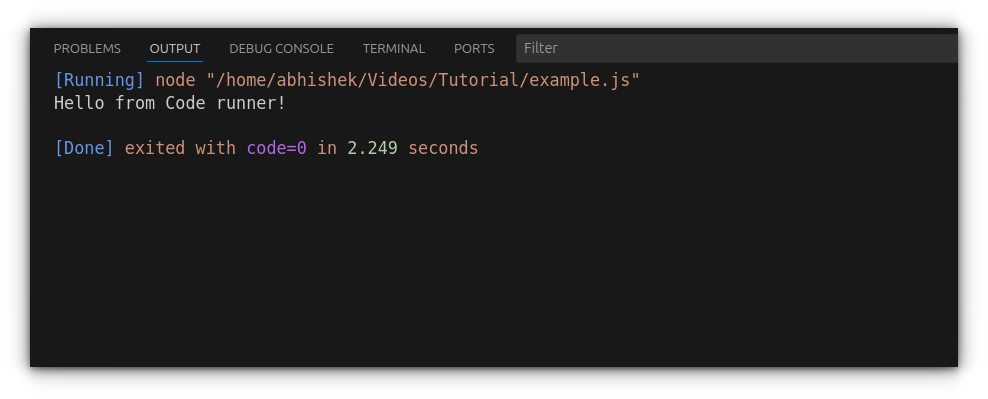
The output will appear immediately in the console, confirming that Node is executing your file properly.node -v
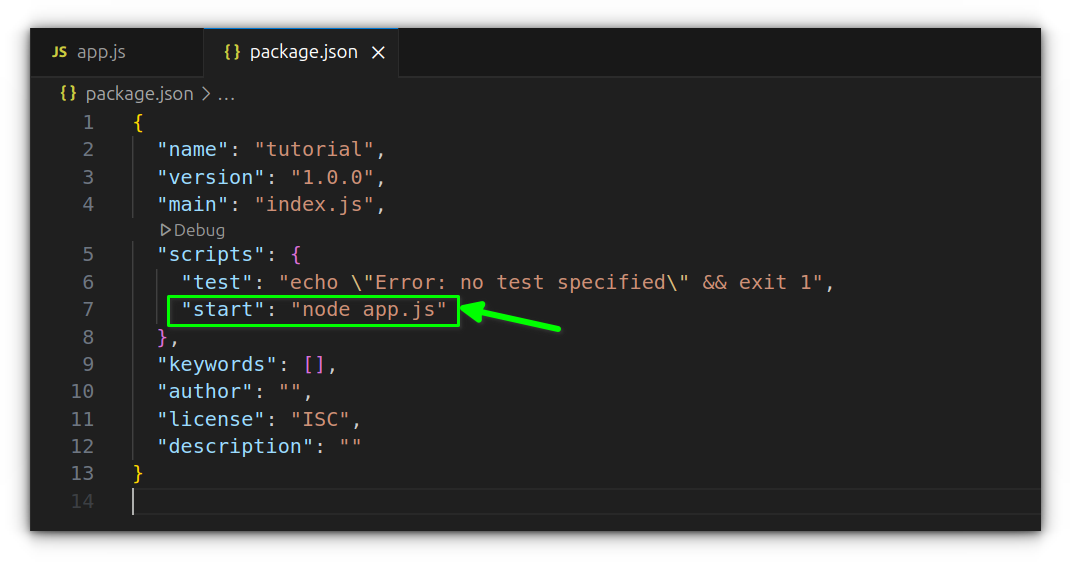
To make things smoother, especially as your project grows, it’s a good idea to define a custom script in your package.json file. Open that file and find the "scripts" section, then add:Once this setup becomes second nature, jumping into frameworks like React or Express will feel a lot more natural too.
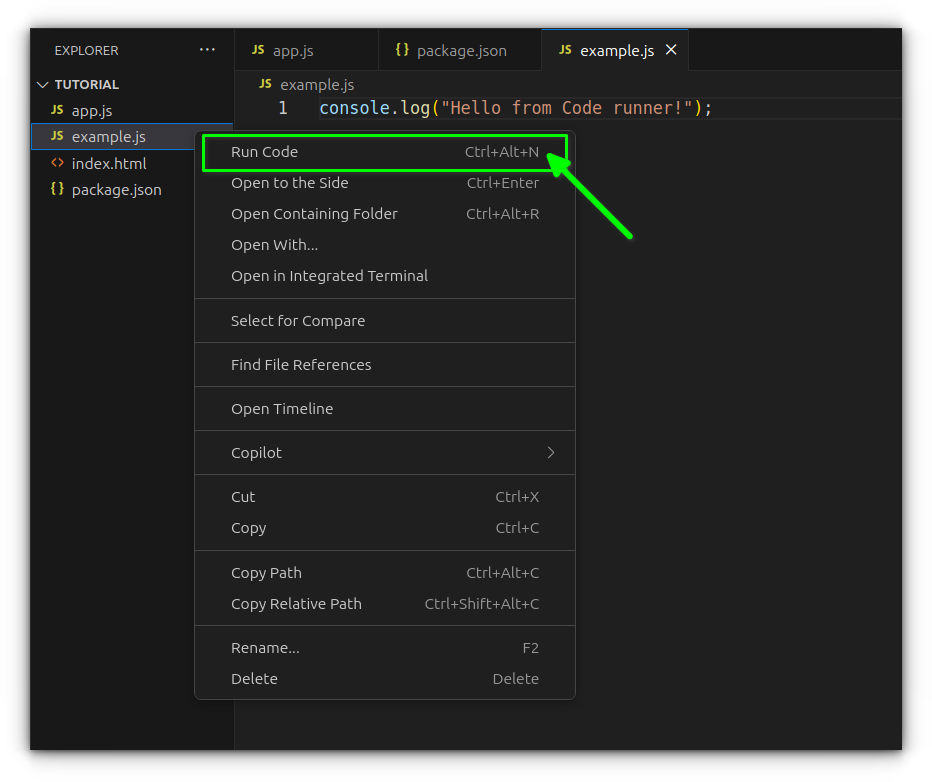
- Open the Extensions tab in VS Code.
- Search for “Code Runner” and install it.
- Open a
.jsfile, write some code, right-click, and select “Run Code.”
"start": "node app.js"
With Node.js set up inside VS Code, running JavaScript becomes a seamless part of your workflow, no browser tabs or external tools required.
The main limitation here is that it doesn’t use the integrated terminal like we used above, which can restrict input/output behavior for more complex scripts.
Wrapping up
Whether you’re testing a quick function or building out a larger project, using the terminal and custom npm scripts keeps things fast and distraction-free.To get started:console.log("Hello from Code Runner!");
With the environment ready, create a new file named app.js and add a bit of JavaScript, for example:If you prefer a quick way to execute small snippets without setting up a project, Code Runner can help. It’s a lightweight VS Code extension that runs code in a sandboxed output window.