In this article, we will walk through the steps of installing the LiteSpeed plugin on your WordPress site and explain how to configure it correctly.
Table of Contents
- 1 Why Use LiteSpeed Cache Plugin On WordPress?
- 2 How to Install the LiteSpeed Cache Plugin on WordPress
- 3 Step-By-Step Instructions On How To Configure The Plugin For Optimal Performance
- 4 Testing Performance Improvements
- 5 Troubleshooting Tips For Common Issues
- 6 After Action Report – Monitoring Site Performance
Why Use LiteSpeed Cache Plugin On WordPress?
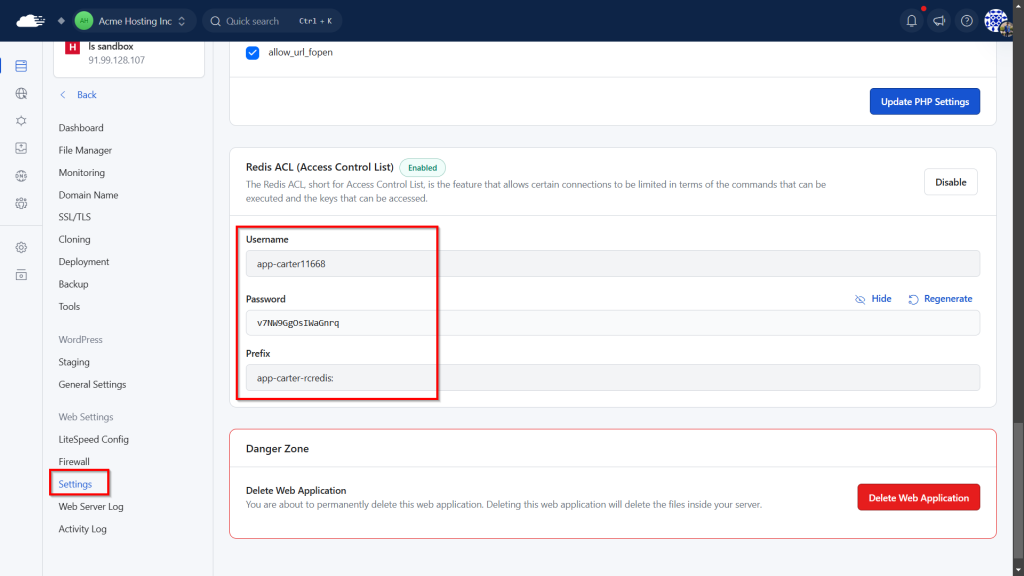
On RunCloud, all new Redis instances are secured with Access Control Lists (ACL) by default. If you want to use Redis for object caching in WordPress using LSCache on your OpenLiteSpeed server, you’ll need to perform a few configuration steps. You’ll need to define a specific cache prefix in your WordPress wp-config.php file. This is necessary for limiting the scope of keys when Redis ACLs are in use. To do this, open your wp-config.php file (found in the root directory of your WordPress installation) and add the following line:LiteSpeed Cache is a caching plugin for WordPress that helps improve the performance of a website by storing frequently accessed data in a cache. This allows the website to load faster for visitors by reducing the amount of time it takes for the server to process and retrieve the necessary data.Your WordPress site is now configured to use Redis with ACL for object caching via LSCache, which can significantly improve its performance and scalability.Caching involves storing a copy of a webpage’s content and resources, such as images and CSS files, on the server. When a user requests the same page, the server can quickly serve the cached version, rather than having to generate the page from scratch each time. This can greatly reduce the amount of time it takes for a page to load.These are the steps we would advise you follow to configure the LiteSpeed Cache plugin for optimal performance on a RunCloud server:
How to Install the LiteSpeed Cache Plugin on WordPress
define('LSOC_PREFIX', 'application-name-rcredis:');
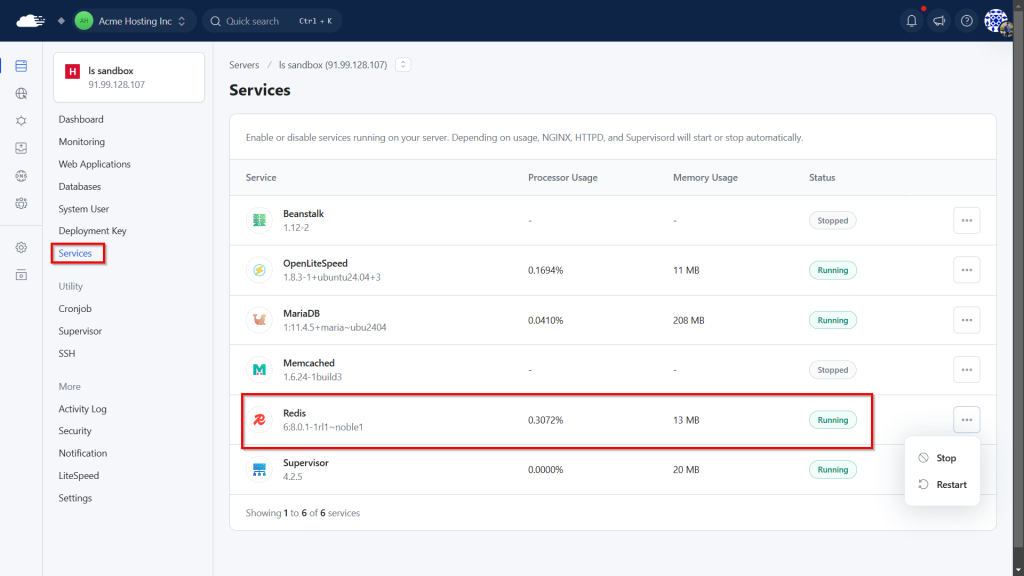
Before we go any further, ensure that Redis is installed, activated, and running correctly on your server.LiteSpeed Cache is a highly effective caching plugin for WordPress that can significantly improve website performance.
- Define the Cache Prefix in wp-config.php
After adding the correct prefix, save your wp-config.php file. One of the key benefits of using LiteSpeed Cache is that it can significantly improve website loading speed by caching website content and resources.
LiteSpeed Cache includes other features such as minification and concatenation of HTML, CSS, and JS files to reduce the size of resources. This also helps to decreases the website loading time.
- Configure LSCache Object Cache Settings in WordPress
LiteSpeed Cache also supports CDN integration, which can further speed up page loading times by delivering content and resources to users from a server that is geographically closer to them.There are several common issues that users may experience when using the LiteSpeed Cache plugin on a RunCloud server. Below are some troubleshooting tips that can help resolve these issues:
- Object Cache: Set this toggle to ON. This enables LSCache’s external object cache functionality and allows it to use Redis (or Memcached) instead of relying solely on WordPress’s internal object caching.
- Method: Select Redis from the dropdown menu.
- Host: This is the IP address Redis listens on. If Redis is running on the same server as your OpenLiteSpeed web server (which is the default and most common setup), then you need to use the value
127.0.0.1. - Port: In this field, enter
6379, which is the default network port for Redis. - Username: Enter the Redis ACL username provided in your RunCloud dashboard.
- Password: Enter the corresponding password for the Redis ACL username that you noted in the previous step.
- Save Changes and Verify Connection
After filling in all the above fields using the details from your RunCloud dashboard, click the “Save Changes” button. After saving the changes, refresh the page, LSCache will then attempt to connect to your Redis server using the credentials you’ve provided. If the configuration is correct and Redis is accessible with the given ACL details, you should see a status update similar to this:
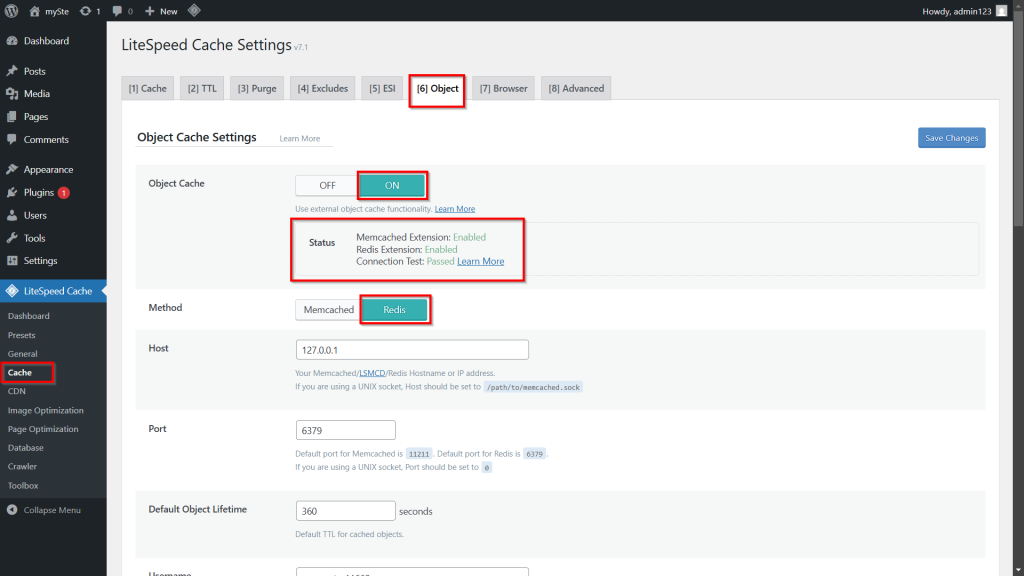
- Redis Extension: Enabled confirms that your PHP environment has the necessary Redis extension loaded.
- Connection Test: Passed confirms that the LSCache has successfully connected to your Redis server using the ACL username and password, and can communicate with it for object caching.
LiteSpeed Cache is built for the LiteSpeed web server, which is known for its high performance and low resource usage.
Step-By-Step Instructions On How To Configure The Plugin For Optimal Performance
It’s always a good idea to test the website performance both with and without the plugin, and compare the results to see the actual impact of the plugin on your website’s performance.
- In the WordPress dashboard, navigate to the “LiteSpeed Cache” menu and click on the “Presets” tab. This tab contains some recommended presets, which are designed to work well for most websites. Pick the one closest to your requirements; we’ll fine tune the individual settings later.
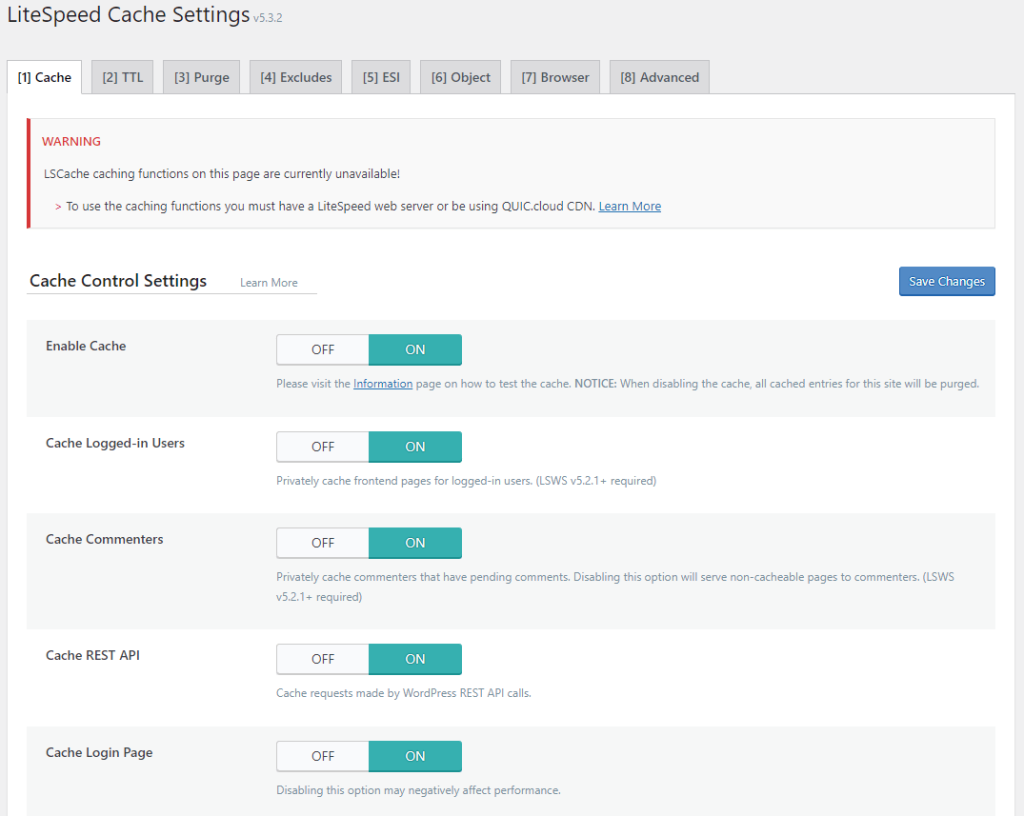
- Under the “Cache” tab:
- Make sure that “Enable Cache” and “Cache Login Page” are both enabled.
- Under “Cache TTL“, set the time for which a page will be cached before it needs to be rebuilt. If the content on your website is updated frequently, then you should consider a shorter time period like 5 minutes; if most of the content is static then you can pick longer timeframes such as 1 day, or even a week.
- Under “Purge All on Upgrade“, select “Auto Purge” if you want the plugin to automatically purge the cache when you update WordPress or any plugins. This is useful because if you’ve recently updated your website’s content or design, you’ll want visitors to see those changes.
- Under the “Excludes” section you can exclude certain pages or posts from being cached.
- Enable “Browser Cache” and “Object Cache” to store static files locally in the user’s browser.
- In the “CDN” tab:
- Turn on “QUIC.cloud CDN“ and enable “CDN Mapping”.
- Configure the integration with Cloudflare or a content delivery network (CDN) by switching on the “Cloudflare API” option and entering the necessary information.
- Under the “Image Optimization” tab:
- Turn on “Auto Request Cron” to automatically optimize images on a schedule.
- Make sure to turn on “Image WebP Replacement” to start using WebP versions of images. This significantly improves load times by replacing images with a newer image format.
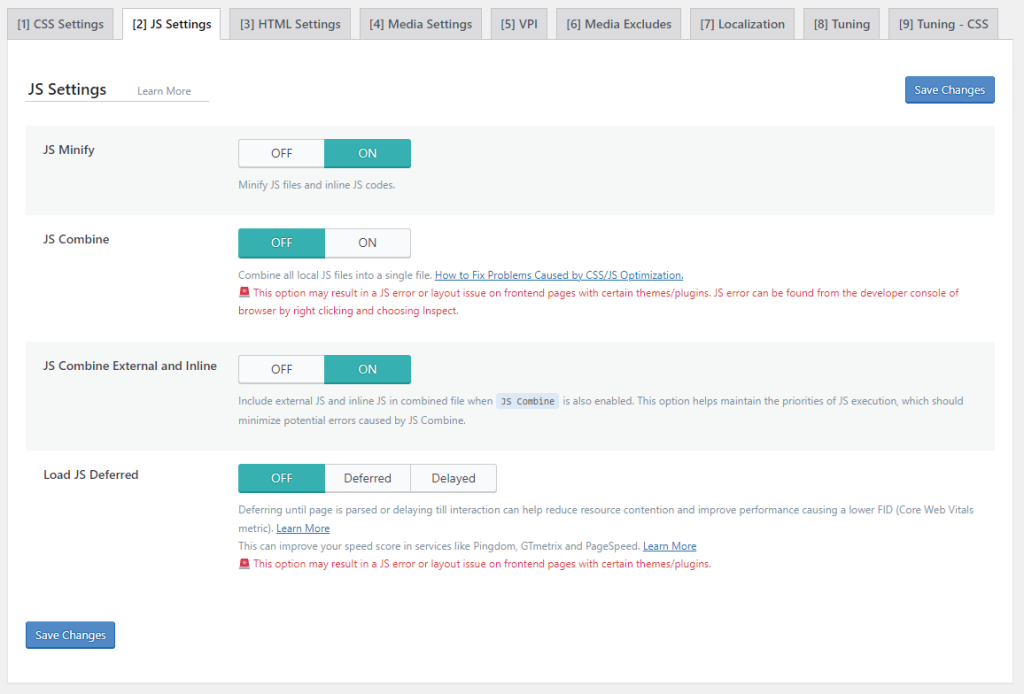
- Under the “Page Optimization” tab:
- Enable “CSS Minification“, “JS Minification“, and “HTML Minification” to minify the appropriate files.
- Enable “DNS Prefetch Control“ to speed up the loading times of all URLs.
- Enable “Lazy Load Images” and “Optimize Images on Upload” to optimize image loading and reduce page load times.
- Turn on “Load JS Deferred” to defer JavaScript execution.
- Once you have configured the plugin settings, click on the “Save Changes” button to save the settings.
Installing the LiteSpeed Cache plugin on a WordPress website is a straightforward process. Here are the steps you can follow to install the plugin:
Testing Performance Improvements
Once the prefix is defined, navigate to your WordPress admin dashboard and go to LSCache > Cache, and then click on the “Object” tab. Here, you’ll configure LSCache to connect to your Redis instance using ACL credentials.On this screen, you will need to fill the following fields:
- Google PageSpeed Insights: This tool analyzes a webpage and provides a score, and suggestions for how to improve its performance.
- GTmetrix: This tool analyzes a webpage and provides a score, along with detailed information about the page’s load time and resources.
- Lighthouse: This is an open-source tool that can be run either as a browser extension, or in the command line. It analyzes web pages and provides performance metrics, and suggestions for improvements.
Troubleshooting Tips For Common Issues
Suggested read: How To Configure LSCache for Laravel
- Cache not working: Make sure that the LiteSpeed web server and the LiteSpeed Cache plugin are both installed and configured correctly. Also, check the plugin settings to ensure that caching is enabled for the appropriate pages and posts.
- Integration with Cloudflare or CDN not working: LiteSpeed Cache can integrate with Cloudflare or a content delivery network (CDN) to serve cached pages and resources to visitors. If the integration is not working, check the plugin settings to ensure that the appropriate integration is enabled and configured correctly.
- Conflicts with other plugins or themes: Conflicts with other plugins or themes can cause issues with LiteSpeed Cache. In such cases, deactivate or remove any conflicting plugins or themes, and check if the issue is resolved.
- Incorrect page cache: If LiteSpeed Cache is not caching pages correctly, make sure that the plugin settings are configured correctly for your website, and clear the cache.
- Not seeing any improvements: In some cases, even after proper configuration, you may not see any improvements in website performance. One possible reason is that the website is already performing well, and LiteSpeed Cache is not able to make any significant improvements. In such cases, it’s always a good idea to monitor the website performance, and compare the results both with and without the plugin.
After Action Report – Monitoring Site Performance
As your development projects become more complex and your team grows, it’s essential to have more control over your servers, and it’s always a good idea to test and measure the performance difference both with and without the plugin.RunCloud provides a comprehensive solution for managing your cloud servers, deploying websites and web applications, and monitoring server health – all through a secure and user-friendly management panel. Sign up for RunCloud today, and see the difference for yourself.This can lead to a better user experience for visitors, which can help increase engagement and reduce bounce rates. Additionally, a faster website can also lead to improved search engine rankings, as search engines such as Google take page load speed into account when determining page rank.