If you are a developer who needs a professional workflow, RunCloud provides features such as Git integration for atomic deployments, creating a smooth CI/CD pipeline directly from your repository.proxy_pass http://host:8000;
proxy_set_header X-Real-IP $remote_addr;
proxy_set_header X-Forwarded-Host $host;
proxy_http_version 1.1;
proxy_set_header Upgrade $http_upgrade;
proxy_set_header Connection "upgrade";
- Click “Save Config” to apply the new configuration.
Table of Contents
- 0.1 Step 8: Access Your Supabase Dashboard
- 0.2 Step 5: Configuring Your Supabase Environment
- 0.3 Step 3: Connecting to Your Server via SSH
- 0.4 Step 4: Cloning and Preparing the Supabase Docker Files
- 0.5 Step 6: Launching the Supabase Services with Docker
- 0.6 Step 7: Configuring an NGINX Reverse Proxy
- 1 Final Thoughts & Your Next Steps
- 2 Frequently Asked Questions About Self-Hosting Supabase with RunCloud
Step 8: Access Your Supabase Dashboard
Before we begin, ensure you have the following three prerequisites in place. This guide assumes you have already completed these initial steps.cp -rf supabase/docker/* <runcloud project root>
cp supabase/docker/.env.example <runcloud project root>/.env
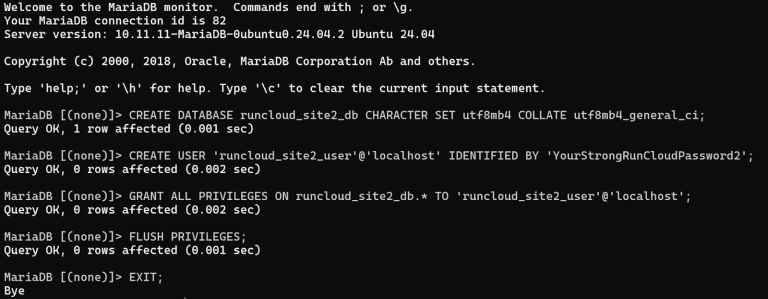
Step 5: Configuring Your Supabase Environment
Once you have updated your .env file, you are now ready to launch your Supabase instance. This process is very simple, and it requires you to run just two commands:nano .env
Now that you’re inside the server, it’s time to download the official Supabase Docker configuration and move it into the web application directory we created. Run the following commands one by one:
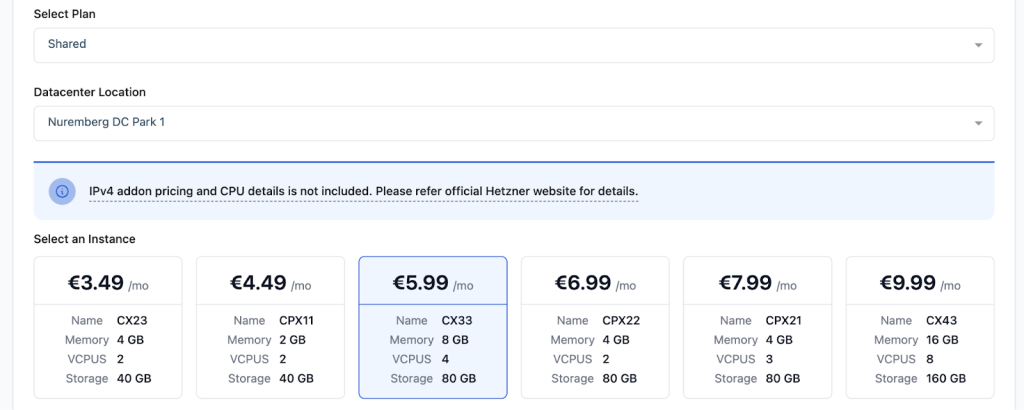
Regardless of what server size you pick, your RunCloud subscription provides you with the ability to create an unlimited number of web applications.cd /tmp
By combining the power of Supabase with the simplicity of RunCloud’s server management panel, you can deploy a scalable and private backend for your applications without vendor lock-in.
- From your RunCloud dashboard, navigate to your server and click on Web Applications.
- Click Add Web Application.
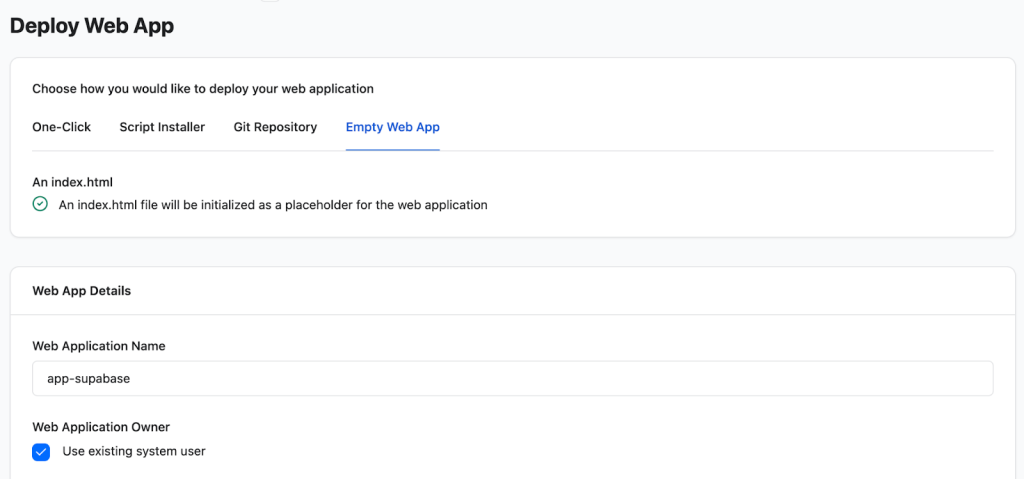
- Choose the Empty Web App option. This is important because we will be deploying a custom Docker setup, not a standard PHP application.
- Fill in the Web App Details:
- Web Application Name: Give it a descriptive name, such as ‘app-supabase’.
- Web Application Owner: You can use the default system user.
- Domain Name: It’s highly recommended to use a real domain or subdomain (e.g., supabase.yourdomain.com). This will make accessing your instance much easier. For guidance on pointing your domain, please consult your domain provider’s documentation and the RunCloud DNS settings guide.
- Select the Web Application Stack: Select Native NGINX + Custom config. This stack gives us the raw power to configure NGINX as a reverse proxy later, which is essential for routing traffic to our Docker containers.
- Deploy the Application: After configuring the basic settings, you can deploy the application on your server by clicking “Deploy”.
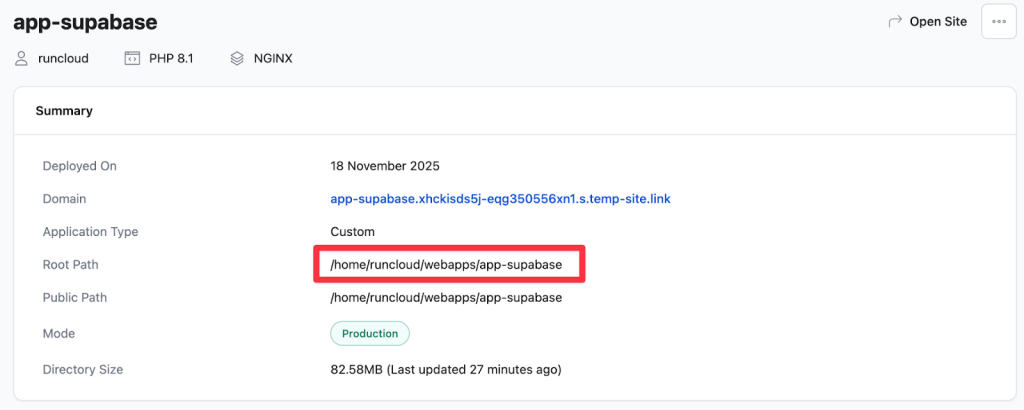
- Note down the Project Root: After the application is created, take note of the Web Root Path, which is displayed on the dashboard. This will be something like /home/runcloud/webapps/app-supabase. You will need this exact path in a later step.
Step 3: Connecting to Your Server via SSH
Navigate to a temporary directory. This is a safe place to clone the repository before moving the files.Whether you’re running a high-traffic WordPress site, a modern Laravel application, a content-rich Ghost CMS, an n8n instance for your automation workloads, or even a private cloud with Nextcloud, RunCloud provides the tools to manage it all effortlessly.
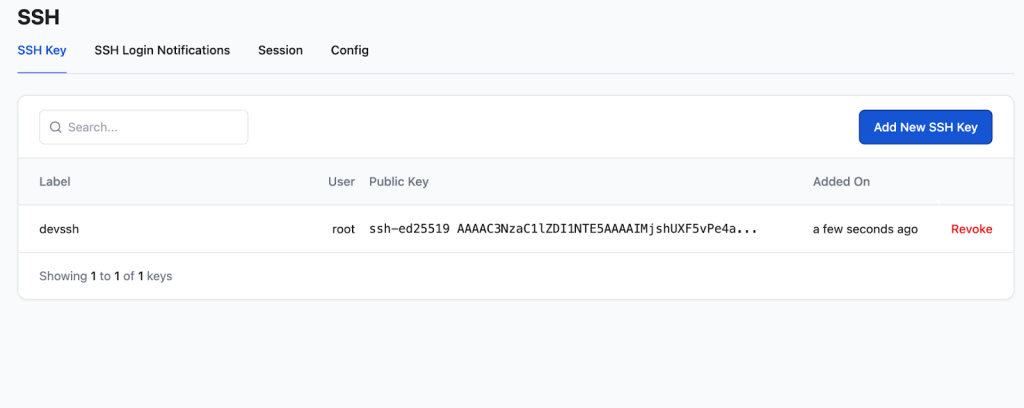
For enhanced security and convenience, we recommend adding your public SSH key to RunCloud Vault. This allows you to log in without typing a password, and is more secure.The Supabase stack listens for traffic internally on port 8000. We need to tell NGINX to take all incoming web traffic (on ports 80 and 443) for your domain and forward it to this internal port. This is a classic reverse proxy setup, and RunCloud makes it very simple.
Step 4: Cloning and Preparing the Supabase Docker Files
RunCloud’s dashboard provides a real-time health monitoring system for your server. You can instantly check CPU, RAM, and disk usage to ensure your server has enough resources to run smoothly. This visual overview helps you anticipate scaling needs and troubleshoot performance issues before they impact your users.Supabase is the most popular open-source Backend-as-a-Service (BaaS) platform, which offers developers the freedom and control of self-hosting.Supabase offers a comprehensive suite of tools, including a PostgreSQL database, authentication services, storage, and more. These services are resource-intensive. To ensure a smooth experience, you’ll need to provision a server with adequate resources.This flexibility allows you to deploy as many applications on your server as its hardware resources can physically handle, making it an extremely cost-effective solution for developers and agencies managing multiple projects.Enter the credentials you configured in the .env file from the previous step, and you will be logged in to your own Supabase dashboard, ready to create tables, manage users, and build your next great application.Sign up for RunCloud today.RunCloud is completely cloud-provider agnostic, meaning it doesn’t lock you into a specific hardware provider. When you need more power, you can simply resize your server at Hetzner, DigitalOcean, or any other provider, and RunCloud will continue to manage it seamlessly.Navigate to your project root directory: But your journey with RunCloud doesn’t have to end here. The same platform that now runs your complex Dockerized Supabase application is perfectly equipped to manage all your other projects.
- POSTGRES_PASSWORD: This is the password for the superuser account in your PostgreSQL database. Change this to a very long, complex, and unique password.
- JWT_SECRET: This secret is used to sign JSON Web Tokens (JWTs) for user authentication and authorisation. Update this with a long, randomly generated token, ideally 32 characters or more.
- ANON_KEY and SERVICE_ROLE_KEY: These JWTs are used for the anon (public) and service_role (admin/backend) users, respectively. While they are full tokens, the underlying signing secret (JWT_SECRET) is the primary vulnerability if unchanged. While changing the JWT_SECRET effectively invalidates the default keys, it is best practice to generate new, unique keys for both the ANON_KEY and SERVICE_ROLE_KEY after updating the JWT_SECRET.
- DASHBOARD_USERNAME and DASHBOARD_PASSWORD: These credentials control access to the Supabase management dashboard. Change both the default username and the default password to strong, unique values.
- SECRET_KEY_BASE: This is a cryptographic key used for various internal security features within the application framework (often related to cookie signing or encryption). Replace the current value with a long, random, and unique cryptographic key.
- VAULT_ENC_KEY and PG_META_CRYPTO_KEY: These are encryption keys used for encrypting secrets and other sensitive data stored within the database vault and the metadata store. Update both keys with unique, randomly generated encryption keys that are at least 32 characters long.
We will demonstrate how RunCloud’s flexibility enables you to run complex Docker applications with ease, providing you with full control over your infrastructure.
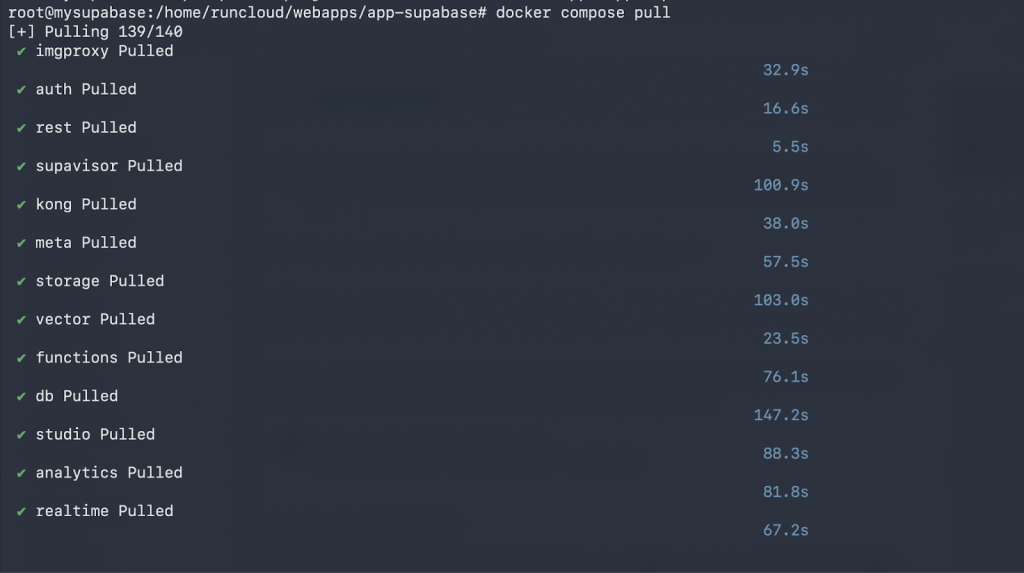
Step 6: Launching the Supabase Services with Docker
docker compose pull
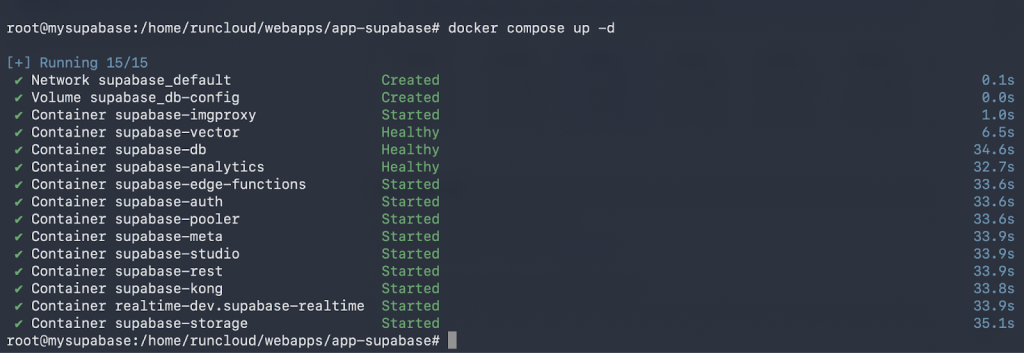
Start Supabase Services in detached mode
RunCloud offers free, auto-renewing Let’s Encrypt SSL certificates for any domain associated with your web application. You can secure your Supabase API endpoints and dashboard with a trusted HTTPS connection with a single click, eliminating the complexity of manual certificate generation and renewal.The file also contains optional settings for sending emails, analytics, and logging. You can leave these blank for now unless you plan to use those services. After you have made the necessary changes, press Ctrl+X, then Y, and then Enter to save your changes in nano.Your Supabase instance is now running inside Docker on your server! However, it’s not yet accessible from the internet. For that, we need to set up a reverse proxy.
After creating your web application, we will begin the process of installing Supabase on the server. For this, we need to run several commands directly on the server. You’ll need to SSH into your server using the SSH credentials provided by your cloud provider.
Step 7: Configuring an NGINX Reverse Proxy
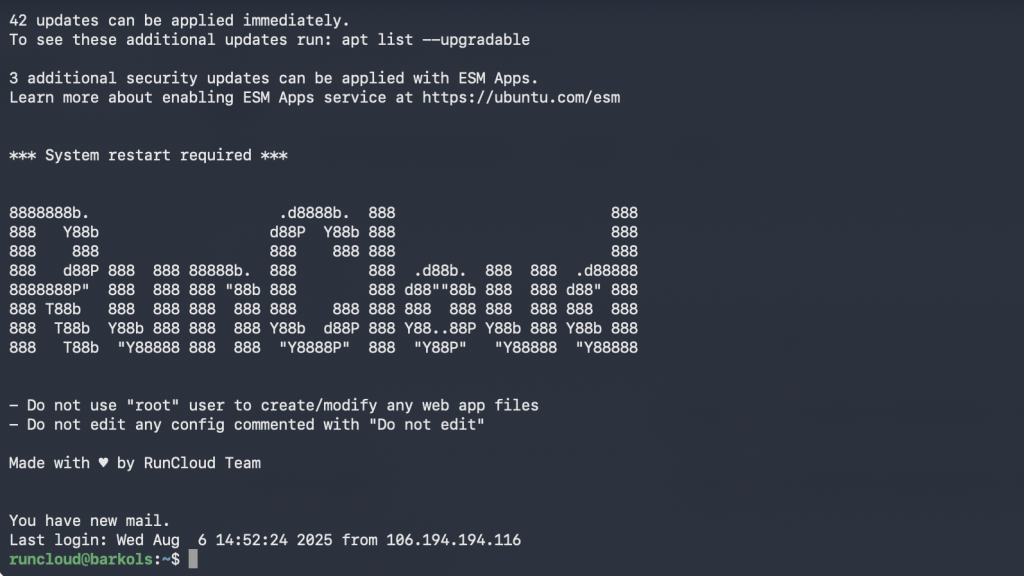
Once your key is added to the RunCloud vault, open your terminal and run the following command to connect to the server via SSH:
- Go back to your RunCloud dashboard and navigate to your app-supabase web application.
- Go to the NGINX Config section and click Create NGINX Config.
- From the “Predefined Config” dropdown, select “Proxy – Effortlessly turn NGINX…”
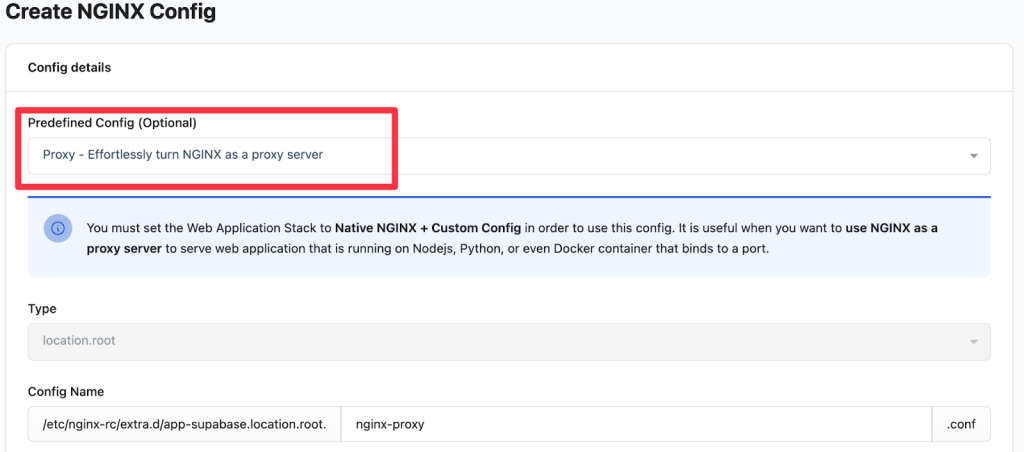
- Delete all the default content in the text editor and paste the following configuration into the editor:
ssh-i ~/.ssh/your_private_key runcloud@<YOUR_SERVER_IP>
This command downloads all the necessary container images for each Supabase service (database, auth, storage, etc.). This may take several minutes, depending on your server’s network speed.

Final Thoughts & Your Next Steps
Manually scripting database backups is tedious and prone to errors. RunCloud offers a straightforward, off-server backup solution that allows you to schedule backups for your database and files with just a few clicks. This ensures that your critical user data is always secure and can be easily restored in the event of an emergency.cd <runcloud project root>
docker compose up -d
Congratulations on taking control of your backend by deploying a fully self-hosted Supabase instance! This tutorial shows more than just how to deploy Supabase; it showcases the true power and flexibility of RunCloud as a central hub for all your server management needs. Perhaps one of the most compelling advantages of using RunCloud is its predictable, resource-independent pricing model. RunCloud does not charge you based on your server’s specifications or resource consumption. Whether you choose a small 2GB RAM server or a powerful 64GB machine to run your Supabase instance, your RunCloud subscription cost remains the same, offering predictable expenses as you grow.If you want to learn more about this process, read our dedicated guides, which cover the process of connecting a new server in great detail:
Frequently Asked Questions About Self-Hosting Supabase with RunCloud
How do I scale my server if my Supabase application grows?
How does RunCloud help secure my self-hosted Supabase instance?
What’s the easiest way to back up my database?
git clone --depth 1 https://github.com/supabase/supabase
In this tutorial, we will guide you through every step of deploying a containerised Supabase instance on a server managed by RunCloud.
![VMware vRealize Log Insight Error Hostd: [LikewiseGetDomainJoinInfo:354] QueryInformation()](https://vmme.org/wp-content/uploads/2024/12/vmware-vrealize-log-insight-error-hostd-likewisegetdomainjoininfo354-queryinformation-24.png)