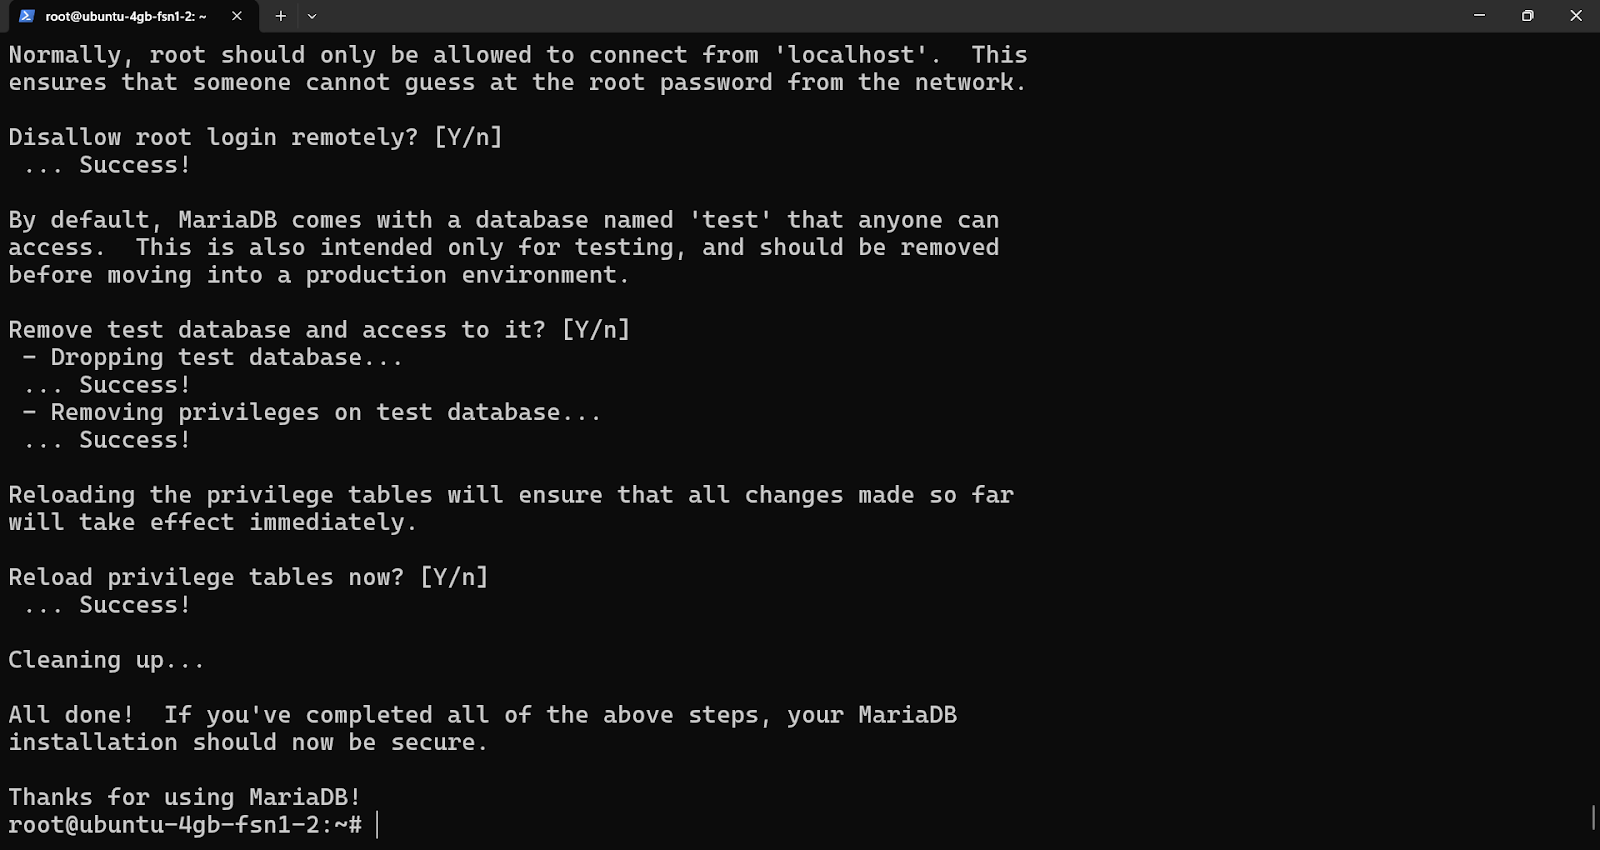
Run the security script and follow the prompts to:Start building faster with RunCloud.
Table of Contents
- 1 Why Host Multiple Sites on a Single Server?
- 2 Steps for Hosting Multiple WordPress Sites on Ubuntu via Nginx
- 2.1 Get Started with WordPress Hosting Today
- 2.2 Step 3: Create Database and User for the First WordPress Site
- 2.3 Step 6: Configure DNS Records
- 2.4 Step 7: Run the WordPress Installation
- 2.5 Step 4: Download and Prepare WordPress Files for the First Site
- 2.6 Step 8: Setting Up Additional WordPress Sites (Optional)
- 3 Final Thoughts & Your Next Steps
Why Host Multiple Sites on a Single Server?
Before diving into the technical steps, let’s clarify why consolidating websites onto one server using Nginx is such a good strategy:
- Significant Cost Savings: This is often the most compelling benefit. Instead of paying for multiple hosting plans or servers, you use the hardware or VPS plan you already have, drastically reducing monthly hosting costs.
- Optimized Resource Utilization: Make full use of your server’s CPU, RAM, and storage. Many websites, especially those with low-to-moderate or complementary traffic patterns (e.g., one busy during the day, another at night), can coexist happily without demanding excessive individual server resources.
- Easier Maintenance: Managing updates and configurations on a single server is often simpler than maintaining multiple separate environments.
- Centralized Infrastructure: Server-wide tasks like backups, security scanning, or performance monitoring become more streamlined when focused on a single machine hosting multiple WordPress sites.
Steps for Hosting Multiple WordPress Sites on Ubuntu via Nginx
sudo nginx -t
cd /tmp

wget https://wordpress.org/latest.tar.gz
RunCloud does the heavy lifting for you.
- (L)inux: The operating system (Ubuntu, in our case).
- (E)Nginx: (Pronounced “Engine-X”) Our high-performance web server. This software listens for incoming connections from visitors’ browsers and serves the appropriate web pages or passes requests to other processes (like PHP).
- (M)ariaDB/MySQL: The database system that stores WordPress content. WordPress needs a database to store posts, pages, user information, settings, theme/plugin options, and more. We’ll install MariaDB, a widely used, community-developed fork of MySQL, which functions as a seamless replacement.
- (P)HP: WordPress uses the PHP scripting language.
- php-fpm (FastCGI Process Manager): This library serves web requests with Nginx.
- php-mysql: WordPress uses this library to communicate with the database.
Get Started with WordPress Hosting Today
WordPress can be installed instantly and for free using our 1-Click script installer:
Get Started with WordPress Web Hosting Today
Nginx uses the Host header from the incoming HTTP request (which contains the domain name the user typed) to match against the server_name directives in your enabled configuration files. This is how it routes traffic to the correct website’s document root and configuration block.Grant privileges to this newly created user only on their specific database:If you face any errors or want to learn more, then we recommend visiting the RunCloud blog, where we have already published in-depth articles on the following topics:sudo ln -s /etc/nginx/sites-available/runcloud_site1.com.conf /etc/nginx/sites-enabled/
Download and extract WordPress into your site’s root folder:CREATE USER 'runcloud_site1_user'@'localhost' IDENTIFIED BY 'YourStrongRunCloudPassword';
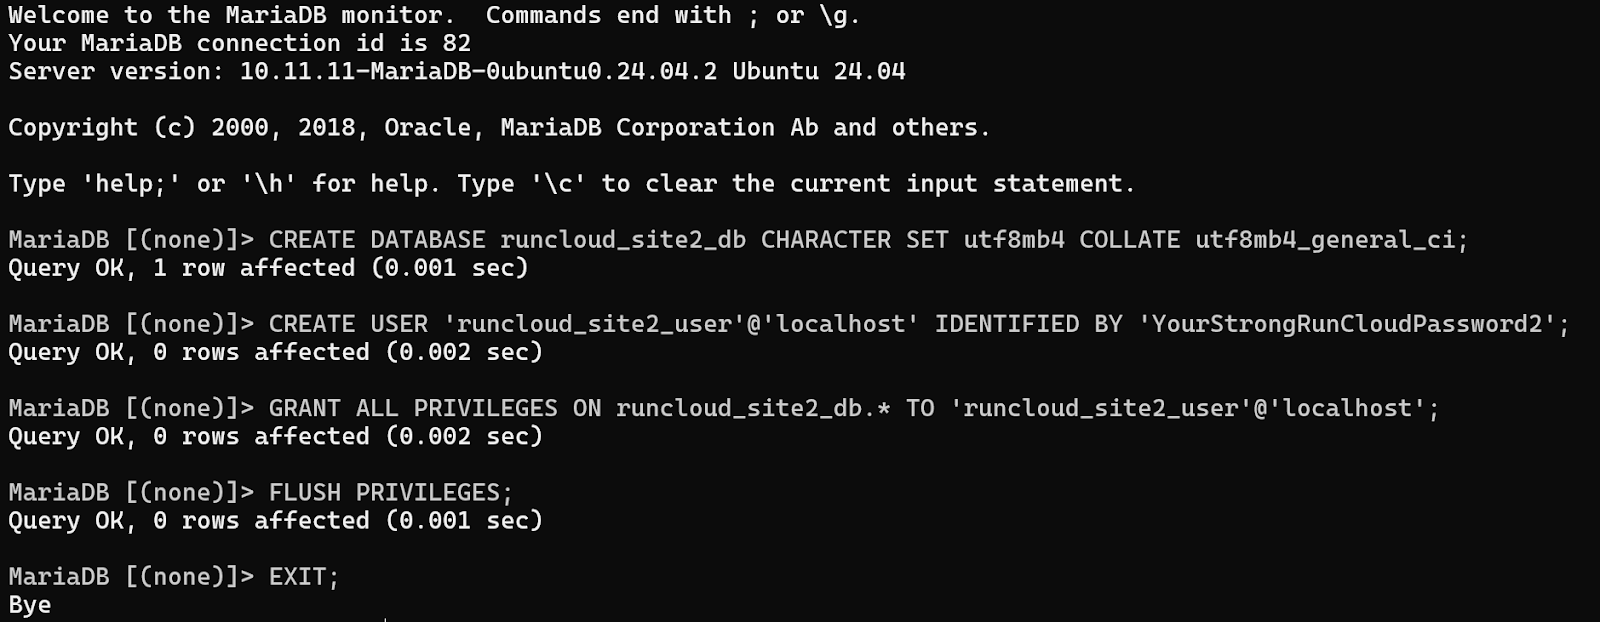
To host more websites (e.g., site2.org), repeat the relevant steps for each new site:
As you can see, moving from a basic setup to fully managed, secure, and optimized hosting involves considerable ongoing effort. Manually configuring default server behavior, tuning performance, managing SSL certificates for multiple domains, scheduling reliable backups, and setting up staging environments are complex and time-consuming and leave significant room for error, especially as you add more sites.
Step 3: Create Database and User for the First WordPress Site
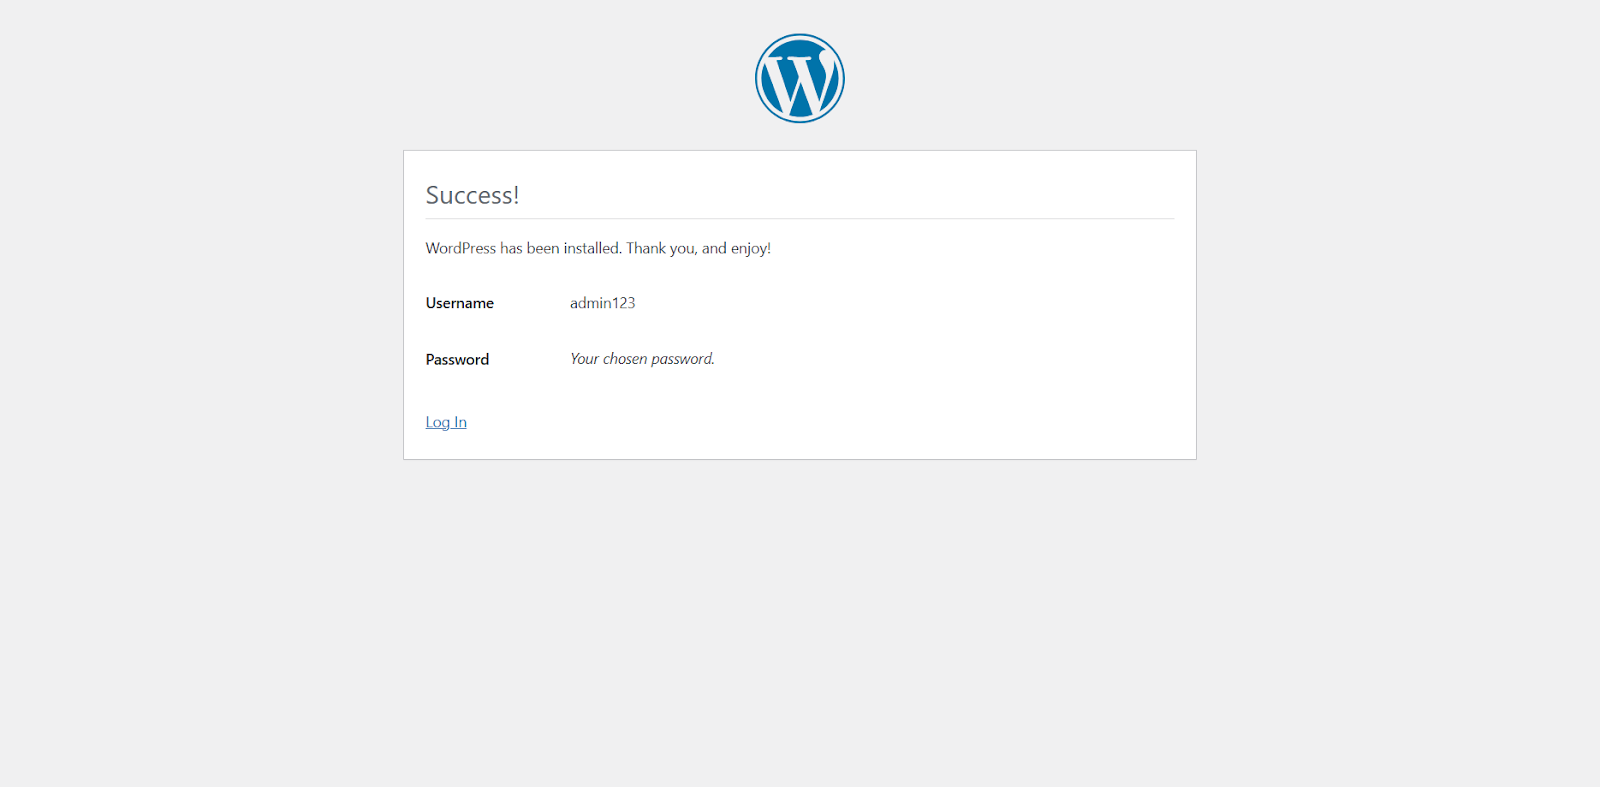
After creating your DNS records, wait a couple of minutes. Once the DNS records have propagated, open your web browser and navigate to your domain name (e.g., http://runcloud_site1.com).Run the following command to check the syntax of your configuration file:You should see the WordPress setup screen. Select your language.You’ve now installed and configured the LEMP stack to host multiple WordPress sites on Ubuntu using Nginx.After this, you need to enable the site by creating a symbolic link from sites-available to sites-enabled:Finally, click “Install WordPress“. Once the installation is complete, you will be greeted with the following screen:Now you can log in to your new WordPress dashboard!sudo apt install php8.3-curl php8.3-gd php8.3-intl php8.3-mbstring php8.3-soap php8.3-xml php8.3-zip -y
If you are unsure how to do this, refer to our blog post, which explains how to edit files on remote servers with SSH and Nano.Create a new Nginx configuration file for your site in sites-available using the following command:Install these PHP extensions now to avoid errors later:GRANT ALL PRIVILEGES ON runcloud_site1_db.* TO 'runcloud_site1_user'@'localhost';
The exact steps to do this will vary depending on your VPS provider and DNS registrar. For example, if you are using DigitalOcean to host your server and purchased your domain from Cloudflare, then you will need to log in to your Cloudflare account and create an A record for your domain (runcloud_site1.com) pointing to your server’s public IPv4 address.sudo nano /etc/nginx/sites-available/runcloud_site1.com.conf
You’ve seen how much time and effort it takes to manually set up and manage multiple WordPress sites on a single server.
runcloud_site1.comandwww.runcloud_site1.comwith your actual domain(s) or any subdomain you configure in step 6./var/www/runcloud_site1.com/public_htmlwith the correct path to your site’s files.php8.3-fpm.sockwith the correct PHP-FPM socket path if you are using a different PHP version.
This guide will walk you through the essential steps for installing and configuring multiple WordPress websites using the popular Nginx (LEMP) stack. sudo mysql -u root -p
# Enter the root password you set during mysql_secure_installation in Step 2
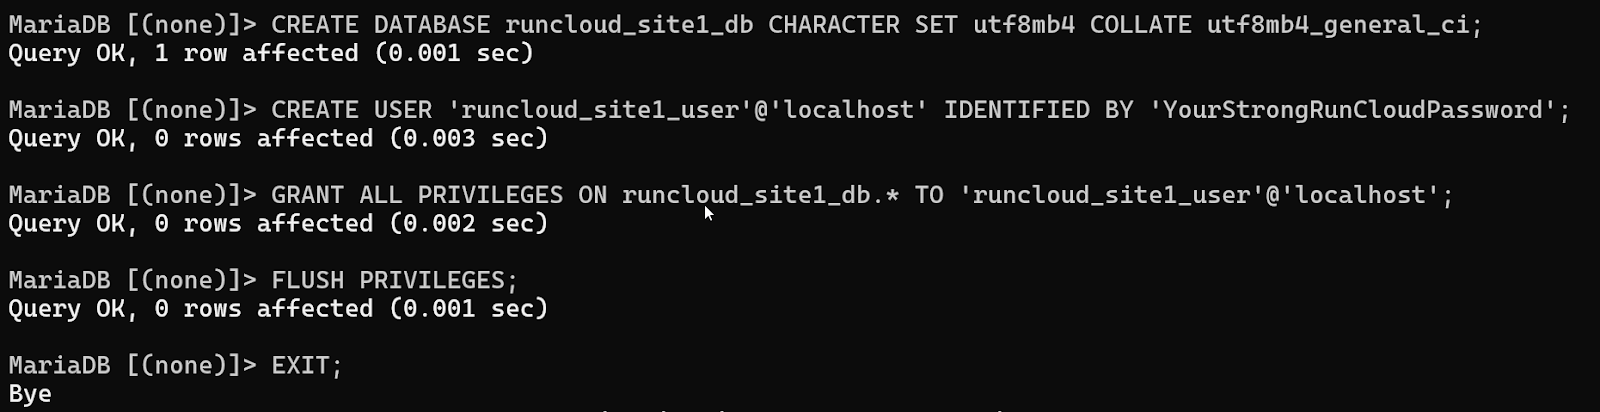
Create the database (use a descriptive name, e.g., runcloud_site1_db):
CREATE DATABASE runcloud_site1_db CHARACTER SET utf8mb4 COLLATE utf8mb4_general_ci;
tar -xzf latest.tar.gz -C /var/www/runcloud_site1.com/public_html/ --strip-components=1
By creating a separate server block for each website, Nginx knows precisely where to direct incoming traffic based on the requested domain.sudo mkdir -p /var/www/runcloud_site1.com/public_html
sudo systemctl reload nginx
Step 6: Configure DNS Records
sudo mysql_secure_installation
sudo apt update

sudo apt install nginx php8.3-cli php8.3-fpm php8.3-mysql mariadb-server -y
First, install the LEMP stack (Linux, Nginx, MariaDB, and PHP) which provides the foundation for your WordPress sites: server {
listen 80;
listen [::]:80; # For IPv6
server_name runcloud_site1.com www.runcloud_site1.com; # Your domain(s) here
root /var/www/runcloud_site1.com/public_html; # Path to WP files
index index.php index.html index.htm;
# Handle requests - try file, then directory, then pass to WordPress
location / {
try_files $uri $uri/ /index.php?$args;
}
# Pass PHP scripts to PHP-FPM
location ~ .php$ {
include snippets/fastcgi-php.conf;
# Make sure the socket path matches your PHP version
fastcgi_pass unix:/run/php/php8.3-fpm.sock;
fastcgi_param SCRIPT_FILENAME $document_root$fastcgi_script_name;
include fastcgi_params;
}
location = /wp-config.php {
deny all;
}
# Add caching headers for static files (optional but recommended)
location ~* .(css|js|jpg|jpeg|png|gif|ico|svg|woff|woff2)$ {
expires 1M;
access_log off;
add_header Cache-Control "public, max-age=604800";
}
# Handle favicon/robots.txt directly (optional)
location = /favicon.ico { log_not_found off; access_log off; }
location = /robots.txt { log_not_found off; access_log off; allow all; }
}
While your sites are technically up and running, getting them truly production-ready requires additional steps:

Create a separate database and user for each site to isolate data and improve security. If you create multiple websites on the same server, you must execute the following commands separately for each site you create, and with unique credentials.
Step 7: Run the WordPress Installation
After installing the database server, you need to run the included security script to initialize your database.For enhanced security and easier management down the line, we’ll follow the best practice of creating a separate database and a dedicated database user for each WordPress site. This isolates each site’s data, preventing potential issues on one site from affecting others.
Follow these steps to host multiple WordPress sites on a single Ubuntu server using the Nginx stack.
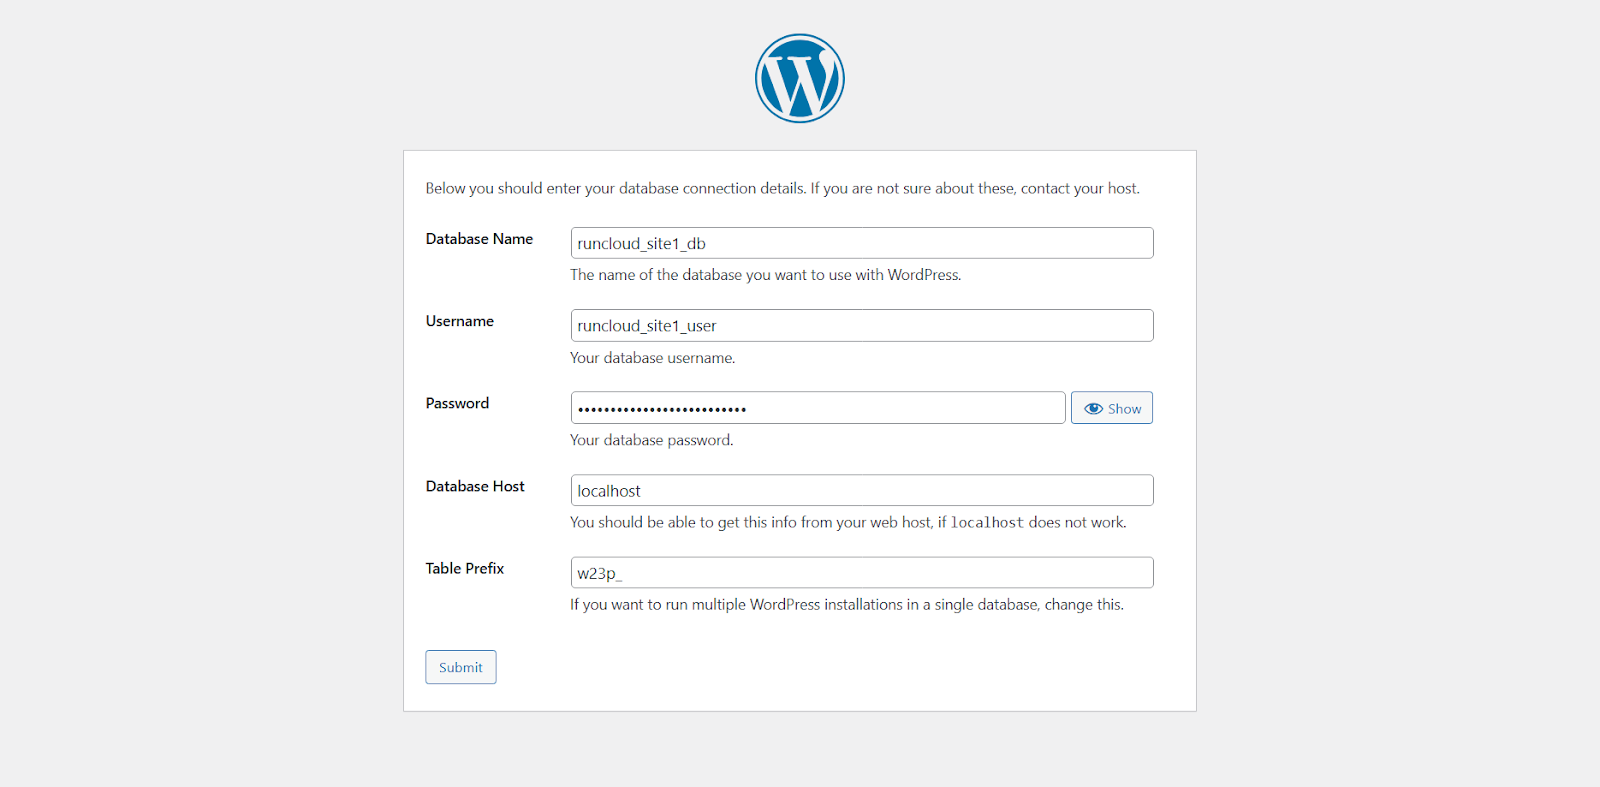
- Database Name:
runcloud_site1_db - Username:
runcloud_site1_user - Password:
YourStrongRunCloudPassword - Database Host:
localhost - Table Prefix:
wp_(or change if desired)
Finally, reload Nginx to load the new site configuration using the following command:
FLUSH PRIVILEGES;

EXIT;
Step 4: Download and Prepare WordPress Files for the First Site
Log in to the MariaDB/MySQL shell as root:
Execute the following commands on your Ubuntu server to install the necessary software:
Step 8: Setting Up Additional WordPress Sites (Optional)
This is exactly why we built RunCloud.
- Database: Repeat Step 3 to create a new, separate database (e.g., site2_db) and a new, dedicated user (e.g., site2_user) with a unique, strong password, granting privileges only on site2_db.
- Files: Repeat Step 4 to create a new directory (e.g., /var/www/site2.org/public_html), download/extract WordPress into it, and set the correct www-data ownership.
- Nginx Config: Repeat Step 5 to create a new Nginx server block file (e.g., /etc/nginx/sites-available/site2.org.conf). Make sure to update the server_name directive to site2.org www.site2.org and the root directive to /var/www/site2.org/public_html. Remember to use the correct fastcgi_pass socket path. Enable the new site (sudo ln -s …), test, and restart Nginx using the commands provided above.
- DNS: Repeat Step 6, pointing the DNS records for site2.org (and www.site2.org) to your server’s IP address.
- WordPress Install: Repeat Step 7, navigating to http://site2.org (once DNS propagates) and using the database credentials created specifically for site2 during the web setup.
📖 Suggested read: How to Change/Reset MySQL Root Password on Ubuntu Linux?
Final Thoughts & Your Next Steps
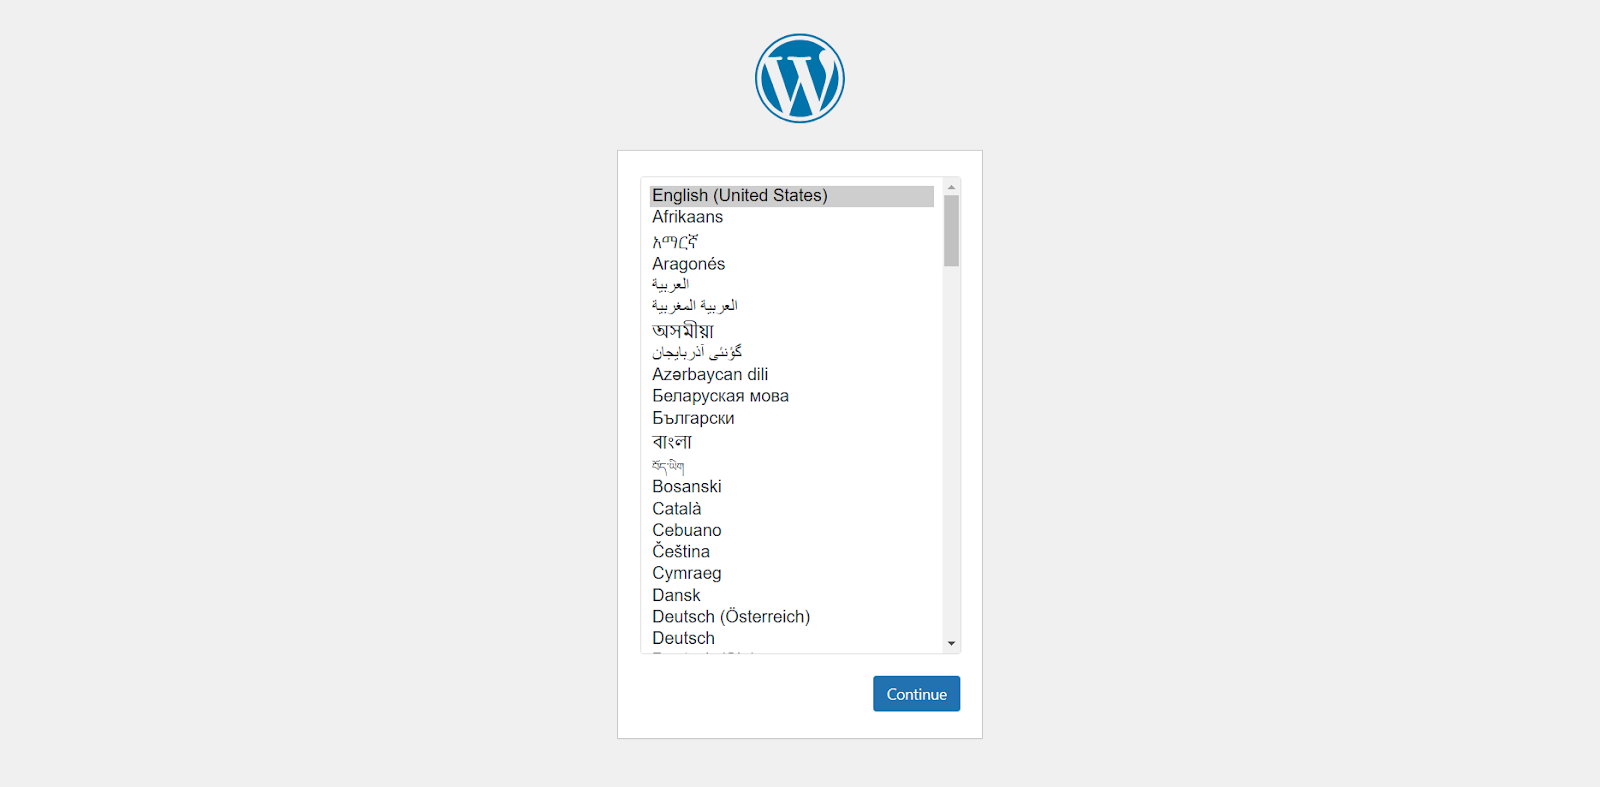
If you are hosting multiple websites on the same server, then you will need to create a separate DNS record for each domain name and point them to the same IP address.On the next screen, provide your site title, create an administrator username with a strong password, and enter your email address.
- Handling Direct IP / Unmatched Domain Visits: What should happen if someone tries to access your server via its IP address directly, or uses a domain name you haven’t configured in an Nginx server block? You should configure a default Nginx block to catch these requests, perhaps redirecting them to your primary website’s homepage or showing a specific landing page.
- Optimizing Performance:
- Image Processing: Installing the imagick PHP extension can significantly improve how WordPress handles image manipulation and optimization, leading to faster load times.
- Caching: Enabling caching can significantly speed up your website. This can involve several layers: Nginx caching for static assets, PHP opcode caching (like OPcache), and WordPress-level caching plugins (e.g., W3 Total Cache, WP Super Cache).
- Securing Your Sites with SSL: In today’s web, HTTPS is non-negotiable. You must configure SSL/TLS certificates for all your domains to encrypt traffic, protect user data, improve SEO, and build trust.
- Implementing Automated Backups: What happens if something goes wrong? You must configure regular, automated backups of your website files (/var/www/) and databases.
- Adopting a Safe Workflow with Staging: Making changes directly on a live site is risky. Setting up a staging environment allows you to safely test updates (WordPress core, themes, plugins) or new features before deploying them to the public-facing site.
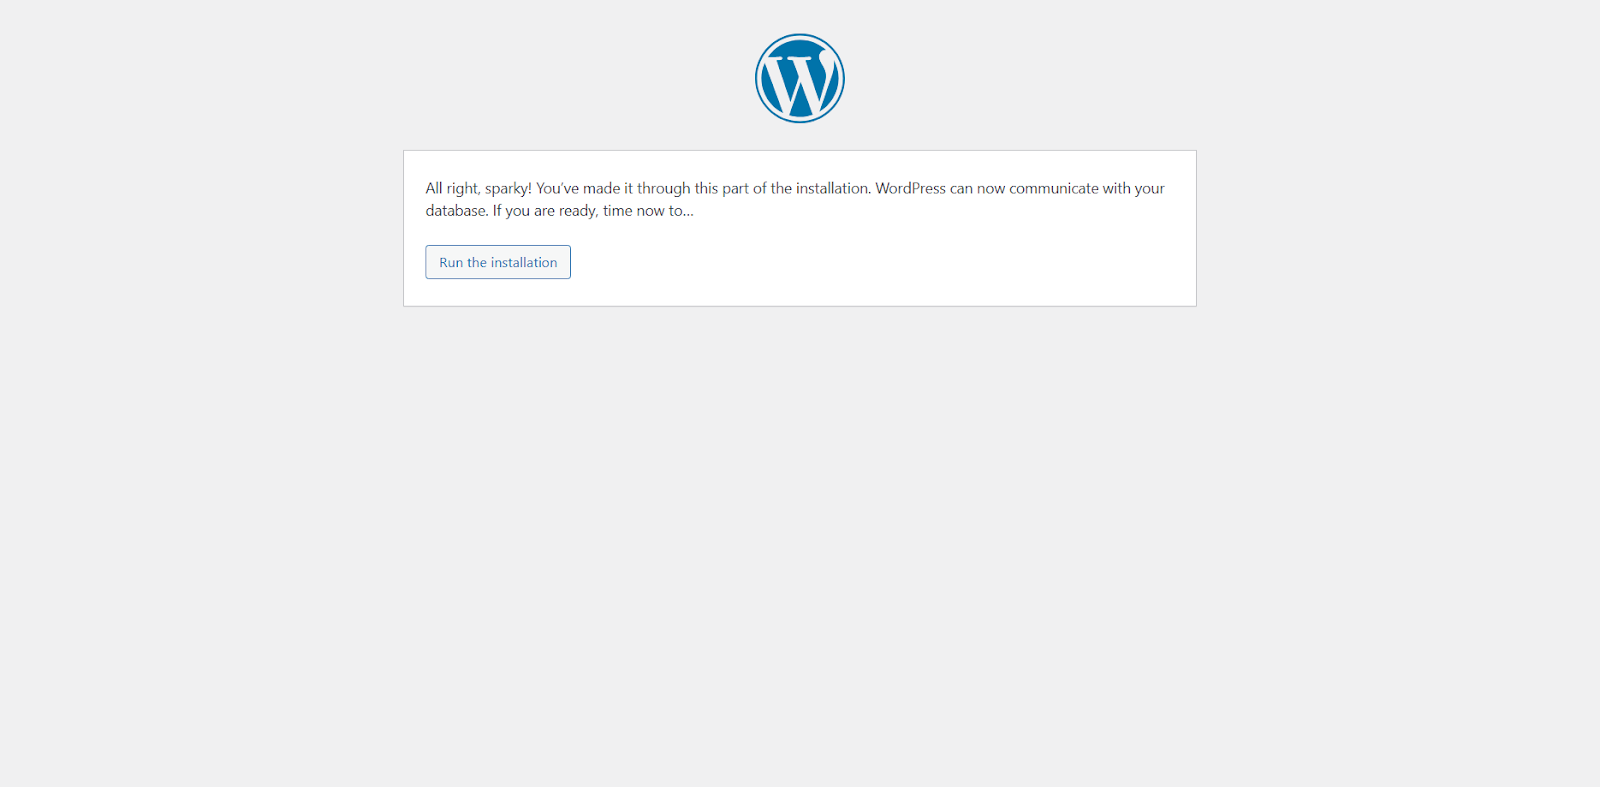
Also, create a CNAME record for www pointing to runcloud_site1.com, or a separate A record if you prefer. Add AAAA records if using IPv6.Most Ubuntu servers can handle far more than a single website. Hosting multiple sites on the same server helps you use resources more efficiently and cut costs.In the next step, you’ll be asked for database information. Enter the details you created in Step 3:WordPress will attempt to connect to the database and create the wp-config.php file. Once the database connection is successful, click “Run the installation“.
- Deploy WordPress sites in minutes, not hours.
- Automate SSL, backups, and server configs.
- Monitor performance and security from a single dashboard.
- Manage PHP, databases, and firewalls without touching the terminal.
- Create staging environments with one click.
sudo chown -R www-data:www-data /var/www/runcloud_site1.com/public_html
Step 5: Configure Nginx Server Block for the First Site
Nginx uses server block files (similar to Apache’s Virtual Hosts) to manage individual sites. Inside each block, we will define important details about how to handle web requests for this website.